Showing posts with label Beans / Lentils. Show all posts

May 13, 2020

Ärtsoppa: Swedish Yellow Pea Soup


Ärtsoppa, a slow-cooked soup made of dried yellow peas, onion, and broth is one of Sweden's classic dishes whose origins reach remarkably far back, as it is claimed to have been documented as a staple from at least as early as the middle ages.

Most commonly, this thick, simple soup is associated with Thursdays, as it was historically served as a hearty bracer before Friday's fast. Even though fasting on Friday is no longer common, this traditional pea soup is often still served at Thursday supper, often in combination with thin Swedish pancakes for dessert (and sometimes with a glass of punsch liqueur). So ingrained is the idea of pea soup and pancakes on Thursdays, that many schools and restaurants serve it for Thursday lunch and even the army continues to serve it on Thursdays. This combination is not exclusive to Sweden, of course, as for example Finland also enjoys this particular duo (although I'm told that Finnish pea soup is usually made from dried green peas). Whether this is due to the complicated history between Finland and Sweden or is simply a Scandinavian favourite across the board, I'm not sure.

Ärtsoppa is available in both vegetarian and meaty versions, with the latter usually featuring either salt pork, ham hock, picnic shoulder, or sausage. I decided to use a fairly simple recipe, culled from the back of the dried pea box (Go Green brand) and various online sources, including Swedish Food and the supermarket ICA.

The traditional accompaniments to the soup itself are mustard (a slightly sweet local mustard called Johnny's is very popular for this) and crispbread. Whether you decide to go full pancake as well, is of course up to you.

Gul Ärtsoppa med Fläsk

Swedish Yellow Pea Soup with Pork

Serves 6 - 8

500 grams dried whole yellow peas, soaked in cold water overnight (or for 12 hours)
2 litres fresh water, for cooking the peas
1 medium yellow onion, diced medium
1 stalk celery, diced small
1 teaspoon dried thyme leaf (not ground)
1 teaspoon ground dried ginger
pinch ground allspice
2 bay leaves
2 tablespoons vegetable bouillon/stock concentrate
250 grams kasseler or other lean ham, diced small

In a tremendous economy of effort, add all of the ingredients except the stock concentrate and the ham in a large soup pot, bring to a boil and simmer gently for an hour. Add the stock concentrate and stir through. Using a wooden spoon or potato masher (you could also use an immersion blender, but be careful not to overdo it), crush some of the peas (30-50%, depending how thick you want the soup) and add the finely-diced ham. Simmer for another 30 minutes, or until the remaining whole peas are tender and the broth has thickened.

Serve drizzled with mustard and some crispbread on the side. For the full-on Thursday experience, follow the soup with Swedish pancakes and strawberry preserves! (Much easier to do if you already have a few pancakes leftover.)

In acknowledgement of my Canadian heritage, I note that there are strong similarities between this soup and the traditional pea soup of Québec (Soupe aux pois), with the most prominent difference being that the Québecois version usually sautés the fresh vegetables in a little fat, frequently contains carrots, and does not, as far as I know, contain ginger. I have never seen Soupe aux Pois served with mustard before either, but if anyone has, please let me know!

March 05, 2019

Black Bean Soup


This is based on a Mayan recipe for a very simple black bean soup with big, striking flavours. It is easy to cook the beans the day before, and start from there. It is quite filling as a main dish, but half-sized portions make a terrific starter. The soup shown in the picture above includes finely diced ham, which is a purely optional add-in to a recipe that is otherwise completely plant-based.

Black Bean Soup

Serves 4

1 cup dried black beans (no need to soak)
water to cover beans
5 cups water (extra) or stock of your choice
2 tablespoons canola or corn oil
1 onion, finely chopped
2 cloves garlic, chopped or pressed
1 teaspoon dried pequin (aka piquín) chiles, crushed
1 medium or large tomato, peeled, seeded & diced
1/2 teaspoon dried epazote
1/2 teaspoon cumin
1/4 cup dry sherry
salt
Freshly ground black pepper
cilantro to garnish

Part 1 - Cook the beans

Rinse the beans well - you don't want grit or dust in your finished dish. Also give them a quick look-over to make sure there aren't any cunningly disguised little rocks in there - sometimes you find little tiny stones or other debris in dried beans.

Cover the rinsed beans with fresh water, up to about 5 centimetres above the beans. Bring to a gentle simmer and cook until the beans are quite tender, stirring occasionally. This can take as little as an hour or as long as two or two and a half hours, depending on how old your beans are. Play it by ear, but don't let the beans boil hard, or they will split and turn quite mushy. Most of the time, I find that dried black beans are ready in just one hour. Once the beans are tender, you can add a little salt - if you will be using stock in the second part, make sure you don't over-salt at this stage. You can also skip salt entirely until Part 2 and then adjust to taste. Note that if you have hard water (or beans of dubious age), a scant pinch of baking soda added to the water when you begin to cook the beans will help soften them more quickly. You can make the beans a day ahead, and then proceed from this point when you want to serve them. If you will be making the soup at a later date, allow the beans to cool and then refrigerate in their cooking liquid. Once they are completely cold, you can freeze them if you like.

Part 2 - Make the soup

If you are making the soup straight away after cooking the beans, you can prepare and sauté the vegetables while the beans simmer in Part 1 above. 

Remove two thirds of the beans to a blender or food processor and puree. If you have an immersion blender, you can certainly use it right in the pot, but in that case you will want to remove about a third of the whole beans before pureeing (they will be stirred back in later, after the vegetables are added).

In a medium frying pan, preheated over medium heat, heat the oil and sauté the finely chopped onion, chopped garlic, and the pequin chiles until the onion is soft. Add the prepared diced tomato, epazote and cumin and stir until well blended. Add the onion mixture to the black bean purée and purée the mixture again until as smooth as possible. Combine the whole beans and the puréed mixture in the soup pot and add the five cups of extra water (or stock) and simmer gently, stirring frequently until the soup thickens and its components integrate. This takes only about five to ten minutes, in my experience.

If you want an even heartier soup, you could at this point add smoked tofu, diced ham, or diced chicken, as you wish, and simmer gently to heat the new additions through, stirring frequently. Remove any thick stems from the epazote that might have escaped the food processor. Add the sherry and stir through. Taste the soup and add more salt if needed, and it's ready to serve. Add cilantro to individual servings, or substitute finely sliced green onion if preferred.

I like to serve this with crispy baked flour tortilla-crackers, and sometimes a drizzle of contrasting hot sauce to add brightness. You can also top the soup with a scoop of salsa (preferably not cold from the fridge).

The soup also freezes very well, as do the cooked beans from Part 1.

September 16, 2018

Hummus Kawarma: Hummus with spiced lamb


Think of Hummus Kawarma as the Middle Eastern answer to Tex Mex's Five Layer Dip: the base is creamy hummus, the next layer is fried spiced lamb, further toppings are whole chickpeas, toasted pine nuts, and lemon parsley sauce. (Oh, did you want seven layer dip? Perhaps you could add finely diced cucumber and tomato, although I prefer those on the side as part of a classic Israeli salad.) What about the tortilla chips, you might ask. Well, oven-toasted pita chips make the perfect stand-in, but you could also simply use fresh pita bread cut or torn into pieces as needed. You can serve this as an appetizer or main course, as a communal shared plate or as individual servings.

The recipe for the spiced lamb topping and the lemon sauce is from the Jerusalem cookbook by Ottolenghi and Tamimi, and is also available on the Ottolenghi website, although I note that I used ground lamb instead of hand-chopped lamb neck.

So, what am I bringing to you here, since the exciting part of the recipe is elsewhere? Well, aside from cheap analogies to Tex-Mex cuisine, you also get my formula for extremely creamy hummus using an immersion blender. You'll need a kitchen scale to get the exact ratio, but if you don't have one you can still get by.

Immersion Blender Hummus

Makes 400 grams

Serves 4 as part of the above recipe (as a main course)

400 gram (14 oz) can of chickpeas, drained, reserving liquid (about 265 grams /9.3 oz cooked chickpeas))
45 ml (3 tablespoons) tahini (stirred well)
2.5 ml (1/2 teaspoon) salt
Juice of half a lemon
1 clove garlic, chopped or pressed
1 tablespoon olive oil
Chickpea cooking liquid OR water to make the total weight of all ingredients 400 grams (14 oz). If you don't have a kitchen scale, start with 60 ml (1/4 cup) liquid and add more as needed. You probably won't need more than 125 ml (half a cup).

You can put all of this into the blender cup and blend until smooth, but I find it's easier on the machine if you first make a puree of everything except the chickpeas and extra liquid. Then add the chickpeas, about a quarter of them at a time, blending until smooth between each addition, and finally adding the extra liquid until you achieve a smooth, creamy texture. Devour immediately, or transfer to a sealable refrigerator container. It keeps nicely for at least three days...I've never had it last longer, so after that you're on your own.

If you're completely obsessed with ultra smooth texture, take the time to pinch each chickpea to remove the skin. It takes a while but it's worth it, although I note that this step lowers the insoluble fibre content somewhat.

November 12, 2017

Khichdi and Kheema


Khichdi (aka Khichri, and a number of other variations, खिचड़ी in Hindi) is a rice-and-pulse dish from India that is not only a vegetarian (vegan, in fact) staple, but also very likely the ur recipe for Kedgeree and possibly even Middle Eastern Koshary. It's been around for a long, long time, and is considered to be a very balanced meal on its own - even better, if you can serve it with condiments such as yoghurt or raita, chutney, or go all out for the famous Hyderabadi combination of khichdi, kheema, and khatta.

Kheema (aka keema, कीमा in Hindi) is essentially a simple, loose, ground meat gravy seasoned with accent vegetables and vigorous application of spices as pleases the cook. My kheema tends to vary quite wildly depending on what I have on hand, but is usually at least a bit spicy. Kheema is not generally by nature a vegetarian dish, but one could make it so by using the ground-meat substitute of your choice, or even simply finely minced vegetables. This one has a mixture of ground lamb and beef, as prepared by our local Turkish butcher. The recipe is below the recipe for the khichdi.

I didn't have the necessary sour ingredients on hand to make khatta, but we enjoyed the khichdi and kheema together.

There are different styles of Khichdi, ranging from the dry, pilau-like separate grains you see here to a more risotto-like dish, more of an extremely thick soup or congee than its drier pilau cousin. Because I was using a lentil that holds its shape very tenaciously, I decided to go with the drier style.

Khichdi can be made with any lentil, but this one is made with whole black urad dal - the same pulse that I use to make Kali Dal (black dal), and this dish is therefore Kali dal ki khichdi. Because the lentils give off a lot of dark colour when boiled, I discard the water used to boil the lentils, but if you don't mind a grey dish, you can certainly use the cooking water to also cook the rice.

Kali Dal Ki Khichdi

Serves 4

150 - 180 mL whole black urad dal, picked over and rinsed well
approximately 6 cups cooking water for the dal
1 teaspoon toasted cumin seeds
2 tablespoons minced fresh ginger
2 teaspoons oil or butter or ghee
1/2 teaspoon kosher or other coarse salt
1-3 dried red chilies, left whole OR 1 long fresh chili, seeded and chopped.
200 grams basmati rice
310 mL water for the rice, rinsed well

You don't need to soak the dal, but you can if you want to. You do need to wash them well, or your dish will be gritty.

In a moderately large pot, bring six cups (or so) of water to a boil. Add the well-rinsed dal, the cumin seeds, the chilies and the minced ginger, and let simmer gently for about 45 minutes, stirring from time to time. The water will be very dark and murky looking. If your dal is a bit old, or you're not convinced of its freshness (mine was rescued from the back of the cupboard), a small pinch of baking soda can be added to the water to encourage the dal to soften nicely as it cooks.

When the dal is tender, drain through a colander, and set briefly aside while you get the rice going: in a medium pot, bring the rice-cooking water and the well-rinsed rice to the barest of bubbles rising to the surface. Add the oil or butter or ghee, the salt, and the drained dal, stir through, and cover with a tight-fitting lid. Turn the heat immediately to the lowest setting, and cook undisturbed (no peeking!) for 15 minutes. Transfer the pot to a cold burner (or pot holder) without lifting the lid, and set the timer again for 15 minutes. When the timer goes, you may open the pot and fluff up your rice with a fork or rice paddle.


You'll notice that the dal have congregated in the top third of the dish, so give it a nice fold with a paddle or spatula to disperse them throughout the rice. If you want to serve it in a tidy shape, you can pack it into a small bowl or measuring cup and upend onto the plate or bowl. Otherwise, just spoon it into a bowl and enjoy - with or without accompaniments.


Plain yoghurt is a very common side, and if the khichdi is being eaten on its own, you may want to consider a tempering made from heating a little mustard oil (or butter or ghee) in a small pan, and adding some chili flakes, swirling them about until fragrant, before pouring over the khichdi. Because we were serving this with kheema, we didn't do that extra step.

* * * * *

A note on kheema vegetables: One of the most popular and traditional vegetables to add to kheema is green peas. If you're not using the peppers and/or tomatoes.


Simple Kheema

Serves 4

500 grams ground beef and lamb (both or either)
1 tablespoon butter or oil
1 tablespoon finely minced ginger
1 medium yellow onion, chopped (about a cup's worth)
2 cloves garlic, sliced
1 teaspoon toasted cumin seeds
1 teaspoon ground coriander seed
1/2 teaspoon ground cardamom
1/2 teaspoon ground black pepper
1/2 teaspoon kosher or other coarse salt
3-4 roma-type tomatoes, cored and seeded, sliced into strips
1-3 red or green hot peppers, cored and seeded, sliced into strips
1/2 teaspoon garam masala
Water, as needed
1 teaspoon cornstarch or 1 tablespoon flour as a thickener (optional)
Cilantro to garnish (optional)

In a large skillet, heat the butter (or oil) over medium-high heat, and when it has melted and foamed out, add the ground meat. Stir and cook the meat, breaking it up with your spoon as you go (it can be as fine or coarsely broken up as you like) until it is thoroughly browned (not just no-longer-pink, you want some golden, flavourful searing on about half of it). Add the salt and the spices (except the garam masala) and stir through again. Add the onions, garlic, and ginger, and continue to stir and fry until the onions are translucent.

If you want a thicker gravy, choose either the cornstarch or wheat flour option (see instructions below) add it now and simmer for about 15 minutes. If you want a thinner gravy, simply add an extra half cup of water now simmer for about 5 minutes.

Add the hot peppers and the tomatoes (if it looks like it needs more water to be a nice gravy texture, go ahead and add a little more), and cook a few minutes longer, stirring frequently, until the vegetables are just tender. Garnish with cilantro if you like.

Thickener Options:

Cornstarch: mix the teaspoon of cornstarch with a half-cup of room temperature or cold water, stir until smooth, and then add to the pan. Stir throughout, and watch it thicken the gravy as it comes up to a simmer.

Wheat flour: mix the tablespoon of flour with a cup of room temperature or cold water by shaking together in a tightly lidded cup. Pour the liquid into the pan and stir throughout, and watch it thicken the gravy as it comes up to a simmer.


April 15, 2017

Harak Osba'o -- Damascus-style Lentil Noodle Stew


Lentils and rice are such a natural and common combination, that it's almost odd to think of them apart, let alone with an interloper. Lentils and pasta? You don't see them together all that often, outside certain soups (such as Harira), and the occasional vegetarian adaptation. However, the textures are surprisingly complementary, and these lentils definitely hold their own as a rightful ingredient that isn't a substitute for ground meat.

The name "Harak Osba'o" translates to "He burned his finger" suggesting an overeager cook who couldn't wait to tuck into an irresistible creation. The pomegranate molasses and tamarind concentrate give an enticing mild tanginess.

This version is adapted from a few different online versions, including one from The Food Obsessive and one from Taste of Beirut.

The garnish of cilantro and pomegranate seeds give a lovely burst of tart freshness to each bite.

Harak Osba'o
Damascus-style Lentil Noodle Stew

Serves 4

1 cup (200 grams) dried brown or green lentils, washed and drained
150 grams long pasta, broken into short lengths
2 medium yellow onions, diced
4 cloves garlic, minced or crushed
1 tablespoon olive oil
1 cup cilantro leaves, roughly chopped, plus more for garnish
3 cups vegetable broth or water
1 tablespoon pomegranate molasses
1 teaspoon tamarind concentrate
1/2 teaspoon coarse salt (more if using water instead of broth)
1 teaspoon ground black pepper
1/8 teaspoon ground cinnamon
1/8 teaspoon ground nutmeg
1/4 teaspoon ground allspice
1/4 teaspoon ground cardamon
1/4 teaspoon ground cumin
1/4 cup pomegranate seeds to garnish (optional)
Ground sumac to garnish
Extra hot water (eg. from a recently boiled kettle) as needed (1 to 2 cups)

In a soup pot, fry the onion in olive oil over medium heat until softened and a little browned, about 10 minutes, then add the cilantro and garlic and fry a further few seconds, while stirring. Spoon out half of the onion-garlic-cilantro mixture into a small bowl and set aside to use as garnish at the end.

Add the lentils to the remaining onion-garlic-cilantro mixture, and add the water (preferably hot, from a recently boiled kettle, but cold is fine, it will just take longer to come up to a simmer). Add the salt. Salt won't make the lentils hard, but adding it now will help them keep from falling apart. Simmer the lentils on low until tender, 15 - 30 minutes, depending on the type, so watch them carefully!

Add the tamarind and pomegranate molasses and stir through. Add the pasta. You can use broken long pasta or short pasta such as small shells. There needs to be enough liquid for the pasta to absorb, resulting in a thick stew once the pasta has finished cooking, so you'll probably need to add a bit more water - start with about a cup - and then add the black pepper and other spices and stir them through.

Simmer, uncovered, stirring occasionally, for about 15 minutes, or until the pasta is tender and the mixture is no longer watery. Keep an eye on the amount of liquid, and if it's getting too thick, add more water, a little at a time. Taste, and adjust seasoning if necessary.

Turn out into a large serving bowl or tureen, and garnish with the remaining onion-garlic-cilantro mixture and sprinkled with sumac (or, individual serving bowls, topped with the onion-garlic-cilantro mixture, and sumac). Fresh pomegranate seeds are also a nice garnish, if available, offering colour, texture, and juicy freshness.

If you don't have tamarind or pomegranate molasses? Try lemon juice or a little apple cider vinegar to bring the tanginess to the party. The simplest versions that I found call only for black pepper instead of the mix of spices, so you can do it that way, too, if you're so inclined. There are probably as many variations as there are cooks.

February 25, 2017

Black Beans & Rice with Sausage


This recipe takes inspiration from those dry packet mixes for black beans and rice, but using fresh ingredients and a lot less salt. It's a fairly quick meal to make, labour-wise (about 45 minutes, most of which is unattended cook time), and while there's a bit of chopping involved, there's not a lot of clean up: cutting board, knife, skillet, spatula, bowls, forks. It's easy, it's delicious, and it reheats well for lunch the next day.

If you want a more Cajun-y version, replace the seasonings listed below with a Cajun spice blend.

Vegetarians/Vegans could either replace the sausage with a similarly styled plant-based sausage, smoked tofu, or simply increase the amount of black beans.

Black Beans & Rice with Sausage

Serves 4

140 grams Cabanossi sausage (or Kolbassa)
2 medium stalks celery
1 medium onion
1 medium red or green bell pepper
1 teaspoon vegetable base (I use reduced sodium)
2 cups canned black beans, rinsed and drained
1 cup parboiled rice
2 clove garlic, minced
1/2 tablespoon olive oil
1/4 teaspoon celery salt
1/2 teaspoon white pepper
1/2 teaspoon ground cumin
1/4 teaspoon cayenne pepper (or to taste!)
2 dash Tabasco pepper sauce
1 3/4 cups water, from a recently boiled kettle
sliced green onions for garnish (optional)

Prepare the sausage by slicing it once lengthwise and then slice cross-wise into half-coin pieces. Prepare the vegetables by peeling or trimming as needed and dicing into thumbnail-sized chunks. I like to string my celery, if it's particularly tough. Mix the seasoning spices in a small bowl and set aside.

In a large skillet, sear the sausage slices, then push to the sides of the skillet and add the diced onion, garlic in the olive oil until it starts to turn translucent. Add the diced pepper, beans and spices, and stir through gently. Let cook, stirring, for about a minute, and then add the Tabasco sauce, rice, and 1 & 3/4 cups boiling water. Bring the mixture back up to a simmer, stirring, then immediately cover. Turn down the heat to a bare simmer and leave undisturbed (no peeking!) for 25 minutes. When it is done, stir through gently. Sprinkle with sliced green onions and serve.

July 18, 2015

Chickpea & Carrot Salad with Tahini Dressing


We're well into salad season. Every thought of actually cooking something when the temperature keeps spiking outside is accompanied by a shudder, and a look around for alternatives. Alternatives such as letting someone else do the cooking, perhaps, or maybe just preparing something that doesn't require heat.

This simple salad works really well as a dinner salad, or as a take-to-work/school lunch, takes very little time to prepare, and lets me continue my love affair with tahini unabated.

You could, of course, cook the chickpeas yourself, in which case do that however you like best. In the interests of a no-heat meal, however, this recipe is made with canned chickpeas (or, if you've got some home-cooked ones stashed in the freezer, by all means use those instead).

Chickpea & Carrot Salad with Tahini Dressing

Serves 2

1 400 gram can of chickpeas/garbanzo beans, drained and rinsed
50 grams of grated carrot (about 1 medium)
1 green onion, finely sliced
1 cup loose-packed cilantro, washed and roughly chopped

Tahini Dressing (only half needed for this recipe)

3 tablespoons tahini (stirred well)
1/2 teaspoon salt
Juice of half a lemon
1 clove garlic, pressed or pureed
1 tablespoon olive oil
cold water, if necessary, to made a thick salad-dressing consistency

This should all be pretty self-explanatory. In a large bowl, combine the salad ingredients (I hold the cilantro to the very end, though, and add it after the dressing).

In a small bowl, combine the dressing ingredients, mixing well with a fork (or one of those mini-whisks, if that's what you like). I didn't need to add water, here, but if you find your dressing is too thick or is clagging up (as often happens if you're down at the bottom of the tahini jar), add a little cold water, a tablespoon at a time, and stir until it becomes creamy again.

Add half the dressing to the chickpeas, carrots, and green onion, and stir through. Add the cilantro, and stir through again. Serve immediately, or transfer to a sealable container and chill until you're ready to eat.

If you happen to live near a Turkish bakery, or are feeling extra industrious and unafraid of baking during the heat, I highly recommend picking up a nice cheese or spinach gözleme (soft flatbread with baked-in filling) to have alongside this.

March 08, 2015

Roasted Vegetable Bowl with Tahini Dressing


This wonderfully veggie-packed, one-pan meal was inspired by a number of different online recipes, including Smitten Kitchen's Warm Butternut Squash and Chickpea Salad and also generally by the amount of reading I've been doing about tahini and the growing realization that I really, really like the flavour of sesame.

There's a bit of prep and chopping involved, but you can also do that part in advance and hold the prepared vegetables in the fridge for a day or two, ready to be seasoned and put in the oven. Doing the prep ahead of time makes this a reasonable dinner to make on a weeknight when you might be wanting something both easy and healthy. The above iteration was made using Hokkaido squash (aka Red Kuri), but butternut is also really nice (and a bit less intense).

You could probably describe this as "steam roasted", since there's a bit of liquid in the roasting pan, which hastens the process of the vegetables becoming tender. You could make this without that bit of liquid, also, simply omit the water from the instructions relating to the squash and cauliflower. You may, in that case, require a little longer of a roasting time (ten minutes or so).

Roasted Vegetable Bowl with Tahini Dressing

serves 3-4

1 small butternut squash or Red Kuri/Hokkaido squash
1/2 head cauliflower
400 grams cooked chickpeas (1 small can)
1/2 red onion
1 teaspoon ground cumin
1 teaspoon your favourite curry powder
coarse salt to taste
2 tablespoons olive oil, divided
toasted sesame seeds for garnish (not shown)

Tahini Dressing

3 tablespoons tahini
2 big cloves of garlic
3 tablespoons lemon juice
1 tablespoon of olive oil
big pinch of salt
Enough water to make a smooth sauce

Prepare the squash by cutting in half, removing the seeds/strings/guts, peeling, and dicing into bite-sized chunks. Store in the fridge in a bag or freezer-type carton if not using immediately.

Prepare the cauliflower by cutting into medium-small florets. Store in the fridge in a bag or freezer-type carton if not using immediately.

When you are ready to cook, turn your oven on to 400 F/ 200 C, with a rack in the middle. Get a large, open roasting pan prepared with a thin film of olive oil.

Place the cauliflower, cumin, a pinch of salt, a tablespoon of olive oil, and a tablespoon of water into a large bowl, and gently stir until the cauliflower is lightly coated with the oil/water/spice mixture. Carefully spread the cauliflower out on one side of the roasting pan. Pour any liquid in the bowl over top the cauliflower.

Rinse out the bowl, and place the squash chunks, curry powder, pinch of salt, a tablespoon of olive oil, and a tablespoon of water, and gently stir until the squash is coated. Spread the squash out on the other half of the roasting tray. Pour any liquid in the bowl over top the squash.

Roast the veggies for 20 minutes. You can prepare the chickpeas and onion while the vegetables are roasting:

- Drain and rinse the chickpeas
- Peel the red onion, and slice into short lengths (I slice thinly in one direction, and then cut into thirds, crosswise)

After the vegetables have roasted for the 20 minutes indicated above, scatter the chickpeas and red onion evenly over the cauliflower and the squash. Put the tray back into the oven and roast for another 10 - 15 minutes, or until the cauliflower pieces are tender, the chickpeas are heated through, and the sharp edge is off the onions.

Once everything is in the oven for that last 10 minutes or so, make up the dressing. Crush the garlic (or press, or pound with a mortar and pestle), and add it to the tahini. Add the lemon juice, the olive oil, and a good pinch of salt. Stir well. You will notice that the mixture starts to become thick and then appears to separate. Do not panic! Simply add cold water, one tablespoon at a time, as needed, stirring until the mixture become smooth and silky. Taste, and decide if you want to add more salt or lemon juice.

Once the vegetables are out of the oven, drizzle a third of the dressing over the pan, and gently stir to (partially) coat the vegetables with the dressing. Dish up into bowls, and drizzle with the remaining dressing. Scatter a few toasted sesame seeds over the top for texture and visual appeal (not shown, sadly).

Leftover reheat very nicely in the microwave.

February 15, 2015

Ful Medames


Ful Medames (also transliterated as Foul Mudammas, or Fuul Medammes, amongst other spellings), commonly referred to simply as Ful (pronounced "fool"), is a middle-eastern bean dish that deserves broader recognition in the western world. It is a popular breakfast dish in Egypt, but its reach extends easts through Saudi Arabia, north throughout the eastern Mediterranean countries, and south into the horn of Africa. It is cheap, filling, and delicious.

As can be expected from a dish that reaches through so many disparate cultures, there are countless iterations. The essentials appear to be fava beans, olive oil, cumin, and lemon juice, but there are variations that include any of (or a combination of) garlic, chopped onion, parsley, tahini, and even chopped tomatoes.

Ful is most commonly served with flatbread, which is used as a utensil to scoop up the beans. The type of flatbread used is going to vary by whichever culture you're in - the good news being that you can safely use whatever flatbread you've got on hand. I served mine with freshly made pita bread (because it was Sunday and I had no choice but to make it if I wanted it), but you could easily use lavash, Somalian canjeero, or heck, even tortillas or chapati. You can also spread it on toasted sandwich bread.

Ful is often served on its own, but equally often as part of a larger, tapas-style meal, especially at lunch or dinner.

While sometimes other beans are used to make Ful, depending on culture and geography, the fava appears to be dominant. Fava beans are a bit more intensely flavoured than chickpeas. They are quite earthy tasting, and therefore pair really well with cumin, and stand up very well under the pungency of fresh garlic and the sharpness of lemon.

You can store it in the fridge for a few days without ill effect, simply adding a little more water to loosen it up as you reheat it. I find that I can make a double batch on Sunday, and have it for breakfast for the rest of the week.

Ful Medames

Adapted from Serious Eats

Serves 2 - 4

2 cups cooked fava beans (or a 400 gram can)
1 tablespoon olive oil
2 small cloves garlic, lightly smashed
pinch of salt
1/2 tablespoon cumin seeds
juice of 1 lemon
1 1/2 tablespoons tahini
In a small skillet, toast your cumin seeds until fragrant, and then carefully pour them out onto a cutting board (or into a mortar).

Into the emptied, unwashed skillet add your beans (with their liquid if they're canned, otherwise with about 1/3 cup water) and heat over a medium flame.

On the cutting board, add your garlic cloves and a pinch of salt, and run your knife through a couple of times until the garlic is finely chopped (or, in a mortar, pound the garlic and cumin together until the garlic is a smooth paste). Scrape the garlic/cumin mixture into the beans, and stir through. If you like things spicy, feel free to add in a few chile flakes, too.

The beans should be gently bubbling away at this point. Once the garlic and cumin have been stirred around a few times, add the tahini and olive oil, stir through, and continue to cook, stirring. At this point, you can mash up some of the beans against the side of the skillet, to make a thicker gravy, or if your skillet is looking a bit dry, you can add a little more water to thin it out. Add a tablespoon or two of the lemon juice and stir through. Taste, and decide if it needs more salt (if you use canned beans, probably not, but if you cooked them up from dried, probably yes). Stir and mash the beans as needed until everything looks well heated and the texture is somewhere between baked beans and thick soup. I know, that's a lot of leeway, but you really do get to choose how thick or thin you want this to be. This shouldn't really take more than about five minutes total cooking time.

Pour/scrape the beans into a bowl. At this point, you can add any final finishing touches that you like (an extra drizzle of olive oil, Egyptian style, or a sprinkle of Aleppo pepper, Syrian style, for example, or maybe some carmelized onions, or some parsley).

Serve with warmed flatbread.

November 22, 2014

Lentil, Mushroom, & Walnut Shepherd's Pie


One of the first German recipes that I made once I moved to Germany was Linseneintopf, a thick and hearty lentil stew, often served with sliced or whole sausages as one of the components. We were really taken with the original dish, but it has been nagging at me for some time that it would make a wonderful vegetarian (or vegan) main course as well.

Just for the sake of variety, I made this one into a Shepherd's Pie rather than making the potatoes simply part of the stew, but you could do it either way. This is the sort of hearty, vegetarian dish that shows it European heritage in its flavours, and is intensely satisfying to eat.

As this is a compound dish that is baked in the oven, I suspect German cooks would classify this as an Auflauf (casserole), rather than an Eintopf (one-pot stew).

Lentil, Mushroom, & Walnut Shepherd's Pie

Serves 4 (generously)

250 grams dry brown lentils
400 grams fresh mushrooms
1 cup toasted walnut pieces
1 medium onion, diced finely
2 cloves of garlic, minced
2 medium carrots, diced finely
3/4 cup celery, diced finely
1 tablespoon olive oil
2 bay leaves
pinch of marjoram
4 cups vegetable broth or water
pinch kosher salt
Black pepper

4 medium-sized potatoes, peeled
1/4 cup milk or non-dairy "milk"
1 tablespoon butter or mild-flavoured oil

To toast the walnuts pieces, spread them in a single layer on a baking sheet and bake at 350 F for about 10 minutes, or until fragrant. If the skins are too bitter, you can rub the warm walnut pieces with a towel, which will remove much of the skin. You can also toast walnuts on the stovetop in a dry skillet, but you need to watch them very carefully, and stir frequently, or they will burn. If you have walnut halves, chop them roughly.

Wipe the mushrooms clean, remove any gnarly bits or tough stems, and coarsely chop. I used a mixture of chanterelles and hedgehog mushrooms, because my farmers market is awesome, but you can use any fresh mushrooms you like -- to be honest, really fancy mushrooms may get a bit overwhelmed by the robust flavour of this dish.

Wash and pick over the lentils. In a dutch oven, heat the olive oil over medium-high heat. Saute the onion, celery and carrot briefly. When onion turns translucent, add the garlic, bay leaves, marjoram (you can substitute oregano if need be) and pinch of salt. If you are using water instead of broth, increase the salt to a half teaspoon.

Add the chopped mushrooms, and stir through. When the mushrooms start to give off a little liquid, add the walnuts, and stir through again.

Add the (washed, drained) lentils, the broth (or water), and bring to a low simmer. Cover and simmer gently for 20 minutes, or until nicely thickened. Taste, adjust for salt, and if necessary, add a small pinch of sugar to balance the flavours. If it tastes a little flat (for example, if your lentils were a bit old, this can happen) you may wish to add a teaspoon of red wine vinegar, to brighten it up and provide a little acidity. Finish with with freshly ground black pepper.

While the lentils simmer, make your mashed potatoes. Boil or steam your potatoes until tender, and drain. Keep the potatoes in the same, hot pan, and break them up with a spoon (or the edge of your masher) so that excess moisture can evaporate. That's advice from Julia Child, folks, and ever since I adopted it, my mashed potatoes have had a more awesome texture. Add the butter (or oil) and milk (or "milk") and mash until smooth.

Dollop the mashed potatoes carefully over the lentil stew, and smooth the top down (or crenellate it with a fork, whatever you like). Brush the top with a little extra butter or oil if you like it to be a bit crusty on top. You could also sprinkle it with a bit of paprika. Bake the stew at 350 F for about 20 minutes, or until the top is golden and inviting. Use a large serving spoon to dish into serving bowls or plates.

Leftovers heat up fairly well in the microwave, or in an oven-proof dish in a regular oven.

December 07, 2013

Linseneintopf - German Lentil Stew


I enjoy walking through supermarkets, especially when I am in a different food culture. There is a lot of information inherent in the selections available in each market, and even in the variety of markets themselves. Within a couple of weeks in my new town, I had determined a hierarchy of local markets in terms of the quantity and quality of items on offer, as well as the focus of each market - whether it offers more or less in the way of products especially formulated for the health-conscious shopper (such as organic foods, vegetarian or vegan options), or if it emphasizes volume/bulk purchasing, or rock bottom pricing (or any combination of those things).

There are the obvious benchmarks - how much shelf space is dedicated to fresh food, to snack food, sweet or savoury treats, whether or not alcohol is available in the markets (here in Germany one can purchase wine or beer in any grocery store or even the tiny corner market), and then there's the really interesting benchmark of ready-to-eat or heat-and-serve meals.

I immediately came face to face with the dominating presence of lentil stew, or Linseneintopf (also sometimes called Linsentopf). There are an astonishing array of brands from which to choose your lentil stew: in cans (of various sizes), in plastic, microwavable tubs (just peel off the lid), and in clear plastic chubs (snip and pour). You can get standard or organic, with or without sausages, in vegetarian, vegan, poultry, or meat. If you want meat sausages, you can choose between ones with mettenden, bockwurst, wieners, or any number of other meaty bits. No matter how exclusive or low-rent the supermarket is, you will find plenty of lentil stew options for your perusal.

Once I realized how prevalent (if not pervasive) this dish is here, my next stop was the bookstore. Of course, bookstores aren't usually big on the canned goods, and here is no exception, but bookstores do have cookbooks. The cookbooks touting local cuisine, or having names that suggest "Grandma's Kitchen" or tag lines "comfort food" or "childhood favourites" all contained recipes for lentil stew. The most surprising thing is how similar the recipes are. Apart from the wildcard of which lentil (or combinations of lentils) to use, I've really only encountered one truly heterodox iteration - "red" (rote linseneintopf), which includes tomato paste and/or diced tomatoes. I don't think the schism is as significant as the American "clam chowder divide" but I have yet to encounter any strong opinions on the subject.

I've only tried one of the supermarket offerings - it was very salty, which is a common failing of heat and serve foods everywhere, but particularly problematic here, if only because there sadly does not appear to be any labelling requirement for salt. Some products seem to include the salt value, but it is by no means universal. Still, other than the saltiness, I liked the dish quite a bit, so I decided to pursue the recipe. After a lot of label-reading and recipe reviewing, I went with a fairly simple recipe that combined the best elements of the various iterations I discovered. It's very simple, and reasonably quick

Linseneintopf - German Lentil Stew

Serves 4 (makes approximately 10 cups)

250 grams dry brown lentils
1 tablespoon olive oil
1 medium onion, diced small
2 medium carrots, diced small
3/4 cup diced-small celeriac (or celery)
2 bay leaves
pinch of marjoram
4 cups vegetable (or chicken) broth, or water
2 medium potatoes, peeled and diced small
pinch kosher salt
1 tablespoon vinegar, or more to taste (I used white wine vinegar)
2 sausages, diced (I used bockwurst)
Black pepper
Fresh parsley (optional)

Wash and pick over the lentils. In a dutch oven, heat the olive oil over medium-high heat. Saute the onion, celeriac and carrot briefly. When onion turns translucent, add the bay leaves, marjoram (you can substitute oregano if need be) and pinch of salt. If you are using water instead of broth, increase the salt to a half teaspoon. Add the (washed, drained) lentils, the broth (or water), and bring to a bare simmer. Cover and simmer gently for 20 minutes. Stir, add the diced potatoes, and continue to simmer for another 15 minutes, or until potatoes are tender (use a fork to test). Add the sausage, and continue to cook until the sausage is heated through. Stir in the vinegar to taste, and if necessary, add a small pinch of sugar to balance the flavours. Finish with with freshly ground black pepper and minced fresh parsley. Serve with bread.

This stew was very hearty, satisfying, and delicious, and is going into our rotation.


July 25, 2013

Refrigerator Triage: Salsa Pie


You know when you have that bit of salsa left over, but no tortilla chips or even tortillas? Sure, you might just throw it on a cheese sandwich, make an omelette, or even just pop it into the freezer, but you should also know this: it makes a wonderful ingredient for savory pie.

So, this is one of those lazy posts where I'm really giving you more of a serving suggestion than a recipe.

You will need pastry for a double crust pie - such as this tried and true pie crust recipe:

Double Pastry Crust
for a 8 or 9" pan

1 1/2 cups all purpose (unbleached) flour
1/2 cup butter
pinch of salt
1 tablespoon vodka
4 tablespoons cold water

Place the flour in the bowl of a small food processor fitted with a metal cutting blade. Add the pinch of salt and the butter (cold is best) in chunks, and pulse until well mixed, and the butter is in pieces no larger than a piece of confetti. Add the vodka and the water, all at once, and pulse again, continuing to pulse until the dough comes together and pulls away from the edge of the bowl. If the dough won't come together, try adding a tiny extra spritz of water. Dump the dough onto your lightly floured work surface, and, as quickly as possible, shape it into a couple of flat discs. Chill the dough for 10 minutes, then roll out as needed.

For the pie filling, this is my usual method:

Fry up some finely diced onion and protein of your choice - here I've used lean ground beef, but you could use any ground meat or analogue you want. Add a little stock to enrich the taste if you like, otherwise just use a bit of water (about a quarter cup). Season the meat to taste with cumin, garlic, oregano, and ground chiles. If your salsa is not very salty, and if your beans are unsalted, you might want to add a little bit of salt now, too.

Add about 400 mL cooked beans - here I've used black beans, but you could use kidney, canellini, pinto, even re-fried beans, if that's what you have. If you mash about a third of the (whole) beans, that helps hold the filling together at the end, when you're slicing the pie. You could also sprinkle a little flour over the meat mixture as it fries, to thicken it (or use a slurry - I won't judge). In goes anything else you think would be good. We always have chiles, so in go a few chopped chiles, we usually have frozen corn, so in goes some of that, and at last, the salsa goes in to tie everything together. A cup of salsa is a good amount, but if you don't have that much, don't worry.

Once everything is well combined, and you've tasted it and adjusted the seasonings to your preference, set it aside and roll out your pie crust. Put the filling in (it doesn't need to cool down) and make sure it's evenly distributed (a low dome in the centre is nice), cover and seal the edges in the manner you like best, slit the top in a few places, and then bake at 450 F for 25 minutes, turning it down to 350 F for another 10 minutes or so, until the crust is completely golden top (and bottom, if you're using a glass pie plate, it's easy to check).

Let the pie stand for about 10 to 15 minutes before slicing. While the pie rests, you can make a nice salad to go with, like the purple cabbage buttermilk slaw in the picture.

Still got extra salsa left? Serve it on the side!

PS: Want a vegetarian version? Use your favourite vegetarian pie crust, and use brown lentils in place of the ground beef (the same method as you would use for lentil tacos, for example), or a combination of brown lentils and barley or bulgar wheat. You may want to mash a few more of the beans, to ensure the filling holds together in the end (rather than spilling all over the plate, leaving a sad, deflated crust).

May 15, 2013

Kali Dal (Curried Black Lentils)


You can use a variety of different lentils to make this - the version shown here is made using whole urad dal (aka black gram), which is traditional, but you can also use black beluga lentils, and even mung beans. You can also make it with or without rajma (red kidney beans). I enjoy including the rajma for the contrast in size, texture, and colour.

You can add melted butter and/or cream or yoghurt to finish this dish (making it, in effect, a Dal Makhani), but it is delicious as is - and vegan, to boot. Perfect for entertaining your vegetarian friends. Make lots - it freezes well and reheats wonderfully for a future lunch or dinner. It thickens slightly once it cools, so if you like a wet dal, you may wish to add a little bit of water to loosen it up (wait until it is reheated before adding any water, as warming it up will also loosen it a bit). You can also make this very wet (simply by adding more water) and serving in small bowls as part of a thali, or as a first course.

Be sure to wash your urad dal very well, in lots of fresh water. A bit of grit will make the whole pot disappointing.

Kali Dal

Serves 8 (with rice or bread)

1 cup black lentils (urad dal or similar)
1/2 cup red kidney beans
6 cups water
1 thumbs-length fresh ginger, minced (divided)
1 teaspoon cayenne powder
2 teaspoon garam masala

Tempering:
2 tablespoons vegetable oil
2 teaspoon whole cumin seeds
1 medium onion, finely diced
8 cloves garlic, minced or crushed
4 fresh tomatoes, peeled and diced
1 teaspoon kosher salt


Pick over lentils and kidney beans to remove misshapen, discoloured or otherwise irregular lentils and any foreign matter (little rocks, plant stems, stray bits of grain, etc). Rinse thoroughly, with several changes of water to remove any grit or dust.

Place lentils in a heavy pot with the water and the cayenne and half the minced ginger, and bring to a boil. Reduce the heat to a medium-low simmer, and skim any foam from the top. Allow the lentils to simmer gently, covered, until kidney beans and lentils are tender – 45 minutes or a bit more, if you have older lentils. You can do this ahead, and let it sit overnight or for a couple of days in the fridge, before proceeding to the next step. At this stage, the lentils look pretty unappealing (and kind of grey-ish), but their appearance will improve greatly with the next step.

In a medium-sized skillet, heat oil over medium-high heat. Add the cumin seeds, giving the pan a shake to distribute. As soon as the cumin starts to pop, add the onions and garlic and the rest of the ginger, and fry gently until the onions have softened and started to brown. If you like your food very spicy, you can add extra cayenne to taste at this point. Next, add the diced tomatoes and salt, and stir until they give up their liquid - often they turn the onions a pretty golden colour - and scrape the mixture into the lentil pottage. Use a spatula to get every last bit. Simmer for about 15 minutes.

Add garam masala powder and simmer on a low heat for 15 minutes. If you are adding dairy, add up to half a cup of half-and-half (or plain yogurt) and let simmer for another five minutes (or until heated through). You can keep this warm, on the heat, for a long time, as long as you stir it once in a while to make sure it doesn't scorch on the bottom.

Taste and adjust for salt to your preference.

September 09, 2012

Greek Night: Briam and Gigantes


Briam, or Greek-style roasted vegetables, is another entry into the family of mediterranean mixed vegetable dishes, keeping excellent company with French ratatouille and Italian caponata. Each one has its own flavour profile and different texture, born of both seasoning and cooking technique. Each one is highly flexible in terms of which vegetables you choose to include, but is also just a truly excellent way to put that eggplant on your counter to good use. Briam works when served hot, room temperature, or chilled, depending on your needs. It makes a lovely little sandwich/pita filling, and I bet it would make a pretty good omelette filling, too.

The standard cooking method for briam is roasting, and most traditional recipes that I found use a breathtaking amount of olive oil. Now, I'm a big fan of olive oil, both for its culinary and health-related aspects, but recipes that call for a half (or even a whole) cup for a single pan of vegetables do make me shudder a little. Fortunately, you don't actually need that much; you can enjoy your vegetables without drowning in oil.

Some recipes also include potatoes, but I elected not to use them in light of the fact that I was already planning to serve beans on the side. The combination of briam and gigantes turned out even better than I expected, and I will definitely be turning to this combination again. It takes a whole lot of chopping to make this dish, so clear your cutting board and pre-heat the oven.

Briam
Serves 4 - 6

250 grams eggplant
250 grams zucchini (green or yellow)
4 roma tomatoes
1 red onion
6 cloves garlic, whole
100 grams tender green beans
1 red bell pepper (orange or yellow are also good)
1/2 cup minced parsley
1 cup dill weed, minced
3/4 teaspoon kosher salt
1 teaspoon ground black pepper
1/4 cup olive oil

Dice the eggplant into large-ish chunks, and salt heavily. Let stand for 20 minutes, then rinse well (I actually submerge the chunks in cold water), and drain, and squeeze dry with a nice clean towel. Which will then need washing.

Peel and chop the tomatoes; mince the dill and parsley.

Dice the zucchini and all of the other vegetables into similar size pieces to the squeezed-dry eggplant chunks. Leave the garlic cloves whole (add more if you like).

Combine the vegetables in a large roasting pan (I use my 9x13" rectangular pyrex dish). Sprinkle the vegetables with salt and pepper and the fresh herbs, and drizzle with olive oil. Combine well (use your clean hands) until everything is well coated and evenly distributed. Cover the dish lightly with tinfoil, and bake at 400 F for 30 minutes.

Uncover, stir, and bake for another 30 - 40 minutes uncovered, or until liquid is all evaporated and vegetables are nicely roasted and starting to caramelize. Serve hot or cold.


Quick & Easy Gigantes
Serves 4 - 6


This recipe feels a little like a cheat, because you start with canned beans. Want to start with dry beans? Soak 3/4 cup of butter beans overnight, cook (unsalted) very gently for about 30 to 40 minutes, or until tender, drain, and proceed as follows:

4 cups cooked butter beans (or other large white beans)
1/2 medium onion, finely diced
1 tablespoon olive oil
2 tablespoons tomato paste
2 - 3 cloves garlic, minced
2 tablespoons minced dill weed
1/4 teaspoon sugar or honey
1 tablespoon ketchup
1/4 teaspoon kosher salt (omit if using salted canned beans).

Drain and rinse the beans.

Heat the olive oil in a medium skillet. Add the onion and garlic and salt, and saute over medium heat until translucent and tender. Stir in the tomato paste, and cook and stir for about 30 seconds, and then add about a quarter cup of water, and stir until it becomes a nice little sauce. Add the sugar and the ketchup. Stir again and add the beans. Stir until the beans are all nicely coated, and add a little more water.

Bring to a very gentle simmer and let cook on the lowest setting, covered, stirring occasionally, for about 15-20 minutes. Add the dill. Stir through and taste. Adjust for salt if necessary. Continue to cook very gently for another 10 minutes or so.

At any time the dish starts to look dry instead of gently saucy, add a little more water, and stir it through. If the dish looks too wet, increase the heat slightly, and leave uncovered until it has thickened.

These two dishes also bento very well, as I discovered the following day, probably because they are both good hot or cold. I stuffed my leftovers into pita pockets, topped with a little feta (tzatziki would have been good, also), and had a wonderful, filling lunch.


September 02, 2012

Khoresht e Gheimeh: Persian Lamb & Yellow Split Pea Stew

The first time I had this dish my brain lit up like a Christmas tree. Well, that's what it felt like, at any rate. The rich flavour of the slow-cooked lamb, the thick, savory tomato gravy plus the wonderfully tart notes of lime seemed so very right that I knew I was going to want to eat this again and again and again.

I first tried a version without sourcing the all-important dried limes (lemons, actually, it turns out), using the internet-suggested substitution of lime juice added at the end of the cooking time. It was tasty, but it didn't taste right. I shelved the dish, mentally speaking, until I could find the proper ingredient.

So, when I discovered an unassuming-looking bag of "dried lemons omani" in my local eastern mediterranean deli, a little research showed that this was exactly what I had been waiting for. I set about the internet once more, looking for likely recipes. In the end, I synthesized my own out of several offerings, and was really happy with the result (and thanks to my co-worker Laya, who assured me that putting fried potato on top was important). This recipe is slow food, so it may not be great for weeknights, unless you like to eat a little later (or you do the prep ahead of time), although we made it mid-week and thought it well worth waiting for.

I used a lot less oil than most of the recipes I could find, but the recipe didn't seem to suffer for it. I made up for it by frying the potato in oil, although you could oven-bake them for a healthier option. The stew itself is quite healthy, especially if you use lean, trimmed lamb, and go with six servings.

Khoresht e Gheimah

Serves 4 - 6
Total Prep & Cooking Time: 120-150 minutes

500 grams lamb stew meat
1 tablespoon olive oil
1 medium yellow onion
1/4 teaspoon kosher salt
1 cup dried yellow split peas
2 cups canned diced tomatoes (no salt added)
2 tablespoons tomato paste
4 dried lemons / black limes / limu omani
1/4 - 1/2 teaspoon cinnamon
1 teaspoon ground turmeric
2 cups shoestring or thin-cut fried potatoes

In a Dutch oven, heat the olive oil over medium-high heat, and cook the onions (sprinkled lightly with the salt) until softened and just starting to brown. Add the lamb chunks and stir frequently until some of it is browned, and the lamb has lost its raw appearance.

Add the turmeric and tomato paste, and stir through, scraping the bottom of the pot with a spatula or wooden spoon, adding a tablespoon or two of water, if necessary to prevent sticking. Stir for a minute or two, and then add the tomatoes and enough water to cover the surface by an inch or so, stirring well and scraping up the bottom of the pot so that nothing burns. The dish will have turned quite red. Lower the heat to the lowest setting. You can use lamb vegetable broth instead of water, but watch the salt content, if you do.

Simmer, covered, stirring occasionally for about 45 minutes. Add the yellow split peas (washed and drained), and enough water to cover by an inch (if necessary). Stir well, and add the cinnamon, and the dried lemons. For the lemons, crack them in half with a hammer, and drop them into the stew (the insides of the lemons should be black or dark brown). Simmer, covered, for another 45 minutes, or more, until lamb and peas are both tender. Remove the lemon peels (some of the insides will now be floating in the stew, that's fine). Taste, and adjust for salt and pepper if needed. Garnish with fried potatoes and serve with rice and yoghurt on the side.

***

I should probably confess that I put the peas in right away, in the picture above, rather than waiting the 45 minutes. However, while the overall dish was excellent, I felt that the peas got softer than they should have, and lost their shape, which is part of the reason that you can't really identify them visually in the photograph. The next time I make this, which will probably be in about a month, I'm going to do the 45 minute delay, because yellow split peas only take about 30 - 40 minutes to become tender, and I'd like to have more of their texture in the dish. If your yellow split peas take longer to cook, add them before you start simmering.

The rice that I served with this was a rice-cooker adapted version of Bhagali Polow - a dill-and-fava rice with a tadig, a recipe that I am still developing. Plain rice is probably more traditional to accompany this khoresht, though.

June 30, 2012

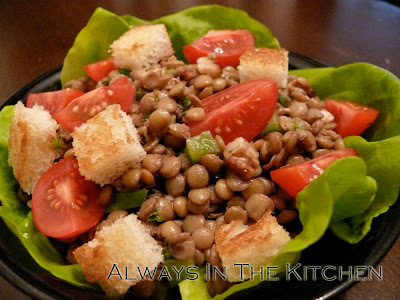
Lentil Walnut Salad, and new book review!

I've finally written another diet book review - this time for "Slimmer - The New Mediterranean Way to Lose Weight" by Harry Papas, over in my Much Ado About Diet blog.

Go check out the lovely Lentil Walnut Salad recipe!

Gluten-free tag disclaimer: obviously, leave out the croutons, or choose a gluten-free version, and otherwise label-read as usual.

January 15, 2012

Mujaddara


Mujaddara sure has a lot of different spellings: mujadarrah, mudardara, mejadra, moujadera...the legacy, I suppose of translating from an alphabet with so many more options for the letter "r" alone, than English. The name derives from the Arabic word for smallpox, apparently because of the way the lentils interrupt the rice surface is said to look like a pockmarked face (another example of this imagery in cooking is in the Chinese dish MaPo Tofu, in which chile flakes stand in as pockmarks). It is a relative of kushari, biryani, and probably a dozen other rice-based dishes, and can be dressed up or dressed down as desired.

In any language, Mujaddara is one of those beautifully simple dishes that is both incredibly healthful and eminently affordable. It is a staple in the Middle East that is, even in its simplest form, popular amongst people of every walk of life. Each cook makes adjustments based on his or her preference, availability, or cultural norm: what starts as a dish of rice and lentils topped with fried onions finds infinite variability in the type of lentil, the ratio of lentil to rice, the type of rice or grain, the medium for frying the onions, and the seasonings. It can be served as a complete meal unto itself, plain or garnished with yoghurt sauce, or beside meat or other vegetables for a more complex meal.

It is delicious. It is easy to make. We served it for dinner with a little leftover roasted chicken mixed in, and curry-roasted cauliflower on the side. I want to try making some of the infinite varieties out there, but first I want to make it again, just like this:

Mujaddara

Serves 4

2 medium yellow onions
2 1/2 tablespoons olive oil
1 cup basmati rice
3/4 cup brown lentils
1 teaspoon ground cinnamon
1/4 teaspoon ground allspice
1 teaspoon ground cumin
125 grams roasted chicken thigh meat (optional)
2 tablespoons flaked almonds or pine nuts
1/2 teaspoon kosher salt
1 teaspoon Baharat* (optional)

Slice one onion, and dice the other. Fry the onions rings in 1 1/2 tablespoons of olive oil, until dark brown, 25 to 30 minutes.

Meanwhile, bring 4 cups of water to a boil in a medium pot, and boil the lentils for ten minutes.

Fry diced onions in 1 tablespoon of oil in a large pot. Once translucent, add the salt and spices. Add the rice, and stir it about for a couple of minutes, and then add two cups of boiling water (from the microwave, or a recently boiled kettle). Drain the lentils, and add immediately to the pot of onions, rice and water. Stir well, and bring back to a boil, reduce heat, and let simmer on the lowest temperature for 25 minutes.

If using chicken, remove meat from bones and skin and set aside. Toast the almond flakes or pine nuts in a dry skillet.

Remove lentils and rice from the heat. Stir in chicken and almond pieces, and half the onions. Top bowls with remaining onions and almonds, and serve, sprinkled with Baharat if you like.


*Baharat: Technically, baharat simply means "spices" in Arabic (bahar means spice), and versions vary from place to place. The one I use is a rather simple one made of cinnamon, nutmeg, cloves, cardamom and black pepper, and I use it in the dish, too, in place of the cinnamon and allspice. It is very fragrant. I add the cumin separately, although some versions of Baharat include it in the mix.

January 07, 2012

Chorizo Succotash


January often marks a fresh attempt at better eating habits, and my house is no exception. The luxuries of the holiday season, some of which are still piled up on the dining room table, have become a menacing responsibility - the need to value the efforts which went into making the various treats, both mine and others, and the wish to refrain from waste, all jumble together against the knowledge that December was full of exceptions and indulgence, and that January had better feature some strategic planning.

My reactionary meal-planning almost always skews to the quickly prepared items, generally brightly coloured dishes which feature the greatest variety of vegetables that I can pack into my skillet. This Succotash fits the bill.

A side dish in the American South, succotash generally features a trifecta of lima beans, corn, and peppers, and varying amounts of butter, cream, bacon, or ham, depending on the cook and the needs of the moment. This version adds a small amount of chorizo to bump it up to centre plate, and is served over rice. Leftover succotash can be stirred right into the rice for a pleasing lunch, too.

Don't let the words "lima beans" put you off, either! I use the bitty little frozen ones, and they are tender and tasty, not bland and starchy. Plus, the combination of bacon and chorizo gives you plenty to take your mind off any childhood lima-induced trauma.

Chorizo Succotash
Adapted from "Cook This! Not That!"
by David Zinczenko and Matt Goulding


Serves 4 (over rice)

2 pieces thick, dry-cured bacon
150 grams dry-cured chorizo, diced
300 grams baby lima beans (fresh or frozen)
2 cups frozen corn
1 medium yellow onion, diced
1/4 cup half & half or light cream
1 medium red bell pepper, diced
1/4 teaspoon ground white pepper
1/2 teaspoon ground cumin
1/4 teaspoon cayenne pepper

Chop the bacon into lardons, and fry gently over medium heat until crispy. Remove the bacon pieces from the pan, but leave a tablespoon of the drippings. Add the onions and chorizo to the skillet, and saute for about three minutes, or until tender. Add the lima beans (no need to defrost, if using frozen), and stir and saute for another three minutes. Add the frozen corn, and stir and saute again.

Season with cumin and cayenne, add the bacon pieces back to the pan, and taste to see if you need to add any salt (the chorizo and bacon may have added enough). Add the red pepper, and a dribble of water, and saute for three more minutes. Continue to cook and stir until vegetables are tender (test the beans). Add the half & half, and cook and stir until liquid boils off to a thin sauce, almost evaporated. Remove from heat and serve over basmati rice.

Could you make this dish vegetarian? Absolutely. Simply omit the meat, and use a tablespoon of olive oil to saute the vegetables. To give a little more depth of flavour, you might want to add a splash of liquid smoke. Alternatively, you could also use an extra-firm smoked tofu, diced moderately finely, in place of the chorizo. For vegans, follow the vegetarian instructions, but also replace the half & half with either vegetable broth or a non-dairy milk (such as almond or rice milk), possibly thickened with a little cornstarch, to give it body. Please note that I haven't yet tried making the vegetarian versions, but these are my best estimates. If you give it a try, or have other suggestions to veg-ify this recipe, please do leave a note, and tell me how it went.

August 06, 2011

Azifa - Ethiopian Lentil Salad

Last year, I was surprised and irritated to discover one of my photos (from the era before I labeled them) was being reproduced all around the internet. Half of my irritation was at the (uncredited) misappropriation of my photo, and half was that it was being wrongly used - it wasn't Azifa at all. The photo had been taken from my old website (linked here)(Update: link has now expired, but you can find the original recipes in the comments below); there are two recipes on the original page - one for the delicious Ethiopian lentil salad called Azifa, and the other was an also fabulous Turkish lentil salad (which I believe translates as yeşil mercimek salatasi). There was only one photo, though: the Turkish salad. The photo had been mercilessly hijacked and propagated with the wrong recipe attached (or versions thereof). I figured the tomatoes in the original photo would be a dead giveaway as to which salad was pictured, but no - it turned up on a number of recipe collection sites and even once on the menu of an Ethiopian restaurant. To the best of my knowledge, those copies have now been taken down.

So now, years after posting the original article on two versions of a green lentil salad, and while I'm in a sort of mood of re-addressing old favourites, I thought I would finally give Azifa a photograph of its own. It may not be the prettiest or most colourful salad, but it is delicious! Do check out the comments of this post for the recipe - it's a fine summer dish, especially with a glass of crisp white wine, or a hoppy IPA. It also packs well for lunches (and bento!) and makes a great pita stuffer, but it also pairs beautifully with grilled salmon, or lemony yassa.

Here's a different picture, from a different batch, with different lighting:

September 30, 2010

Beans with Bacon


I'm a big fan of beans, and possibly a bigger fan of bacon. Fortunately, they need not be mutually exclusive.

I grew up eating Boston-style baked beans - sometimes the canned kind, but if we were lucky, the kind made from scratch, soaking the beans overnight and baking them slowly in the oven in a specially designed bean pot. Sweet and savory, hearty and comforting. Something that you wait for, and are rewarded for your patience.

I still like to make beans from scratch. Aside from the classic baked version, I developed a Stovetop version that only takes a couple of hours. It's not as good as the original, which takes about nine hours, but clocking in at under two hours, it's easier to wedge into my schedule (and it's still better than the canned kind).

The beans above, however, are not the "Boston" kind at all. They're a simple pot of pinto beans and bacon, with the flavour supplemented by onions and garlic, cooked with bayleaf and salt. It's a sort of foundation recipe, good on toast for a light supper, or to be seasoned up in the manner of your own choosing. I took inspiration from the Mexican dish called "thick beans", served as a protein/starch side dish, and often cooked with lots of lard. The lard in this recipe is only a little of the rendered bacon fat, but I've left the chunks of bacon in.

The thing that really elevated this dish was the quality of the bacon. My friend Rodney smokes his own bacon, and is extremely generous in sharing the bounty. I cut the bacon into thick lardons, and seared it quickly to render enough of the fat to saute some onions and garlic. Then I added the dried (washed) pinto beans, the bayleaf, and enough water to cover the beans generously, brought the whole thing to a simmer, and let it cook, covered over the lowest temperature on my stove until the onions and garlic dissolved, and the beans became tender. I checked on them periodically, topping up the water level as necessary as the beans absorbed the liquid.

The final stage was to add a little salt, and then mash up some of the beans and stir them back into the pot, thickening the gravy and cushioning the rest of the beans.

The beans were exactly what I wanted them to be (although I'm now contemplating making a spicy version, which would also be good). Even more, as the leftovers were turned into a delicious bean and bacon soup, which, on its own is a fine reason to cook up a big pot of beans.