Showing posts with label Beef and Lamb. Show all posts

May 13, 2015

Easy Weeknight Risotto Bolognese


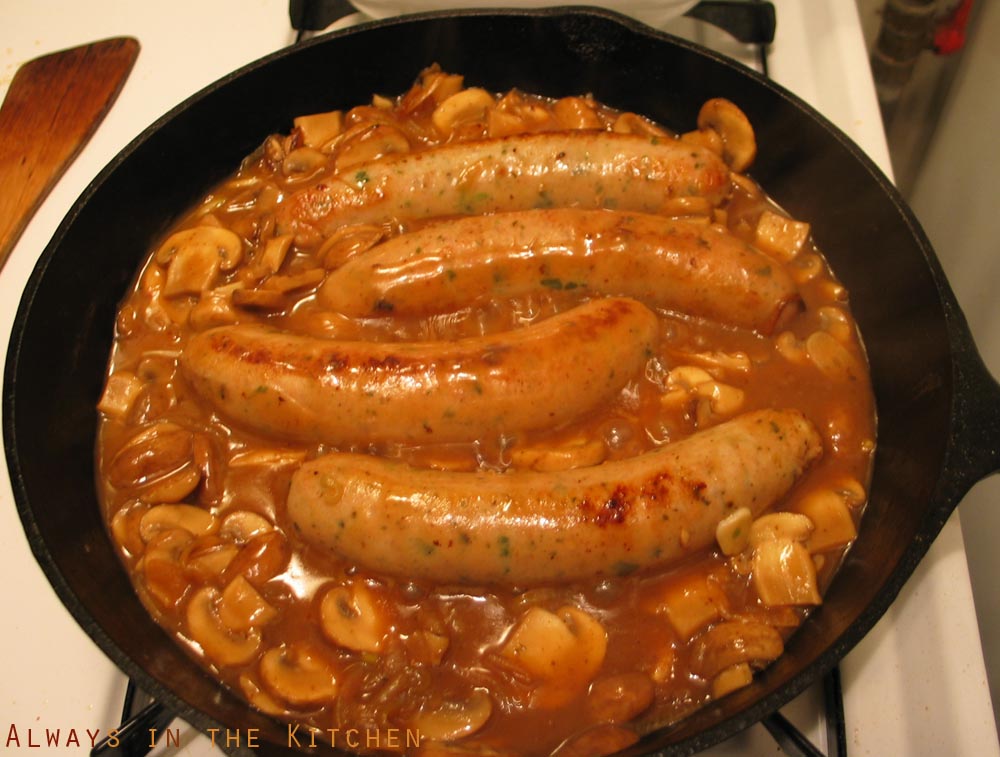
This was inspired by Nigella Lawson's recipe for Risotto Bolognese from her book Kitchen, but to be honest, I didn't really follow it. I skimmed the ingredient list and directions and decided that it was more about the idea, the fact of combining two normally discrete dishes into a delicious juxtaposition, and then I just ran with that. Consequently, my ingredients, ratios and even my method ended up being quite different from hers.

The shortest possible version of this recipe goes something like this: Build a bolognese sauce, and then use that as a base to build a risotto on top of. That of course depends on the cook knowing what normally goes into both of those things, and otherwise being willing to take the rest on faith. Fortunately, that's me. This is a true skillet dinner, without the need to remove anything to a separate plate or pan at any point during the cooking process.

I won't claim that this is a really serious Bolognese (note the use of "Easy Weeknight" as a modifier), but it's a meaningful nod in the general direction, and for this dish, that's good enough for me. Although, if you happen to have some genuine Bolognese tucked away in your freezer that you want to use instead, go for it. It's not a lightning-fast dish to make - risotto takes time, after all, but it's very straight forward, and if you use a chop-and-drop method, it all comes together surprisingly quickly.

Easy Weeknight Risotto Bolognese

Serves 4

4 thin (or 2 thick) slices of bacon, finely chopped
1/2 tablespoon olive oil
1 small onion, very finely diced
2 cloves of garlic, crushed or minced
1 medium carrot, peeled and grated
400 grams minced beef/pork blend (or meatloaf mix)
2 teaspoons beef stock paste (such as Better Than Bouillon or Alnatura Rinderbrühe)
pinch dried oregano
big pinch dried basil
big pinch ground white pepper
1/2 cup whole milk
1/2 cup vermouth
2 tablespoons tomato paste
1 400 gram can of finely chopped tomatoes
1 cup arborio (or other suitable risotto rice)
4 cups hot water from a recently boiled kettle
Fresh basil, for finishing and garnish
Freshly grated parmesan

In a large heavy skillet, over medium-high heat, fry up the bacon until it is a bit crispy and releases its fat into the pan. Add the olive oil and stir through. Add the onion and garlic, and stir through. Stir and cook until the onion is thoroughly softened and translucent. Add the grated carrot, and stir through, cooking for about five minutes until wilted and starting to become tender, and the excess liquid has evaporated.

Add the minced meat and stir, breaking it up with a big wooden spoon as you go. Fry and stir until the meat is a little browned, and then add the stock paste, oregano, dried basil, white pepper, and the vermouth. Stir and scrape up the bottom of the skillet while until the vermouth has evaporated. Add the milk in two stages, stirring until mostly evaporated in each case. Add the tomato paste, and stir through. Add the chopped tomatoes and their juices and stir through.

Let the mixture get completely hot and bubbly, and then stir the rice in. Reduce the heat to medium. Add a bit of water from the kettle, and stir until the extra water is absorbed by the rice. Basically, at this stage you just keep repeating that, adding the water a bit at a time, stirring between additions until the water is mostly absorbed, until you've either used all the water, or the rice is cooked to your liking. The rice will slowly absorb not only the water but the juices from the sauce itself, the grains swelling to full size and taking on a creamy appearance. The combination of the carrots and the tomatoes will give the finished dish a uniquely orange-red tone, quite different from most meat/tomato based sauces, but it coats the rice grains beautifully.

When all of the water is absorbed and the rice grains are cooked to your satisfaction, spoon into shallow bowls and garnish with basil and freshly grated cheese. And maybe some garlic bread.

If you have leftovers of this, it reheats very nicely in a covered casserole in the oven (you will want to add in a bit of water, and poke some holes to allow speedier reheating), and I imagine it would reheat well in a microwave, too. If you must reheat it on the stovetop, try not to over-stir it. While it's stirred to death during the making, after it is fully cooked, cooled, and reheated again, it can get a bit mushy if you stir it too vigourously.

April 17, 2015

Kofta B'siniyah - Beef & Lamb Meatballs with Pine Nuts


This is another fantastic recipe from the Jerusalem cookbook by Ottolenghi and Tamimi. I do wish that my serving platter were a bit bigger, because they're a little crowded-looking here, but this was a spectacular dish that we're very keen to make again as soon as possible.

Do not hesitate to include the tahini sauce that provides the bed for the kofta to lie upon - it goes so beautifully with the kofta that you'll probably find yourself dabbing each bite into a little more sauce.

You can find the original recipe here on The Telegraph's website.

Kofta B'siniyah

adapted from Jerusalem

Makes 10 Kofta

300 grams minced lamb
300 grams minced beef
1 small red onion, very finely chopped
2 large cloves of garlic, crushed
50 grams toasted pine nuts, divided, half roughly chopped
3 tablespoons flat-leaf parsley, finely chopped, plus extra for garnish
1 large hot red chile pepper, deseeded and finely chopped
1 teaspoon ground cinnamon
1 teaspoon ground allspice
1/2 teaspoon grated nutmeg
1/2 teaspoon ground black pepper
1 teaspoon coarse salt (kosher or sea salt)
1 tablespoon canola oil

Sauce
4 tablespoons tahini paste, well stirred
2-3 tablespoons lemon juice
1 large clove of garlic, crushed
2 tablespoons olive oil
2-3 tablespoons water

To Finish
2 tablespoons butter, browned
2 tablespoons finely chopped parsley
Toasted pine nuts (the whole ones, from above)
sweet paprika, to garnish (or you could use sumac instead)

If your pine nuts aren't toasted, do that first, in a dry skillet over medium heat until golden and fragrant. Then prepare your mise en place - mince the onions, crush the garlic, mince the parsley and the chile, prep the seasonings - everything but the oil.

If you can buy the meat from the butcher already combined, that will ensure the greatest level of integration of the beef and lamb, but not to worry if you buy them separately. Into a large mixing bowl, break up the meat with your fingers - pinching a little bit off the packet at a time and dropping it into the mixing bowl - so that when it has all been pinched out, you have a fluffy, aerated pile of ground meat(s). Add the prepared mise ingredients for the kofta and mix together lightly with your hands to distribute all of the "bits" evenly throughout the meat. The smaller your onion pieces the better they will integrate (although don't crush them to mush in a food processor, or you will make the mixture too wet).

Divide the meat mixture into ten pieces, and shape each one into an oval or "torpedo" shape.

Heat the canola oil in a large skillet, and, working in batches if necessary to not crowd the pan, fry the kofta over medium heat until browned on all sides.

If you want to be doubly sure that they are cooked through, you can pop the pan into a hot oven for five minutes or so after they're well fried, but if you have good quality meat from the butcher, a little rare in the middle is delicious.

While the kofta are frying, stir together the ingredients for the sauce, and separately brown the butter.

Spread the sauce onto a serving platter, and arrange the kofta evenly over the surface. Scatter parsley and pine nuts over top, and dust with a pinch of paprika or sumac. Spoon a little of the browned butter over each kofta, and serve.

January 11, 2015

My Mom's Chinese Beef & Greens


My mother used to make a version of this quite regularly, served over brown rice as was the custom of our household. I don't know where she got the original recipe, or what modifications she might have made to it. As both her knowledge of and exposure to Asian cooking of any kind was severely limited during the time we kids were growing up, and the availability of such ingredients in our small town was quite restricted, her version did not contain either sambal, fermented black beans, or even fresh ginger, and it was thickened with flour rather than cornstarch or tapioca flour (my version still is). It still tasted wonderful, and was a family favourite.

As I began to make the dish for myself as an adult, I gradually added the black beans, sesame oil, and exchanged some of the ground ginger for freshly grated ginger root. Plain button mushrooms were switched for shiitake, straw, or shimeji/beech mushrooms (although I'll still use buttons if that's what is available to me).

Normally there's about twice the amount of bok choi that you can see in the picture - it turns out that I had less on hand than I realized when I went to make the dish. It was still excellent, but had slightly less greens than usual. The baby corn is the most recent addition to recipe, and it's an absolute keeper. This recipe continues to be requested on a regular basis in our household.

Mom’s Chinese Beef & Greens

Serves 4-6 (over rice)

500 grams extra lean ground beef
1 large onion, halved and sliced, pole-to-pole
3-5 cloves of garlic, sliced or pressed
200 grams mushrooms, sliced or quartered if necessary
1 large head of bok choi, washed & sliced or 4 heads of mini bok choi
1-2 carrots, peeled & sliced into coins
200 grams fresh baby corn, sliced once each horizontally and vertically (optional)
1 thumbs-length of fresh gingerroot, sliced, minced, or grated
1/2 teaspoon dried, ground ginger
1/2 teaspoon ground white pepper
2-3 tablespoons soy sauce (preferably a less sodium type)
1 tablespoon black bean sauce or Chinese fermented black beans, rinsed and mashed
1 teaspoon sambal oelek or other chile paste or chile oil
1 cup stock – beef, chicken, bouillon cube – whatever you’ve got
1 large tablespoon of flour
1/2 cup of cold water
1/2 teaspoon toasted pure sesame oil

In a large, heavy-bottomed skillet or cast-iron pan, over high heat, brown the beef until any liquid has boiled off and the meat is frying gently. If you are not using extra lean ground beef, you may wish to drain any excess fat.

Add the chopped onions, garlic, ginger root, baby corn, and carrots, and stir well until the onions are translucent. Add the mushrooms, white pepper, ground ginger, black beans (or black bean sauce) sambal oelek and soy sauce. Stir well. Add a smidge of water if it’s starting to stick on the bottom, and/or lower the heat a little.

Let the mixture fry a little until the mushrooms start to get tender, and then add the stock or broth. Stir well, scraping the bottom of the pan so that nothing burns on. Bring to a gentle boil. Mix the cold water and flour together with a whisk, or shake together in a plastic lidded container until smooth. Pour into the meat mixture, stirring constantly, and bring back to a boil to thicken the gravy. If it gets too thick, you may need to add a little more water or stock. Reduce the heat and let simmer until the vegetables are tender.

Taste the gravy and adjust the seasoning to taste.

Slice the bok choi is sliced into large, bite-sized pieces (they will shrink a bit as they cook). Pile the bok choi on top of the meat mixture – don’t stir it in – and cover with a lid. Cook over medium-low heat for about five minutes, or until the greens wilt and decrease in volume. Then, stir carefully into the beef mixture underneath. Add sesame oil and stir through.

Taste to adjust seasoning, then serve over rice. My family liked to add a final drizzle of soy sauce at the table.

If you have leftovers, they can easily be reheated in the microwave or the stovetop, but my mother's usual approach was to combine the rice and beef mixture thoroughly, and then reheat it in the oven, covered, in a casserole dish (with maybe a tiny sprinkle of extra water to keep it from drying out. We liked it just as much on the second day as the first, even though we referred to it as "horse mash" because my sister thought the combined dish looked much like the cooked porridge that was fed to horses recovering from strangles (equine distemper), in the stables where she worked.

February 01, 2014

Malaysian Rendang


Rendang ist a wonderfully spicy meat stew, originally from Indonesia, but which has traveled well and evolved a number of delicious, location-specific permutations. I've made both Indonesian and Malaysian versions in the past, but there are also Indian, Thai, and Philippine versions to be had. It is classed as a "dry curry" based on the volume of liquid in the finished dish being on the low side, although mine here is a little wetter looking than it might otherwise be, as I didn't use quite the prescribed amount of meat.

The steps in this recipe are fairly simple, especially if you are using ground spices and/or have a processor or mini-prep to help. However, even in my (currently) low tech kitchen, it was pretty easy. I used a mortar and pestle for the whole spices that I had on hand, and also to pound the onions. A less messy alternative for grating/pulping the onions and ginger is the microplane grater, of course. Choose one a little larger than you would use to zest a lemon, say one you would use for somewhat coarsely grated parmesan. A box grater is not ideal for this, because its holes are variously too big or two small, but it will do in a pinch.

The prep is all up front, and then you can leave it alone to simmer on low heat, or in an an oven at 150 C / 300 F for a couple of hours (it would also work in a crockpot), while you relax with a refreshing beverage.

Malaysian Rendang
Adapted from The Essential Asian Cookbook

Serves 4-6 as part of a rice based meal.

900 grams chuck steak, cubed
2 medium yellow onions
4 cloves garlic
3-5 long red chile peppers, seeded
1/2 inch piece of ginger root, grated
400 millilitres coconut milk
1 tablespoon peanut oil
1 tablespoon ground coriander
1 tablespoon ground cumin
1 teaspoon ground turmeric
1 teaspoon ground cinnamon
1/4 teaspoon ground cloves
1/4 teaspoon cayenne
1-2 large strips of lemon zest, pith removed
1 tablespoon lemon juice
1 tablespoon palm sugar
1 tablespoon tamarind concentrate

Finely grate the onion and garlic, and finely chop or puree the red chiles. You can do this in a food processor with a couple of tablespoons of the coconut milk if you like, pulsing until it becomes a sort of paste.

In a dutch oven, or other large, heavy pot, heat the peanut oil until just shimmering. Add the onion paste along with the dry spices, lemon rind, and meat. Stir until the meat is thoroughly coated with the spices, and then add the remaining coconut milk. Simmer over low heat for 1.5 hours, stirring occasionally, until the meat is tender and the liquid has mostly disappeared into a thick gravy.

Once the meat is tender, and the oil starts to separate from the gravy (you will see it start to form little tiny pools on top of the gravy), add the lemon juice, the sugar, and the tamarind, and stir it gently through. Serve with steamed rice. Curry-roasted cauliflower makes a great side.

You will note that this recipe does not call for salt. It may not need any. Taste it after you've added the tamarind, and decide if you would like to add a little salt to the dish as a whole, or simply allow individuals to adjust their own servings accordingly.

Bonus: This tastes even better the next day, so if you want to make it for a potluck or dinner party, it's easy to knock it out the day before, and then just gently re-heat the next day, while you set about the rice and any other condiments. It also freezes very well for up to about a month.

November 07, 2013

Heart & Blade Burgers


These were intensely, astoundingly, beefy. I got the idea from Jennifer McLagan's book "Odd Bits" where she exhorts the reader to make burgers entirely of heart, but for my inaugural attempt at cooking beef heart I decided to go with her further suggestion of cutting the heart 50/50 with non-organ muscle meat. She suggested brisket, but, based on the availability of the day, I went with bottom blade. For four patties, I used 250 grams trimmed heart, and 250 grams bottom blade, making each patty roughly a quarter pound.

I do not have a meat grinder, which is the only reason that it took me this long to make these. However, I cribbed from Alton Brown's instructions for making ground meat using a food processor, and that worked incredibly well:

Heart & Blade Burger Patties

Prepare the beef heart by trimming any muscle sheath, silverskin, tendons, or veins that may be clinging to the outside. Using a chef's knife, dice the meat into short, thick strips about 5 centimetres long. Next, trim and dice the blade meat into the same sized pieces.

Place the meat in a metal pan in the freezer for about 20 minutes, so that the meat begins to freeze and stiffens, but is still somewhat pliable.

Scrape the meat off of the pan into a food processor fitted with a metal blade, about 250 grams at a time - you don't want to overload the machine. Pulse the processor's blade repeatedly until the mixture begins to look like ground beef. Empty the processor, and repeat until all of the meat is chopped.

At that point, I put all of the meat together in the processor, added a tiny dribble of olive oil, and gave it another few pulses, simply to integrate it into a single mass and make sure there was enough fat to keep the meat from drying out.

Remove the metal blade and season to taste. We wanted to go with simple, almost stark burgers, so that we could really taste the meat. We used only a good pinch of kosher salt, but you could season these any way that you like to season your burgers.

Next I turned all of the meat out onto the counter, and shaped the mass of fluffy meat into four patties, which we fried over medium-high heat in a little butter (you could also use olive oil, of course). I worried that the patties might not hold together nicely, but they did. I was struck by how dark a red they were - lots of iron, for sure. These patties are quite lean, because heart meat is inherently lean. I patted them out quite thinly, because I wanted good bun coverage, but a thicker patty would work fine, too. If you're making them very thick, you might want to poke a hole through the centre to speed up and even out the cooking process, but that's up to you.

Now, I won't lie to you: there is a faint trace of gaminess, of "organ meat flavour" that one gets from the heart, but it is quite mild compared to, say, liver or kidney, and the overall effect is so overwhelmingly meaty tasting that the general impression that you get when biting into your burger is simply that of beef (and rightly so). I suspect that the all-heart burgers would be a little gamier, which would certainly be fine with me, but these were a wonderful introduction into cooking beef heart. Piled up onto a bun with all of the fixings (not pictured, sadly, because we fell on the finished burgers ravenously, and I forgot to take pictures), it made a delicious dinner.

So, what's next? All-heart burgers? Heart Loaf? "Heart"y Meatballs? There seem to be an awful lot of options, and I'm looking forward to further experimentation.


September 23, 2012

Autumn's here: Cabbage Rolls


Cabbage rolls are one of those quintessential comfort foods for anyone with even a passing relationship to the cuisines of northern or eastern Europe, and of course the middle east, central asia, and the eastern mediterranean regions also have stuffed leaf and vegetable dishes with considerable similarities. Did I leave anyone out? Probably. (Sorry.) Stuffing food with other food and wrapping it up, whether you start with dough or a leaf, just seems to be a universal development in almost every cuisine.

If someone tells me that he or she is making cabbage rolls, my first question is "Oooh, what kind?" - closely followed by offers of help eating up any pesky leftovers, of course. In western Canada we tend to favour either the Ukrainian or Polish styles most of all, and the ones I've made here are a sort of unholy hybrid of every cabbage roll that I've ever found to be delicious. These ones are made with meat (beef, specifically) and rice, but there are plenty of options for vegetarian/vegan fillings (I would suggest a rice/walnut/mushroom blend, for starters).

A lot of recipes will suggest that you braise the cabbage rolls in tomato soup. Those of you who have been reading my blog for a while already know that I shy away from tinned soup as an ingredient for my casseroles and such, and I am not recommending tins of soup here, either. Rather, I humbly suggest my very own Simple Tomato Soup recipe (expired link removed, please see recipe in the comments section below), made exactly as listed. It comes together really quickly, and you can also make it a day ahead (or stash some in the freezer, and simply thaw it out when you are ready to make cabbage rolls). One recipe of Simple Tomato Soup is perfect for one tray of 12 large cabbage rolls.

I recommend savoy cabbage, which is easier to peel without tearing the leaves.

Cabbage Rolls

Makes 12 rolls
Total Prep & Cooking Time: 3 - 4 hours

1 Savoy cabbage, whole
500 grams lean ground beef
1/2 onion, very finely minced
2 cloves garlic, pressed
1 tablespoon tomato paste
1 tablespoon water
100 grams (1/2 cup) long grain rice (uncooked)
3/4 cup water
1 teaspoon mushroom base (optional)
1/4 teaspoon salt
2 tablespoons minced parsley
1 egg, beaten
1/4 teaspoon black pepper
1/2 teaspoon smoked paprika (to finish)

1 recipe Simple Tomato Soup, made as directed in the comments section below. You could also use a thin, tomato-based pasta sauce, or even simply use beef, chicken, mushroom, or veggie broth, and serve the rolls "dry" with sour cream. You will need about four cups of soup/braising liquid.

Prepare the soup, or, if defrosting, heat the soup until it is serving temperature.

In a small saucepan, bring water and mushroom base to a boil. Add the rice and stir quickly with a fork. Reduce heat, cover and simmer 10 minutes, then turn off and leave for another 10 minutes. The rice will be slightly underdone - chalky. That's perfect. Combine with the onions and garlic, and let the mixture cool a bit while you deal with the cabbage.

Cut the cabbage deeply, all the way around the core (about half an inch out from the core knob). Peel the outermost leaves, starting from the base of the cabbage, gently pushing up until the leaves come free. You can do this step a day ahead, and loosely bag and refrigerate the leaves (they will take up a lot of room). You will want 12 good, big, whole leaves, plus a couple of spares.

Trim the leaves by shaving down the thick central spine with a paring knife, and cut a small, thumb-tip sized v-shape at the base of each leaf to remove the toughest bit.

Bring a large saucepan of unsalted water to a boil. Add cabbage leaves and cook for 2 to 4 minutes or until softened, and drain. You can also soften the cabbage leaves by dipping them in water and microwaving them, 2 at a time, for about 60 seconds.

In a medium mixing bowl, combine the raw beef (broken into tiny bits), cooked rice mixture, egg, salt and pepper, and parsley, along with 1 tablespoon of tomato paste combined with one tablespoon of water. Mix thoroughly, using your impeccably clean hands, until everything is nicely integrated.

Prepare a 9x13" baking dish by ladling about half a cup of the tomato soup into the bottom of the dish, and swirling it to cover the bottom thinly. Some folks like to chop up the core of the cabbage, along with any leftover leaves, and put that in the bottom, too, as a bed for the cabbage rolls. This is a great way to use up the rest of the cabbage, as well as making sure you get plenty of veggies in your dinner.

Divide the beef mixture into 12 portions, and roll them up: this bit is awesome, but messy: Dip the softened cabbage leaves in the tomato soup/sauce, and microwave them, two at a time, again (unless they are completely floppy) for about 30 seconds. This tomato-dipping of the leaves is optional, but very flavourful.

Lay a limp, tomato-y cabbage leaf on your plate or cutting board, and add a portion of the meat to the lower third of the leaf. Flip the bottom (stem edge) up and over, bringing the points of the "v" closed so that it makes a tight package. Hold that with one hand, while you tuck the sides in (as if you were making a burrito, or an envelope), and then finish rolling up the leaf. A little practice, and this isn't as difficult as it might sound.

Place each roll, seam side down, in the prepared baking dish. You should get two rows of six, filling the pan. Pour the tomato sauce (or any other braising liquid of your choice) gently and evenly over each roll, using all of the soup, cover with tinfoil, and place in a cold oven. Set the oven to 325 F, and set the timer for 2 hours. Remove foil, and sprinkle with smoked paprika before serving.

Serve with sour cream (or plain yoghurt), mixed with a little dill. Perogies (pierogies), naturally, make a fantastic side dish, but so do plain boiled potatoes, or roasted carrots. Obviously, if you need to hurry the process up a bit, set the oven to temperature before you start rolling up the cabbage leaves, and bake for 90 minutes.

These freeze excellently, as well. Make your own ready-meals!

For the curious, here's a picture of the cabbage rolls just before they go into the oven (see how perky the cabbage still is!):

September 20, 2012

Meatballs & Polenta

Technically, not new recipes, simply a serving suggestion: the meatballs are my all-beef Italian-seasoned version of these meatballs here, and the polenta is my all-purpose polenta recipe which you previously saw when I was making polenta fries. This is just how easy it can be to get a good dinner on the table, when you have a stash treasures, such as meatballs, in your freezer (I haven't tried freezing polenta, but I imagine the texture would suffer). We had a tossed salad on the side, but you could add any extra vegetable you like to round out the meal (roasted fennel, anyone?)

The meatballs are somewhat smaller than usual, about half the size indicated in the linked recipe, as they were originally made up as part of a big batch designated for meatball subs, and I find slightly smaller meatballs are preferable in that context (so that you can have more of them, of course). I used a two-tablespoon disher (60 mL, or 1/8 cup) per meatball, and baked them in my usual fashion. Leftovers were briefly frozen on a baking sheet, and then tipped into a freezer bag for storage for another day.

The polenta recipe is particularly unchanged, simply necessitating that you pour it into individual serving bowls as soon as it is cooked, and serve it hot. The texture is a little bit like mashed potatoes - the creamy, finely whipped restaurant style, that is. If you have extra polenta (the recipe makes four servings, served in this manner), you can simply pour it into a baking dish or other small container, and let it set up to make fries (or simply re-heat and eat) at a later date. It would work wonderfully in a bento, although I didn't think of that in time to deal with the leftovers in such a way - I simply plunked slab of cooled polenta on top of the remaining meatballs in sauce, in a standard plastic container.

For the tomato sauce, you can use any one you like, of course. This was, again, a "freezer treasure" - the sauce leftover from making the same meatball subs. Essentially, a simple combination of a little onion and garlic sauteed in olive oil, a 398 mL tin of high-quality diced tomatoes (don't you hate opening a tin and finding it full of stem ends?), fresh oregano and basil, and a little simmering time. Your mileage may vary, of course. A few chile flakes wouldn't be amiss, either.

Reheating the meatballs in the tomato sauce saves time and dishes. Adding a little extra fresh basil as you reheat gives a little lift to the sauce, and makes you forget that you're essentially just eating up leftovers. This can happen almost untended while you stir up the polenta.

Parmesan, of course, is the natural finisher. Mozzarella would also be good, or any grating/melting cheese you fancy.

Now, for those of you following the "convertible to vegan" tag, I haven't completely lost my mind! Here's the fix: Instead of meatballs, use roasted cauliflower chunks, and simply toss them in the sauce for a few minutes before ladling onto the polenta. And as for the polenta, with its pesky sour cream and parmesan? Omit those ingredients in favour of a little silken tofu (beaten well until creamy) and a bit of prepared vegan shredded cheese-substitute. You may need to adjust the salt to your taste, depending on the brand you use. Change the chicken broth to vegetable broth (or just use water, as I sometimes do), and presto: converted to vegan.

September 02, 2012

Khoresht e Gheimeh: Persian Lamb & Yellow Split Pea Stew

The first time I had this dish my brain lit up like a Christmas tree. Well, that's what it felt like, at any rate. The rich flavour of the slow-cooked lamb, the thick, savory tomato gravy plus the wonderfully tart notes of lime seemed so very right that I knew I was going to want to eat this again and again and again.

I first tried a version without sourcing the all-important dried limes (lemons, actually, it turns out), using the internet-suggested substitution of lime juice added at the end of the cooking time. It was tasty, but it didn't taste right. I shelved the dish, mentally speaking, until I could find the proper ingredient.

So, when I discovered an unassuming-looking bag of "dried lemons omani" in my local eastern mediterranean deli, a little research showed that this was exactly what I had been waiting for. I set about the internet once more, looking for likely recipes. In the end, I synthesized my own out of several offerings, and was really happy with the result (and thanks to my co-worker Laya, who assured me that putting fried potato on top was important). This recipe is slow food, so it may not be great for weeknights, unless you like to eat a little later (or you do the prep ahead of time), although we made it mid-week and thought it well worth waiting for.

I used a lot less oil than most of the recipes I could find, but the recipe didn't seem to suffer for it. I made up for it by frying the potato in oil, although you could oven-bake them for a healthier option. The stew itself is quite healthy, especially if you use lean, trimmed lamb, and go with six servings.

Khoresht e Gheimah

Serves 4 - 6
Total Prep & Cooking Time: 120-150 minutes

500 grams lamb stew meat
1 tablespoon olive oil
1 medium yellow onion
1/4 teaspoon kosher salt
1 cup dried yellow split peas
2 cups canned diced tomatoes (no salt added)
2 tablespoons tomato paste
4 dried lemons / black limes / limu omani
1/4 - 1/2 teaspoon cinnamon
1 teaspoon ground turmeric
2 cups shoestring or thin-cut fried potatoes

In a Dutch oven, heat the olive oil over medium-high heat, and cook the onions (sprinkled lightly with the salt) until softened and just starting to brown. Add the lamb chunks and stir frequently until some of it is browned, and the lamb has lost its raw appearance.

Add the turmeric and tomato paste, and stir through, scraping the bottom of the pot with a spatula or wooden spoon, adding a tablespoon or two of water, if necessary to prevent sticking. Stir for a minute or two, and then add the tomatoes and enough water to cover the surface by an inch or so, stirring well and scraping up the bottom of the pot so that nothing burns. The dish will have turned quite red. Lower the heat to the lowest setting. You can use lamb vegetable broth instead of water, but watch the salt content, if you do.

Simmer, covered, stirring occasionally for about 45 minutes. Add the yellow split peas (washed and drained), and enough water to cover by an inch (if necessary). Stir well, and add the cinnamon, and the dried lemons. For the lemons, crack them in half with a hammer, and drop them into the stew (the insides of the lemons should be black or dark brown). Simmer, covered, for another 45 minutes, or more, until lamb and peas are both tender. Remove the lemon peels (some of the insides will now be floating in the stew, that's fine). Taste, and adjust for salt and pepper if needed. Garnish with fried potatoes and serve with rice and yoghurt on the side.

***

I should probably confess that I put the peas in right away, in the picture above, rather than waiting the 45 minutes. However, while the overall dish was excellent, I felt that the peas got softer than they should have, and lost their shape, which is part of the reason that you can't really identify them visually in the photograph. The next time I make this, which will probably be in about a month, I'm going to do the 45 minute delay, because yellow split peas only take about 30 - 40 minutes to become tender, and I'd like to have more of their texture in the dish. If your yellow split peas take longer to cook, add them before you start simmering.

The rice that I served with this was a rice-cooker adapted version of Bhagali Polow - a dill-and-fava rice with a tadig, a recipe that I am still developing. Plain rice is probably more traditional to accompany this khoresht, though.

April 29, 2012

Cincinnati Chili

I've never been to Cincinnati. My only points of reference for the city, I confess, are watching WKRP on tv and Cincinnati Chili (only the former of which I've experienced first hand). So, as you can see, this will be a bold adventure down chili avenue, and at the end I won't really know whether I've succeeded or not in creating an at-home version of "Cincy/Cinci Chili"; all I'll know is if I've made a tasty dinner. To be fair, that's usually my primary goal, so I'm not too worried about it.

My interest in Cincinnati Chili is based on two things: a deep appreciation of American regional cuisine, which I explore whenever possible, and a recollection of a pastitsio I once ate in Mykonos, which contains a similar combination of pasta, meat and spices, albeit without the cheddar cheese, kidney beans, or oyster crackers. I loved that dish so much, that I've tried to make a version of it before.

Ah, oyster crackers. You can't really get them here, I've discovered (unless you have an account with Sysco Restaurant suppliers, I suppose), so unless I want to visit one of the local oyster bars and clandestinely make off with a packet (or, you know, ask them nicely for an extra packet) I'm forced to either a) make my own from the dubious recipes floating around the internet (not happening today!), b) substitute soda crackers/saltines, despite numerous websites cautioning me against doing so, or c) use the also-dubious looking oyster crackers available from Carr's in the entertainment 9-variety pack.

I've opted for c) and the scant offering of suspiciously flat oyster crackers it is. For the purists, I apologize that I'm not easily able to meet the simple standard, but perhaps I can gain a little credit for not just using goldfish crackers?

My starting point was this recipe from Allrecipes, which is claimed (by a commenter, not the original poster) to be the very recipe for Skyline Chili as was posted in the newspaper in the 1970s. It seemed like a pretty good place to start. Yes, I did my reading, and understand that Empress is widely recognized as the first cincinnati chili, but at the end of the day, after all the reading, I couldn't find a version of that one available. Skyline seemed just the thing. When I eventually make it to Cincinnati, I will have to taste test Skyline, Empress, and Gold Star, just to truly understand the differences. I read a lot of recipes, and a lot of comments, and am impressed by how passionately Cincinnati folks love their chili. Food that is subject to hotly debated opinion, contested between strangers and friends alike in the quest for the perfect representative version, is always worth investigating.

I halved it, because I wasn't feeding 10 people, and I have finite freezer space, so I hope that doesn't compromise the flavours and/or textures. I also found it necessary to substitute dark cocoa powder for the chocolate (not going to the store again today), and upped the cinnamon. I use an unsalted tomato sauce, so this will likely be a bit less salty than other, more accurate versions.

So, the only remaining question was...one-way, two-way, three-way, four-way, or five-way? Which, of course, isn't a question at all; five-way, hands down. For those completely unfamiliar with this dish, it breaks down like this: one-way is just chili in a bowl. Two-way is served on spaghetti. Three-way is served on spaghetti with cheddar cheese. Four-way is three-way plus chopped onions (raw). Five-way, the ultimate version as far as I can tell, is all of the forgoing plus beans, either in the form of chili beans or kidney beans, warmed separately and added either on top of the spaghetti, or on the bare plate before the spaghetti. Well, how could I opt for anything less than the full experience? Five-way it is.

Cincinnati Chili
Adapted from Allrecipes
Serves 5

454 grams lean ground beef
4 cups filtered water
*****
200 mL unsalted tomato sauce
1 medium yellow onion, finely grated
1 tablespoon vinegar
1 teaspoon Worcestershire sauce
2 cloves garlic, finely chopped or crushed
1/2 tablespoon dark cocoa powder
1/2 teaspoon kosher salt
3/4 teaspoon cinnamon
1/2 teaspoon cumin (ground)
3 whole cloves
3 whole allspice berries
1 bay leaf

The night before, break up the meat into a medium-sized pot and cover with water. Bring the mixture to a low boil, and cook for about a half-hour, or until the meat is finely broken down and cooked through. Top up with more water as needed - it should be a bit watery. In fact, it looks kind of awful. That's okay, it gets better tomorrow. Cool it down, and then refrigerate overnight, in the same pot.

The day of, skim the solidified fat from the top and discard. Or make candles, or bird feeders, or whatever it is you do with tallow. Re-heat the meat and water mixture, and add everything else. About half-way through grating the onion, I couldn't hold it without risking grating my fingers, too, it was all so slippery with tear-inducing onion juice, so I wimped out and tossed the rest into the min-prep and let the sharp blades finish mincing it for me.

Simmer over a low heat for three hours, to allow time for all of the flavours to develop, adding water as necessary to keep it from drying out. The texture should be more along the lines of a pasta sauce, so it needs to stay "loose".

For five way, drain and rinse your beans, and reheat them separately in a little water. Cook up however much spaghetti you want to use - we go for smaller portions here, so a half-pound (225 ml) spaghetti gives me 4 servings, leaving one "serving" of chili leftover to make a "cheese coney" in the middle of the night. Ahem. So, beans, spaghetti (in which ever order you want to put them), topped with a full portion of the chili (1/5 of the pot), topped with finely chopped onion, and finished with a whole lot of cheddar cheese (I used sharp cheddar, because that's how I roll). Oyster crackers on the side, to be added by the various diners.

I didn't have a grater that would give me the kind of long, fine strands of cheese that I wanted, so I simply went with a fine shred. The overall effect is not the same, but it seemed a better option than using a coarser shred.


So, the verdict: The two-stage meat cooking yielded a texture that was very silky, almost fluffy, and I cannot imagine a way to get that without the lengthy cook time. The combined seasonings were incredibly tasty, although for my tastes I could have upped the allspice and clove (perhaps with a little pinch of ground spices, instead of whole), and I could have easily upped the cocoa to a full tablespoon, too. However, even exactly as written above, it was fragrant, rich, and satisfying, and a dish I'd be happy to have again. A tasty dinner, indeed.

Now I just need to get myself to Cincinnati, and check out the real deal.

January 29, 2012

Beef Fried Rice Noodle

(Belated) Happy Year of the Dragon! How about some 乾炒牛河?

This was the very first dish I had in a Chinese restaurant, and I both adore it and hold it to high standards. It's a tricky one to be sure - careful handling is needed to ensure that the noodles do not become either greasy or mushy. It's also often overloaded with bean sprouts, which puts a lot of people off it entirely, but I don't mind bean sprouts, actually. There's none in the picture simply because I don't tend to keep them around generally, and I didn't remember to pick some up on my way home from work. The loss is negligible, really, especially if you serve the dish with some nice gingered broccoli. It really does need a vegetable on the side, in my books, to feel like a meal.

Now, it should be noted, that while I mentioned that I am picky about this dish, my version includes an ingredient which is not usually found in it (black bean sauce), but I do enjoy the depth of flavour that it brings, so I'm keeping it. Since I use a low sodium version of soy sauce, my dish is not as darkly coloured as some, so if you want a darker overall look, substitute some dark soy sauce in the sauce mixture. Do keep in mind that this is a very sodium-intense dish, though - a little less is probably better for you.

Now, I suspect some of you may be saying "wait a minute! She's got "convertible to vegan" in her tags!" Yep. To convert this dish to vegan, all you need to do is use a combination of sliced mushrooms and/or fried tofu (atsu-age) instead of the beef, and a vegan-friendly sweetener (such as agave). It's still going to be delicious, but it might need a new name.

As for Gluten-Free? Simply ensure you are using one of the GF versions of soy sauce and black bean sauce (or skip the black bean sauce and use a little extra soy sauce in that case, right at the end).

Beef Fried Rice Noodle
Serves 4 (as part of a meal)
Total Prep & Cooking Time: 45 minutes

2 tablespoons peanut oil, divided
200 grams thinly sliced beef
600 grams fresh wide rice noodle (ho fun)
1 cup trimmed bean sprouts
1 medium yellow onion
2 cloves garlic, sliced
2 green onion

Marinade for beef
2 tablespoons low sodium soy sauce
1 teaspoon sugar
2 teaspoons cornstarch
1 tablespoon Chinese cooking wine (or dry sherry)

Sauce
1/4 cup low sodium soy sauce
2 tablespoons water
1 tablespoon black bean sauce
1 teaspoon sesame oil
1 teaspoon beef concentrate

Combine the marinade ingredients in a bowl, and add the beef, stirring well to make sure it is thoroughly coated.

Wash and dry the sprouts (trim the dragging tails, if you like). Wash the green onions and cut into matchstick-lengths (full disclosure - in the picture above, I erred by forgetting to prep the green onions, so I sliced them thinly and added them as a garnish, after the picture was taken). Slice the yellow onion (pole to pole) in long slices.

Combine the sauce ingredients in a measuring cup and set aside.

Separate the noodles onto a plate - if they are really stuck together, place them in a large pot of almost-boiled water (the heat should be off) and let them sit for about five minutes, giving a stir occasionally, until they separate. Drain immediately into a colander. If the noodles separate nicely without the soaking step, give them a quick microwave-zap for a minute or two, until they are hot. This will prevent over stirring later.

Heat a tablespoon of peanut oil in a large non-stick skillet over high heat. Add the garlic, then the bean sprouts and green onions, fry for a minute or two, then remove them to a warm plate. Lift the beef slices out of the marinade, and quickly stir fry them until they are mostly cooked. Remove the beef to the plate with the bean sprouts. Add the second tablespoon of peanut oil, and quickly stir fry the onions until just tender-crisp - they should be translucent, but not too floppy. Quickly add the hot noodles, the reserved marinade from the beef, and the sauce ingredients, and stir and toss the noodles until thoroughly coated and hot throughout. Add the beef and sprouts back into the pan, and continue to stir and toss until everything is nice and integrated. Serve hot, with extra soy sauce and/or chile oil on the side (and a nice green vegetable, too, ideally).

Enjoy!

January 16, 2011

Hamburger Stroganoff Skillet Dinner


First things first: this is, obviously, not a true stroganoff, nor is it pretending to be one. Instead, it's a quick weeknight dinner that only uses one pan and doesn't take a whole lot of time. Bonus points that it is made from ingredients that I'm likely to have on hand. Even better, it has a surprisingly modest caloric payload, which (according to an online recipe calculator) is approximately 400 calories per serving, somewhere in the vicinity of 1 1/2 to 2 cups. Add some fresh steamed veggies for a side dish, and you're licking the plate (and patting your satisfied belly) for under 500 calories. This dish is, I presume, what Hamburger Helper wants to be. Only better, I think, and with less sodium, which means it doesn't send you desperately, repeatedly to your water glass until your insides slosh when you walk. Comfort food!

Hamburger Stroganoff Skillet Dinner

Serves 4

450 grams extra lean ground beef
1/4 teaspoon Kosher salt
1/2 teaspoon black pepper
1/4 teaspoon dry mustard
1 cup finely diced onions
2-3 cloves garlic, minced
200 g broad/wide egg noodles
1 1/2 teaspoons Better than Bouillon Beef Base (or substitute beef broth for the boiling water below)
3/4 cup plain Greek yogurt (I use Liberte's 0% fat)
2 cups sliced mushrooms of your choice
2 tablespoons unbleached flour
1 1/2 cups boiling water
1/2 cup cold water
1 teaspoon Worcestershire sauce
1/2 tsp cornstarch

In a 12" non-stick skillet, fry the beef, stirring occasionally until well browned. Sprinkle the dry mustard and the salt over the meat and stir again. Add the onions and garlic, cooking and stirring until softened and a bit translucent. Add mushrooms to skillet, and a splash of water to make sure nothing sticks. Add the noodles, beef base, Worcestershire sauce, and boiling water, stir well and bring to a simmer. Shake the half cup of cold water in a lidded container with the flour, until smooth. Add to the skillet and stir well until thoroughly incorporated and gravy starts to thicken up, and then cook over medium heat until noodles are half-done (about 5 minutes). Combine yogurt with cornstarch (so it doesn't break and curdle) in a small bowl and beat with a spoon or whisk until perfectly smooth. Add yogurt mixture to skillet. Cook stirring until mixture thickens to a creamy coating and the noodles are fully cooked.

A crisp salad would be another lovely way to round this out.

January 03, 2011

The Last Pie of the Year is also the First Pie of the Year

Which can only mean one thing: Tourtière for New Year’s Eve (and again, New Year’s Day). (It's also often made for Christmas Eve, instead, depending on where you hail from.)

Tourtière is one of those wonderful foods which can be summed up as “those Quebecois pork pies” (doing it something of a disservice in brevity), but also holds an awful lot of holiday tradition, and hot debates as to the exact ingredients required (or, in some cases, permitted). There is the great potato debate - should it be included at all, should it be in chunks, or should it be mashed smooth? There is the meat debate - all pork, a mixture of pork and beef (and the percentages thereof), should you use game, such as venison or rabbit? And finally, last but not least, the seasoning. I’ve seen arguments for salt-and-pepper only (boring, but safe, I suppose), nutmeg and cloves (my personal favourite), and a sort of kitchen sink approach which encompasses every possible option from the spice rack, and infinite variations in between.

I am not Quebecois (although part French), and therefore do not have a family imperative to include in my definition of this dish, but I have a great fondness for French food in general, including its many regional variations. Here is an ad-hoc version that should prove tasty to most meat-pie loving folks:

Dawna’s Tourtière

Serves 6 - 8
Total Preparation & Cooking Time: 1.5 to 2 hours

Pastry for one double crust pie
2 cups flour
½ cup butter, cold
Pinch of salt
5 tablespoons cold water

Using a food processor fitted with a metal blade, blend the flour, butter and salt with quick, full-speed pulses until the butter is the size of little peas and evenly distributed throughout the flour. With the motor running on low, add the water all at once through the top of the food processor. Immediately crank the speed up on the processor, and in a few seconds it should start to become dough, little chunks of which start to glomb together and try to crawl up out of the bowl. Pull the dough clump(s) out onto a lightly floured counter, and knead just barely until it comes together. Separate into two roughly equal pieces, and pat down into disks. You’re done! You can refrigerate them until you are ready to work with them, or you can roll out the pastry now if your filling is ready. This pastry works beautifully for sweet or savory pies and tarts.

Filling

600 grams lean ground pork
300 grams extra lean ground beef
1 medium onion, minced
2 cloves of garlic, minced
1 bayleaf
1 medium potato, boiled and mashed (as smooth or lumpy as you wish)
½ teaspoon salt
Good pinch of ground nutmeg
Good pinch of ground cloves
Small pinch ground sage
Small pinch ground thyme
Black pepper to taste (lots)
½ cup vegetable broth

Brown the pork and the beef in a large skillet. Add the onion, garlic, and bayleaf and stir and saute until the onion becomes translucent and tender. Stir in: first the seasonings, then the broth, and finally the potato. Stir about, and taste. Adjust the seasonings to your liking, remove the bayleaf, and remove the filling from the heat.

Roll out your pie’s bottom crust and place it in the pie plate. Heap up the filling in the middle, and then spread it about so that the pie will be full, without gaps by the side crust. Sprinkle the filling with extra nutmeg, and lay the top crust over the filling. Trim and crimp the sides, and cut slits (air vents) in the top of the pie, and brush it with an egg wash (essentially, one egg, beaten smooth, applied with a pastry brush until the whole top surface, including crenellations, are liberally coated with yellow goo. This only uses up about a tablespoon, at the most, of your beaten egg, so put the rest in the fridge (in a little dish, covered well) for a future omelette or other baking tasks).

Place pie in a 450 F oven for 10 to 15 minutes, then reduce the heat to 350 F and continue to cook for another 20 to 30, depending on your oven.

Allow to cool for about five or ten minutes before slicing, to help it preserve its shape when cut.

You may wish to serve this with a nice tomato chutney, or banana ketchup, or even salsa. I won’t judge - well, not much, anyway.

Happy New Year!

December 07, 2010

A Thousand kinds of Chili: Texas Red

Why, that's my baked acorn squash stuffed with leftover Texas Red, that's what that is.

I have been eating chili all my life, but until I left home, I had only had chili that was made from ground beef and contained kidney beans. I loved it. I still do. But I soon realized that it's not the only chili kid on the block, and there are an awful lot of tasty contenders to get wrapped up in. These days, my chili might be made with ground buffalo and black beans, or, in Palle's case, ground turkey, pumpkin, and beer.

There is the great debate, of course: beans or no beans. People have very strong opinions on the subject, and while I am a fan of beans, generally speaking, I've certainly enjoyed the bean-less chiles that I've had. Tomatoes or no tomatoes is an almost as heated question. Certainly the chile of my childhood depended on tomatoes as part of the flavour and texture and overall body of the dish.

As I considered the different styles and recipes available, it gradually dawned on me that the dish I really wanted to make was closer to Mexican Carne con Chile than anything I had eaten as a kid, but I wanted an American style. A classic. I started doing some research on the classic preparations of Texas style chile, the infamous, notorious bowl of red.


Because I do like beans, I opted for red kidney beans on the side, and made them nice and spicy with lots of fresh green chiles. That's a whole separate recipe. And, because I do like cornbread, I made some to go with.

After extensively slogging my way through old American cookbooks and the interwebs in general, I found in Homesick Texan the inspiration for the chili that I wanted to make. It had almost everything I wanted: chocolate, ancho chiles, beer, chunks of tender meat braised long and low.

I confess to the scandalous addition of tomato paste, because I like the depth of flavour it brings, without contributing a particular tomato-y-ness to the entire affair.

Texas Red Chili
Adapted from Homesick Texan

4 ancho chiles
2 pasilla chiles

2 pounds of bottom blade beef, cut into 1/2 centimetre cubes

1 large onion diced

4 cloves of garlic, crushed

1 bottle of beer (I used Tankhouse Ale)

2 cups of water

1/4 tsp cinnamon

1/4 tsp allspice

1/2 tsp cayenne

2 teaspoons cumin
1 teaspoon ancho powder (just for good measure)
1/3 mexican chocolate tablet, grated
2 tablespoons tomato paste
1 tablespoon Bufalo Jalapeno Hot Sauce

I heated the dried chiles by holding them over a flame on my gas stove until they became pliable. I tore them open and removed the seeds, and tore the pods into pieces. They went into a bowl with enough water to cover, and were let to soak for half an hour while I cut up the meat. I sprinkled the meat lightly with kosher salt.

I seared the meat in batches in my Dutch oven, then added the onions and garlic, and stirred them around until the onions became translucent. I added the tomato paste and dry spices, and stirred them around until everything was evenly coated. I deglazed the pan with some of the beer, then added the rest as a braising liquid, along with the water.

The chiles were retrieved from their soaking liquid, and pureed in a mini food processor with a little water to make a thin paste/thick sauce. This was then added to the chile pot.

Once the chili began to boil, I turned the heat down to low and let it simmer for about three hours, stirring occasionally.

I smashed up a couple of wedges from a Mexican hot chocolate disc using my meat mallet, and sprinkled the cocoa dust into the pot. I had some masa harina standing by to thicken it up, but it really didn't need any help, as far as I could tell Maybe a Texan would have wanted it thicker, but the spoon was standing up pretty well on its own, so that was good enough for me. I let the chili simmer for another half hour or so, and served as you see above.

Oh, and if you want to serve it (or the leftovers thereof, perhaps mixed with any leftover beans, or perhaps not) in a squash, simply hollow out a nice acorn squash, brush with canola oil and sprinkle with cumin and smoked paprika. Bake uncovered in a baking dish at 350℉ for about 20 to 30 minutes. Fill with hot chile, and maybe a nice coleslaw on the side.

January 21, 2010

Ersatz Pizza, with lamb

I needed to use up the tortillas. They were lingering in the fridge a little longer than was ideal, and had gotten stale. If I was going to use them, it was going to have to be immediate, and something over high heat to crisp back some semblance of personality into them.

Fortunately for me, my corner grocery has a small, fresh meat section, and a butcher who comes in for a few hours in the morning to set up the various and sundry cuts necessary in the preparation of Vietnamese and Filipino dishes. This includes very thinly sliced raw lamb rounds which, it turns out, fry up blazingly fast. It's the same place that I get my thinly sliced beef for the Sesame Beef. They do a very nice thinly sliced meat.

In the interests of both creating a nicely sturdy surface to play on, and my desire to use up maximum tortillas, I chose to glue two tortillas together with freshly grated parmesan. After that, a thin smear of spinach pesto, followed by the seared lamb slices, some pine nuts that were also in need of being eaten, and some feta cheese. The lower right side also had a drizzle of pomegranate molasses, which I was initially unsure of, but it turned out delicious. The loaded tortillas were then shoved onto a baking sheet and slid under the broiler just long enough to crisp up the edges of the tortillas, and toast the pine nuts.

The final stage was performed post-broiler: a friend had given me a whole-spice blend called "Grains of Desire" which turned out to be a wonderfully fragrant mixture of black peppercorns, nutmeg (not whole, obviously), cloves, orange rind, rose petals, ginseng, and grains of paradise. The combined aroma reminded me a little of ras el hanout, a justly famous Moroccan spice blend, and indeed, shares an overlap of ingredients (although a good ras el hanout might have upwards of 40 spices within), most notably the rose petals and the grains of paradise.

I had been searching for the perfect dish to crack the seal on the spice mixture, and this was a good call. Lamb provided a beautiful backdrop for the flavours, and tied the whole impromptu dish together in a way that I could not have really predicted.

It's not really pizza, but I really don't know what else to call it. I know I'd love to have it again.

November 10, 2007

Comfort Food: Chili Mac


If there's one thing that the chilly autumn weather and the battling of health issues have in common, it's that comfort food makes them recede a little into the background, leaving instead (if only temporarily) a swathe of warm, well-fed well being.

It's a little funny to me that this dish, Chili Mac, is a comfort food for me, because it is something that I never had growing up. However, we did have a lot of chili, and if this had occurred to my mother as an option, I'm certain she would have made it, and often, at that.

The type of chili necessary for this dish is the uber-basic ground meat and bean style chili, which can be made very quickly and without much fuss. My standard, go to recipe is called "20 Minute Chili" because it is really that quick to knock together, and while chili is always better the next day, it's pretty good as is, shored up with lots of spices. This kind of thick chili can be made from simple pantry/freezer staples, and it freezes most excellently itself, ready to be hauled out and used for anything from Chili Mac to chili dogs, or even as a filling for a fluffy omelette!

Assuming that one has the chili already in the freezer, Chili Mac is dead easy to make (even for someone whose hands don't always work very well). The meat, onions and peppers, and other things that require knife-wielding have, for the most part, already been done, and it becomes a simple skillet dinner of patience and stirring (topped with a little cheese, and maybe some green onion and/or cilantro).

You can use your own favourite ground-meat chili here. Heck, you could even use your own favourite vegetarian chili. It's very adaptable. It uses the absorption method, so you only mess up one pot, which is also good. It's sort of like making a risotto out of pasta, only much less fussy.

Chili Mac

3 cups prepared chili (defrosted)
1 cup uncooked elbow macaroni
2 1/2 cups low-sodium beef broth (or water)
1 cup tomato sauce

Optional garnishes:
Grated cheese
Sliced green onion
Chopped cilantro
Extra hot sauce

In a 12" non-stick skillet with high sides, heat up the chili until bubbly. Add the uncooked macaroni, the broth (or water) and the tomato sauce, and bring up to a boil. Reduce heat to a simmer, and cook and stir intermittently for about 10 minutes, or until the macaroni is cooked to your liking. The liquid should be mostly absorbed, but the dish should still be a little saucy. If your heat was too high, and your liquid evaporated to quickly, you may need to add a little more water (or, for example, if you like your macaroni well-cooked instead of al dente).

Dish up and garnish as you see fit. If there are any leftovers, they warm up nicely for lunch the following day.

May 19, 2007

Surf & Turf

I've never been a big fan of the surf 'n turf platters in restaurants. When I have occasionally had them, they've been disappointingly cooked steaks with even more disappointingly dry, tough, overcooked, often tiny shrimp. I stopped trying them a long time ago.

While it seems strange to think of pairing seafood with beef, really, I think I understand the intent: both are luxurious items, so the combination must be even better, right? In the words of Homer Simpson, "I'll have your finest food, stuffed with your second finest food." Which, as you may know, turned out to be lobster stuffed with tacos.

I wanted a nice dinner for our anniversary. It's our tenth, so something a little special or unusual seemed the thing to do, but as we are saving money right now (and moving across town very shortly), we decided to stay in for dinner rather than go to one of our favourite special occasion haunts. Since I had a lovely bottle of Saintsbury Garnet Pinot Noir on hand, thanks to my sister, all I needed were a few items from the market to make a festive meal.

There aren't really recipes attached to this dinner - the tenderloin steaks started at room temperature, were seasoned with salt and pepper, quickly seared on both sides and placed in the oven for about four minutes to come up to temperature. As soon as they went into the oven, I melted some butter, added the freshly shelled, raw prawns, tossed once, added kosher salt and coarsely pounded black and white peppercorns, tossed again for a couple of minutes until they all started to pinken, then turned the flame off and added a couple of cloves of fresh garlic. The garlic softened and mellowed while the steaks rested on the cutting board. We ate a whole pound of prawns (well, that was their shell-on weight) between the two of us, since the theme was indulgent luxury. The asparagus were simply roasted on a piece of foil on a sheet in the oven for about seven minutes, so they still had a bit of a crisp bite. Ten minutes gets you silky, tender stalks.

Simple, and good. A fitting meal, we thought, for the ten years that we've spent together so far.

We had no room for dessert. The vanilla ice cream and limoncello drizzle would have to wait for another day.

April 28, 2007

Caught between two seasons (Beef Biscuit Pie)

Spring has been difficult, this year. I never know quite how to dress, and I oscillate between cooking for winter and cooking for spring. One day, the sun will be shining and the air smells green and fresh, and I suddenly want salad, and the next day we're back to the gloomy, rainy, dark and difficult dregs of a season we're long tired of.

I try to be pleased that I can fit in one more slow-braised beef dish, before it becomes hopelessly out of step with the season, and to that end the Biscuit Pie fits in quite nicely. The beef cooks slowly in the oven for a couple of hours before getting fitted with a thin biscuity topping and a high temperature just long enough to make the biscuit rise and crisp, and become slightly golden. It's really a pot pie, I guess, but with a biscuit top rather than a traditional or puff pastry crust. This is the way my mother used to make Steak & Kidney "pie" and since I like mushrooms more than I like kidney, I've made a simple substitution. Either way, the flavours are rich and tasty. You can outfit any kind of stew you like with a biscuit topping, though, and I've certainly made Chicken Biscuit Pies plenty of times, too, although they don't really need the long slow braise. Perhaps next winter (because, we are on to spring now, right?) I'll try a Lamb Biscuit Pie, because I think that would work beautifully.

Then, the sun shines, and I find myself wanting things light and fresh, and there is asparagus in the markets demanding to be taken home and steamed or roasted, or chopped into pasta. There is no recipe for the above dish, because I failed to take notes while I threw it together. The asparagus were simply spritzed with a little canola oil and roasted at 400 F for about 8 to 10 minutes, and the cherry tomatoes in the pasta were also roasted for about 10 minutes. I made a simple white sauce with a small amount of butter and flour, and stirred in some lemon zest, lemon juice, and fresh basil. A little shell pasta, and a little leftover ham that needed using, and the whole thing came together in about 20 minutes. The pasta was topped with a heavy-handed dose of fresh, lucsiously nutty shredded parmesan cheese, and, you know? It felt like spring was actually here, for a moment...

March 17, 2007

Palle Makes Merguez

I'd been eyeing the recipe since I first unwrapped the book: Marcus Samuelsson's The Soul of a New Cuisine. The recipe? Merguez meatballs, which I've mentioned were on the hit-list before.

While the first dish to be made from the book was Chicken-Peanut Stew, I knew it wouldn't be too long before the meatballs would be on the table. What took me by surprise was the fact that I wasn't the one to make them. I bought the ingredients, and got started in the kitchen, but Palle came to help me out, and ended up doing all of the actual meatball creation and cooking, while I busied myself making rice and a somewhat less-spicy version of Spicy Carrot Coins. Why less spicy? Welll, because I wanted the spices in the merguez to shine through, and I didn't want too much cross-flavour contamination.

The meatballs were a resounding hit - the deliciousness of spiced lamb sausage, in super-easy meatball form...why hadn't I thought of this before? No fussing around with casings or extruding devices, just quick, simple and delicious. The recipe also made quite a lot of them. These are no demure soup-style meatballs, they're great, bloody golfballs, and densely meaty without any fillers. No problem, though - some were cooked up for dinner, some were frozen (raw) for a super-easy dinner at a later date, and some were flattened into thin patties for a home-version of that ever-so-famous english muffin based breakfast sandwich (more on that later).

At the end of the day, I'm glad that I scaled back on the heat of the carrot dish, because the merguez were not as spicy as I had anticipated. Neither were they quite as fiery-red as a merguez generally should be (in my mind, anyway). Simple enough to fix - next time I'll increase the harissa and the paprika, and both little quirks will be easily fixed.

I do wonder, though - plenty of the recipes in the book call for habanero peppers, without all the usual ensuing hand-wringing about how dangerous they are to work with. It made me think that the recipes wouldn't be dimmed-down for western palates, but now I'm not so sure. Certainly, the spicing seemed light when I examined the recipe, but I decided to go with the precise instructions. Merguez isn't usually the hottest sausage around, but I would like it to be a little bit peppier than our first go at this recipe. Next time...

October 25, 2006

Rainy day food

When the rain begins, and the weather starts to cool, my mind wanders inevitably to sausages. Particularly, I must confess, the wonderful specialty sausages from Oyama Sausage down at Granville Island Market. I never know exactly what they will have available, each day, although there are certainly some frequent flyers, but I know that there will be a variety of fresh and cured sausages that will include, but not be limited to chicken, pork, lamb, beef, and a variety of game meats. Perhaps my favourite is the venison and blueberry, although competition is steep, and the chourice sitting in my freezer right now is looking mighty attractive. They don't use fillers (unless, as with black pudding, it is an essential part of the recipe), and they don't use more fat than is needful. Every sausage that I have had from there has been outright delicious. Sausage need neither be unhealthful nor frightening in the making, famous sayings notwithstanding.

Bangers and mash, that great classic comfort foods of British cookery, is one of the most straight-forward way to enjoy a good sausage, and I certainly do. I also borrow scraps from other european cuisines, though. Sausage with lentils and red wine, as the Italians would do. Cassoulet, as the French are prone to just about get into fist-fights over. Grilled beside a heap of red cabbage and apples, and buttery egg noodles, which would go down well in Germany or Scandinavia.

These are just beginnings. The possibilities, when you are starting with a good sausage, are just about endless. Breakfast hashes, stuffed into a good bun for lunch, or cut into coins and tossed with pasta for dinner. Jambalaya. Paella. Assorted casseroles and composed dishes. Heck, a nice, plump pork sausage next to a big bowl of homemade baked beans would be just fine, thanks.

A bit of onion, a bit of mushroom, and, as above, you have the beginnings of a sausage and gravy dinner that can feature any side dishes you like: scalloped potatoes, steamed broccoli, giant pile of coleslaw... really, whatever is in the fridge will likely go well with sausage.

When the weather starts to cool and the days are starting to grey with rain, this is what I want on my plate.

There are warm-weather sausage dishes, too, of course

August 28, 2006

A Good Steak

A good steak can be hard to find but, fortunately, it's pretty easy to make. I marvel at minor-league steakhouses that charge an arm and a leg for something that usually requires pretty much minimal preparation - and then often manage to do it badly or at least indifferently. I know that best-quality meat can be expensive, of course, but for goodness sake, do it right!

I don't cook steak all that often, though. I don't have the attachment to it as special occasion food, as some folks seem to, and it is a bit pricey for good cuts. I have had excellent luck with rib steaks, (and I make a mean flank steak) but this time, I decided to try the good ol' dependable strip loin, simply because I had never cooked one before.

I selected a smallish steak - the smallest that I could find, actually - since I was cooking only for myself. In the store, it seemed petite to the point of being teensy, but it really would have been big enough for two people to share, if they weren't being too greedy. Sadly, I ate the entire thing myself, and I'm not sorry one bit.

I followed Alton Brown's instructions, which have never failed me on the rib eye, and which apparently work wonderfully with any tender steak. A quick pat of butter in the vacated pan, while the steak rested, a slosh of red wine from my glass, and a smattering of parsley made an impromptu pan sauce, reducing to a syrup consistency in the time it took for the steak to recover its composure.

I had a side dish of Thai red rice (not pictured, sorry) and a salad with fresh tomatoes and cucumbers, but almost any side dish at all would do just fine.