Showing posts with label Chinese. Show all posts

July 22, 2018

Black Pepper Tofu


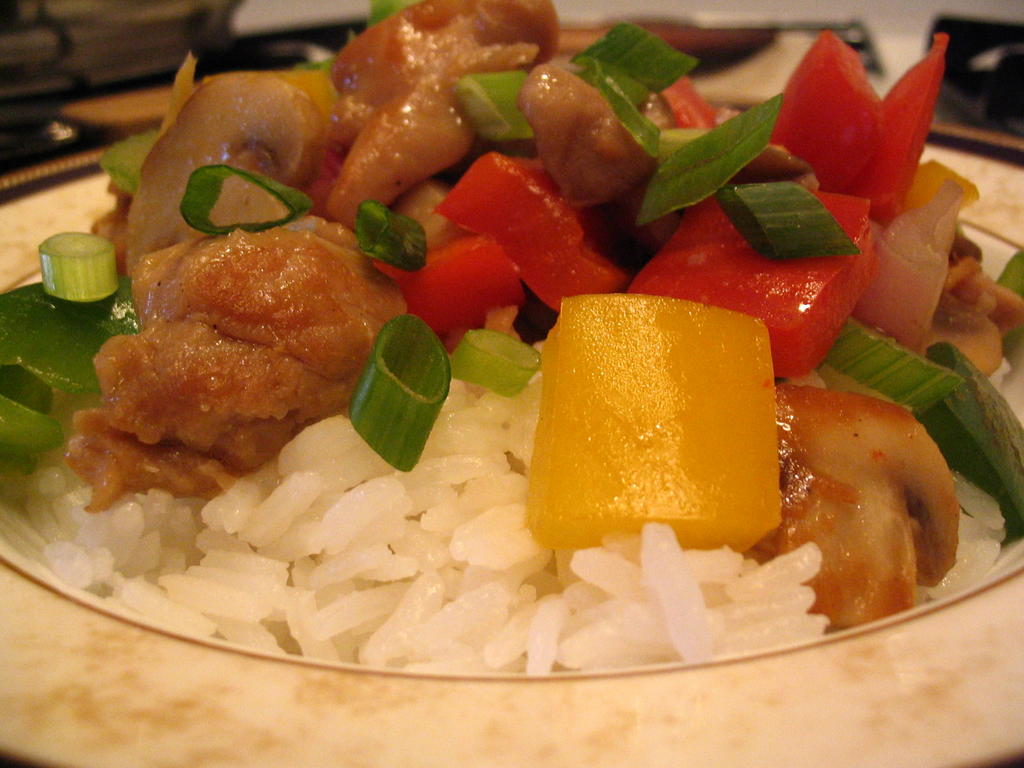
There are an awful lot of recipes out there for Black Pepper Tofu, it turns out. So why not one more? This version is adapted from a variety of internet sources, but primarily from Lazy Cat Kitchen. It is intense and delicious, with wonderful textures. Serve over rice or noodles, maybe with a nice bright green on the side (gai lan would be an excellent choice).

Black Pepper Tofu

Serves 4
Total Prep & Cooking Time: 45-60 minutes

For the fried tofu cubes
600 grams firm tofu, diced and pressed
2 tablespoons less-sodium soy sauce
Cornstarch, as needed for dusting
4 tablespoons peanut oil or canola oil, divided

Sauce & Assembly
1 tablespoon less-sodium soy sauce, plus extra to make 3 tablespoons (including the leftover from the tofu stage above)
1/2 tablespoon dark soy sauce
1 to 1 1/2 tablespoons unseasoned rice vinegar (depending how tart you want the sauce)
2 tablespoons honey (brown rice syrup or coconut sugar for vegan)
125 mL (1/2 cup) water
2 level teaspoons cornstarch
4 large garlic cloves, pressed or minced
1 thumb-sized piece of ginger, peeled and minced (about 2 tablespoons of minced ginger)
1-2 hot chili peppers, sliced thinly
4 small green onions, sliced thinly
1 rounded tablespoon ground black pepper
Sesame seeds, to garnish (optional)

The following instructions are for frying the tofu cubes, but you can bake them instead if you prefer.

Cut the tofu into large or medium dice – bite sized – and press between paper towels under a weighted cutting board for 15 minutes. Pour off and discard any liquid, and place tofu in a shallow bowl. Pour 2 tablespoons soy sauce over the tofu and very gently stir to coat. Drain the excess soy sauce and set aside to use in the sauce.

Heat 3 tablespoons of the oil in a skillet over medium-high heat. While the oil heats, quickly and carefully roll about a quarter of the tofu cubes in cornstarch, shaking off any excess. Place them in the hot oil, well spaced out, and fry gently, turning each piece with tongs as needed to get a crisp golden brown crust on all sides. As each piece is done, (they basically finish in the order they were placed in the pan, remove it to a paper towel-lined plate. Repeat (in the same oil) with the remaining tofu cubes, in batches, until they are all done. Remove the pan from the heat, pour off any remaining oil, and wipe the pan clean (carefully, because it’s hot) with a paper towel. Put the pan aside while you prepare the other ingredients.

If you are using whole peppercorns, grind them now (grinder or mortar and pestle), because it takes too long to get the amount you need at the point where you need to add it. Put the tablespoon of ground black pepper in a small dish and set aside.

Mix in a separate bowl or 500ml/2 cup measuring cup: soy sauce, dark soy sauce, rice vinegar, honey, and 125 mL (½ cup) of cool or room temperature water. Add the 2 teaspoons of cornstarch and stir until smooth. Prepare, in separate piles on your cutting board, the garlic, ginger, chilies, spring onions, and black pepper, and have them ready to go.

Return your skillet to medium-high heat, and add a tablespoon of oil along with the white parts of the spring onions, the ginger, and sliced chilies. Lower the heat to medium and fry for 2-3 minutes, until slightly softened. Add the garlic and stir through for about 20 seconds.

Carefully stir the sauce bowl, because the cornstarch will drop to the bottom and you want it integrated. Once it is smooth, add the cornstarch slurry to the the vegetables in the skillet, and let it come to a gentle boil, stirring constantly. A flat-bottomed wooden spoon or wok tool is really good for this It will thicken almost immediately. Add the black pepper and then the fried tofu cubes and stir them through until the tofu cubes are coated in the sauce. Add the green parts of the spring onion and stir through quickly to integrate. Serve over rice or noodles, garnishing with sesame seeds if you like.

July 15, 2018

Mapo Nasu


I'm a big fan of Mapo Tofu, a Sichuan dish that integrates small cubes of tofu into a spicy (think Sichuan peppercorn) flavourful minced pork sauce (or, if you want to get old-school, integrates spicy pork sauce into cubes of tofu) and served atop rice. Whether you lean more heavily to the meat-side or the tofu-side, it's a delicious meal. But wait! There's more.

While classic Chinese Mapo Tofu is very popular in Japan, Mapo Nasu is a localization that substitutes the tofu with eggplant. As with the original, there are a lot of versions vying for position as the ur-recipe, but that just means you can be very flexible in your approach.

I recommend long, narrow East Asian type eggplants, here, rather than the Mediterranean type, as they are generally less seedy and less bitter. The ones I used here were super skinny Japanese eggplants, the diameter of bratwurst, but wider ones work just fine (and are a bit less fragile). You can choose to sauté the eggplant strips in hot oil instead of broiling them, if you prefer, but they do tend to fall apart a bit more that way.

Mapo Nasu

Serves 2-3

Total prep and cooking time: 20 - 30 minutes

1/2 lb. lean ground pork or beef
2 tablespoons dry sherry or vermouth
1 teaspoon cornstarch
1/2 medium yellow onion, finely chopped
300 grams Japanese eggplant
1 teaspoon toasted sesame oil

Sauce ingredients
1 tablespoon fermented chile bean paste
1/2 teaspoon cayenne pepper or to taste (optional)
2 tablespoons less-sodium soy sauce
3 cloves of garlic, crushed
1 teaspoon minced fresh ginger
1/2 teaspoon white pepper OR ground Sichuan pepper
1/2 cup chicken broth
1 tablespoon cornstarch diluted in 1/4 cup water

If you're serving this over rice, get it started first, as it can wait patiently if need be. Preheat the broiler with a rack set 15cm/6inches from the burner.

Combine the meat, sherry, 1 teaspoon of cornstarch, and set aside. In a small bowl, combine sauce ingredients up to the white pepper and set aside.

Slice the leafy ends off the eggplant(s) and quarter the eggplant lengthwise. Slice the long spears of eggplant into finger-lengths, and brush with sesame oil. Place skin-side-down in a single layer on a baking sheet and broil for 7 - 10 minutes or until slightly browned and blistered. Remove from oven and keep to one side.

In a large skillet, over medium heat, cook the meat until evenly browned, breaking up any large clumps. Add the onion and cook until the onion turns translucent. Stir in the spicy sauce mixture until the meat is evenly coated. Add the eggplant and stir gently (you don't want to mash the tender pieces). Pour in the chicken broth and bring to a boil. Stir in the dissolved cornstarch and cook, stirring constantly but gently, for a couple of minutes until the sauce has thickened.

Serve over steamed rice with a green vegetable. May I suggest Kale Gomaae?

August 20, 2017

Hainanese Chicken Rice


One of the quintessential dishes of Singaporean cuisine, Hainanese Chicken Rice is a bone-deep satisfying meal dished up everywhere from Hawker’s Markets to fancy restaurants. It is an excellent example of how ingredient repetition need not render a meal boring or feel repetitive - the ginger, sesame oil, and garlic are powerful flavours, but come across differently in each item on the finished plate.

This recipe serves 2-4 people (or more, if you double the rice), but in our house it is the start of a multi-meal whose leftovers evolve into two more dishes over the following days (see Multi-meal, at the bottom of this post).

Hainanese Chicken Rice

Adapted from Steamy Kitchen

Chicken
1 whole chicken (about 1.5 kg)
Fresh cool water to cover the chicken
2 teaspoons kosher salt plus extra for exfoliation (as described below)
5 cm chunk of fresh ginger, peeled and sliced
2 stalks green onions, cut into two-inch lengths
Basin of ice water
1 teaspoon toasted sesame oil (for after the chicken is cooked)

Rice
15 mL (1 tablespoon) chicken fat or canola oil
1 large clove garlic, minced or crushed
15 mL (1 tablespoon) minced fresh ginger
200 grams (1 cup) raw basmati rice, washed until the water runs clear
310 mL (1 1/4 cups) reserved chicken poaching broth
1/2 teaspoon toasted sesame oil
1 pinch kosher salt

Chile Sauce
15 mL (1 tablespoon) fresh lime juice
30 mL (2 tablespoons) reserved chicken poaching broth
10 mL (2 teaspoons) sugar
60 mL (4 tablespoons) Sriracha sauce
4 cloves garlic
30 mL (2 tablespoons) minced fresh ginger
a pinch of salt, to taste

To serve
Dark soy sauce (in a dish, or just the bottle)
Green onion, finely sliced on the bias
Cucumber, thinly sliced

First, you must exfoliate the chicken. Rinse the chicken inside and out and place on a clean plate. Use a small handful of kosher or pickling salt to gently massage the chicken all over, being careful not to tear the skin if possible. Rinse the salt away and stuff the chicken with the ginger slices and green onion pieces. Place the chicken in a large stockpot and add fresh cold water to cover (it’s okay if it doesn’t quite cover - the breast will still cook if it sticks up above the water level). Add salt. Cover and bring the pot just barely to a boil over high heat, then immediately turn the heat to low to keep a bare simmer, checking from time to time. Simmer for about 40 minutes (less for smaller chickens).

While the chicken simmers, get your mise en place in order for the chile sauce and the rice. That means, mince the ginger for both the rice and the sauce, peel the garlic and set aside, and wash, wash, wash the rice in cool water until it runs clear. Set the rice aside in a strainer to drain. You can put the sauce ingredients all (except for the broth) into a blender cup now, if you like.

Once the chicken is cooked through, turn off the heat and remove the pot from the burner. Carefully lift the chicken from the broth (I lift it by inserting a wooden spoon into the centre and tilting it up so that the juices run out of the cavity) and into a basin of ice water to cool. You will need the broth for the rice, sauce, and side bowl of soup. I like to have my basin in the sink, so that I can and add more fresh cold water over the chicken to help the skin achieve the firm, springy texture associated with this dish, and I like to change the cold water once as it rests. Let the chicken rest in the cold water while you start cooking the rice. Remove any aromatics (ginger, green onion) from the broth, and return the pot of broth to the stove to stay warm over low heat.

Rice: You rice should by now have been rinsed and drained and is resting nearby in a sieve. Heat the chicken fat or canola oil over medium-high heat in a medium saucepan. Add the ginger and the garlic and pinch of salt, and stir fry until fragrant but not coloured. Add the sesame oil and then drained rice and stir to coat each grain with the fat and seasonings.

If you’re cooking the rice on the stovetop, add the 310 mL of hot poaching broth to the rice and stir it through. Turn the heat to the lowest setting, and cover the pan with a tight fitting lid. Set the timer for 15 minutes, and when it rings remove the rice pot from the hot burner and, without lifting the lid, set it aside to rest somewhere for another 15 minutes. Fluff, and it's ready to serve.

If you’re cooking the rice in a rice cooker, use a spatula to scrape the rice/fat/seasoning mixture into the rice cooker, add the poaching broth, and then turn it on according to your rice cooker’s instructions.

While the rice is cooking, remove the chicken from its ice bath and pat dry with paper towels. Using your impeccably clean fingers, rub the outside of the chicken with the sesame oil, and let it stand until needed. Just before the rice is finished resting, carve the chicken for serving and arrange on plates, and then add the rice once it's ready. For a nice tidy dome of rice, pack it lightly into a measuring cup and overturn onto the plate. I find a 3/4-cup measure works perfectly, yielding 4 portions of rice from 200 grams (1 cup) of raw rice.

Chile Sauce: combine all chile sauce ingredients in a blender cup and process until smooth. Stick blenders work very well for this. The first time I made this, I didn’t have access to any mechanical means to puree it, so I simply finely chopped everything by hand. That also worked very nicely, but it was of course not a smooth sauce.

Soup: You should have several cups of the chicken-poaching broth available. Ladle into small bowls and garnish with some finely sliced green onion.

Serve the chicken and rice with cucumber slices, and a bowl of the soup on the side. Place the chile sauce and some dark soy sauce on the table for individuals to use at will.


Multi-meal

I mentioned at the start of this post that this is a multi-meal dish for our household of two (your mileage may vary, depending on your family size - for bigger families, you would want to have doubled the rice recipe above). This is what I do:

Finally, after you’ve eaten and had a little rest, strip the remaining chicken meat from the bones, and put in a container in the fridge. As for the bones, you can either discard them, or add them back into the soup pot and simmer them for another hour or so for a much stronger broth. Cool and strain the broth, and transfer to fridge/freezer friendly containers. Cool and refrigerate any leftover rice.

The next day, leftover rice and about half of the leftover chicken meat are converted into fried rice (this is an especially good use for any leftover skin!) with the addition of a little extra onion, ginger, garlic, beaten egg, low-sodium soy sauce, any any other vegetables you’ve got kicking around. (For fried rice technique, please see my post on fried rice, and adapt as necessary.) Serve with leftover chile sauce, if you have any.

The following day, the leftover broth (or some of it) is used to make congee, by adding some water, washed raw rice, and the remaining chicken meat (added at the very end). Serve with leftover chile sauce, if you have any.

Alternatively, you could stash all of the broth in the freezer and use that instead of water for the next time you want to make Hainanese Chicken Rice. Because, there will be a next time. If you have lots of broth, you can split the difference.

Three delicious meals from one master-meal.

March 04, 2017

Zhajiangmian: Beijing-style "Fried Sauce Noodles"


This is a delicious and simple dish (炸酱面, zhá jiàng miàn) that appears in a variety of styles within China, as well many iterations and similar dishes in other parts of Asia, from the almost black Jajangmyeon in Korea to the dry-style ramen dish Ja Ja Men in Japan.

It's easy to make if you have a well-stocked Asian pantry, and it's good enough to warrant picking up any ingredients you might not already have on hand. I like spicy food, so I've added a bit of heat that may or may not appear in restaurant versions (some will serve it either way, and some will simply bring you a jar of chile oil if you ask). The amount of umami in this is ridiculous.

The uncooked vegetable garnishes are an important part of this dish, bringing a fresh crunch and brightness to the dark heat and intensity of the sauce. The use of dark soy sauce instead of regular brings depth to the colour of the fried sauce.

This serves two generously.

Zhajiangmian

Lightly adapted from The Woks of Life

Serves 2

175 grams thick wheat-based dry noodles

250 grams ground pork
1/8 teaspoon salt
1 teaspoon cornstarch
1/2 teaspoon peanut oil, plus 1 tablespoon
1/8 teaspoon white pepper

3 slices ginger, minced finely
4 cloves garlic, pressed or finely grated
6 fresh mushrooms (shiitake, if available), finely chopped
1 tablespoon Hoisin sauce
2 tablespoon chile bean paste
2 tablespoons yellow soybean paste
1/2 tablespoon sambal oelek or 1/2 - 1 teaspoon chile oil
1 tablespoon dark soy sauce
1 cup water

Garnish
1/2 cup julienned carrots
1/2 cup julienned cucumbers
1/2 cup julienned scallions

In a mixing bowl, combine the ground pork, salt, cornstarch, 1/2 teaspoon peanut oil, and white pepper, and stir well until completely integrated. Set aside.

Prepare the mushrooms, ginger, and garlic. In a small bowl, combine the Hoisin sauce, chile bean paste, yellow soybean paste, sambal (or chile oil), and dark soy sauce, and mix well.

Set a large pot of water on to boil for the noodles. Meanwhile, heat the remaining tablespoon of oil in a medium or large skillet, and add the meat mixture. Fry and stir, breaking up the meat with a spatula, until the meat is well browned, and then add the chopped mushrooms. Continue to fry over medium high heat, adding a tablespoon of water if necessary to prevent sticking or burning. When the mushrooms have softened and shrunk a bit in size, add the sauce mixture and stir through until the pork is thoroughly coated. Add the water, stirring it in slowly, and simmer gently until the sauce is thick. While it simmers and the noodles are cooking, prepare the fresh vegetables - julienne the carrots, cucumber, and scallions.

When the noodles are cooked, drain them divide between two bowls. Spoon the meat mixture over the noodles, and garnish with the julienned fresh vegetables.

February 04, 2017

Rice Noodle Rolls: Chee Cheong Fun (and two pan-fried variations)


If you have access to a good Asian grocery store, you might never need to make the noodles from scratch although it's not at all difficult - merely time consuming. Just buy a nice fresh package and proceed below to the serving suggestions. But if, for example, you live in a small European city that doesn't seem to have really figured out yet that Asian cuisines are in fact plural, I hope that you will find this useful.

The time consuming aspect of this recipe lies in the fact that the noodles can only be cooked one at a time, and this makes 13-14 noodle sheets (at least, using the size of pans I have), each of which take 6 - 7 minutes to steam. If you have a better steaming rig than I do, one with stackable layers, you might be able to reduce the time by quite a bit.

Fortunately, you can make these a day or two ahead of when you want to serve them, and just keep them in a tightly sealed container in the fridge.

Chee Cheong Fun (Chinese Rice Noodle Rolls)

175 grams pyramid dumpling rice flour blend (or 150 grams rice flour plus 25 grams tapioca flour)
2 tablespoons cornstarch
200 mL cold water
300 mL hot water (from a recently boiled kettle)
1/2 teaspoon coarse salt
1 tablespoon canola oil

Combine the flour(s) and cornstarch with the salt, and whisk in the cold water. When there are no more lumps, add the hot water, and whisk well, until thoroughly integrated. The batter will look way too thin and watery, but it’s fine. Add the oil and whisk again.

Let the batter rest for 20 to 30 minutes.

Set up your steamer, and two or three trays that you can use to shape the noodle sheets. I use foil trays, the same kind used for baking or take-out containers. Make sure the trays can lie flat in the steamer, so your noodles are even. Lightly oil the trays, using a pastry brush or similar. Prepare a cold water bath - something large enough to put your steaming trays in, such as a baking dish or larger aluminum pan. Prepare a plate for the finished rolls, by brushing it very, very lightly with oil.

Place the first tray in the steamer (with steam already rising) and (after stirring the batter well) add a very thin layer of batter to the tray. Make sure the bottom of the tray is just barely covered. Cover, and steam for 6 - 7 minutes, or until it looks set. Remove tray from steamer and place it in the cold water bath. Place the next tray in the steamer, and repeat, being sure to stir the batter vigorously before ladling into the tray (it will separate, otherwise).

Let the tray with the cooked noodle rest in the water bath for a minute or two, and then lift it out and use a spatula to free the sides and slowly, with the pan tilted toward you, use the spatula to peel the noodle sheet down from the top, bit by bit, causing it to roll into a tight cylinder. Remove the noodle roll to your resting plate. Brush lightly with oil, especially if you will not be using the rolls until later.

Repeat until all of the batter is used up. How many noodle rolls you get depends very much on how big your trays are, and how thick your noodles. Once they are at room temperature, you can refrigerate them to use later, or even the next day.

As you can imagine, at about seven minutes per noodle, it takes a while to cook all of the batter. Using trays that measure approximately 16x10 centimetres, I got 13 or 14 rolls, and it took over an hour and a half to complete the steaming, because I could only steam one tray at a time. If you have a multi-tiered steaming rig and can handle more trays at a time, that will speed up the process a lot.

Pan fried rice noodle rolls with XO sauce

In a large skillet, heat a tablespoon of peanut oil until very hot. While the oil is heating, slice the rice rolls into smaller pieces - from the 10 centimetre rolls I made, I cut the rolls into thirds, but you could also do halves or quarters. I cut them on an angle, to make them look pretty.

The amount of sauce here is for 7 noodle rolls (half a batch), so double it if you're going to fry up the whole amount.

Lay the noodle rolls pieces in the hot skillet, and let them sear lightly. Use a spatula or tongs to flip them over to get both sides. If you are frying all the noodles, maybe go through the searing stage in two batches, so to not overcrowd the pan and remove the finished ones to a holding plate while you fry the second batch.

It only takes a couple of minutes to sear the noodle rolls on each side. Use that time to slice some red chiles and green onion, and to make the finishing sauce:

1 teaspoon dark soy sauce
2 tablespoons less-sodium soy sauce
1/8 teaspoon sugar
1/2 teaspoon toasted sesame oil
1 clove garlic, pressed

When the noodle pieces have seared on both sides, add of the seared noodles back into the pan just before you add the sauce. Add the finishing sauce and the red chile slices, and gently stir and fry until the noodles have a glossy brown coat. Plate the noodles, and top with green onions and a nice spoonful of XO sauce. Serve immediately.

Pan fried rice noodle rolls with prawns and snow peas

To make a meal of it, simply add some prawns and snow peas. You can sear them either before or after searing the noodle rolls, making use of a holding plate, and then just add it all together into the skillet (or wok!) before you add the sauce.

Proceed as above. Serves 2.

January 07, 2017

Turkey Congee


Congee (also called jook in Cantonese, amongst many other names worldwide) is a rice porridge popular throughout Asia, and there are many different ways to have it. At its most basic, it is a blank canvas for your favourite flavours, whether you need it to be soothing and restorative, or something a little more lively. It is almost infinitely customizable to what you already might have available in your kitchen. It can be meat-based, or vegetarian, or vegan. Congee isn't always made from rice (millet, mung beans, barley, and sorghum are some of the other variations), but rice is by far and away the most common version. It is a popular any time of day - from breakfast to late night, post-pub snack. Every time I make congee, I remember how much I love it, and vow on the spot to make it more often.

This version came from my desire to make something with the strong turkey stock that I made from the bones of our Christmas turkey. Since I'm generally pretty well stocked for Asian condiments and garnish-ingredients, I was able to make this with what was on hand.

It does take a while to cook, but it's fairly low effort, even so: stir it every so often, and it takes care of itself.

Turkey Congee

Serves 2

100 grams (about 1/2 cup) long or short grain rice
1 litre (4 cups) water
250 mL (1 cup) strong turkey stock
1/2 - 3/4 teaspoon coarse salt
1 cup diced or shredded cooked turkey meat

Garnishes

1 clove of fresh garlic, finely slivered
1 inch fresh ginger, finely slivered
1/4 cup thinly sliced green onion
cilantro leaves
slices of red chile pepper
a few drops of sesame oil

You can garnish lightly or heavily, depending on what you have on hand:

Other typical congee garnishes might include:

Youtiao (Chinese doughnut/cruller)
hot chile oil
soy sauce (not too much, or it will overwhelm)
peanuts
pork floss
fried shallots/shallot oil
preserved duck egg
lettuce (stirred in at the end)
sliced mushrooms
preserved greens
...and many more (and that's not even counting featured ingredients, such as the turkey in this version.

Wash your rice well in cool water. Meanwhile, bring the litre of water listed in the recipe to a boil in a medium-large soup pot, and once it is boiling, add the stock and the rice. Reduce the heat to medium-low until the mixture is bubbling enthusiastically, but not at a rolling boil, cock a lid half-on the pot (to let steam escape, and set the timer for 20 minutes. Feel free to stir occasionally.

When the timer goes, give everything a good stir, making sure there's nothing stuck to the bottom of the pan. I like a wooden spoon for this. Taste the broth, and add the salt. Start with 1/2 teaspoon (especially if you are using a salty, commercial turkey stock, or will be adding soy sauce later), and add more later if needed. Stir well and leave it to cook, uncovered, this time, stirring occasionally, for another 20 minutes on the timer.

When the second timer goes, check on it again. It should be much thicker (and more likely to start sticking to the bottom of the pot), but still not completely at congee-texture. These things take time. Stir it really well, and put the timer on for another 20 minutes, uncovered. At this time, you can chop or shred the turkey meat and have it standing by, and you can start to prepare the other garnishes.

When the timer goes for the third time, add the turkey meat to the congee, and marvel at how much thicker it has gotten. If it is too thick, feel free to add a half-cup of water (or more, but add only a little at a time) until it reach the consistency you like. Let the mixture cook, stirring frequently for 15 - 20 minutes, and then ladle into bowls. Top with the garnishes of your choice, and devour.

The below picture shows the finished congee, just before the garnishes are added. You can see a little of the turkey peeking through, but you can also see how thick the porridge itself is.

January 11, 2015

My Mom's Chinese Beef & Greens


My mother used to make a version of this quite regularly, served over brown rice as was the custom of our household. I don't know where she got the original recipe, or what modifications she might have made to it. As both her knowledge of and exposure to Asian cooking of any kind was severely limited during the time we kids were growing up, and the availability of such ingredients in our small town was quite restricted, her version did not contain either sambal, fermented black beans, or even fresh ginger, and it was thickened with flour rather than cornstarch or tapioca flour (my version still is). It still tasted wonderful, and was a family favourite.

As I began to make the dish for myself as an adult, I gradually added the black beans, sesame oil, and exchanged some of the ground ginger for freshly grated ginger root. Plain button mushrooms were switched for shiitake, straw, or shimeji/beech mushrooms (although I'll still use buttons if that's what is available to me).

Normally there's about twice the amount of bok choi that you can see in the picture - it turns out that I had less on hand than I realized when I went to make the dish. It was still excellent, but had slightly less greens than usual. The baby corn is the most recent addition to recipe, and it's an absolute keeper. This recipe continues to be requested on a regular basis in our household.

Mom’s Chinese Beef & Greens

Serves 4-6 (over rice)

500 grams extra lean ground beef
1 large onion, halved and sliced, pole-to-pole
3-5 cloves of garlic, sliced or pressed
200 grams mushrooms, sliced or quartered if necessary
1 large head of bok choi, washed & sliced or 4 heads of mini bok choi
1-2 carrots, peeled & sliced into coins
200 grams fresh baby corn, sliced once each horizontally and vertically (optional)
1 thumbs-length of fresh gingerroot, sliced, minced, or grated
1/2 teaspoon dried, ground ginger
1/2 teaspoon ground white pepper
2-3 tablespoons soy sauce (preferably a less sodium type)
1 tablespoon black bean sauce or Chinese fermented black beans, rinsed and mashed
1 teaspoon sambal oelek or other chile paste or chile oil
1 cup stock – beef, chicken, bouillon cube – whatever you’ve got
1 large tablespoon of flour
1/2 cup of cold water
1/2 teaspoon toasted pure sesame oil

In a large, heavy-bottomed skillet or cast-iron pan, over high heat, brown the beef until any liquid has boiled off and the meat is frying gently. If you are not using extra lean ground beef, you may wish to drain any excess fat.

Add the chopped onions, garlic, ginger root, baby corn, and carrots, and stir well until the onions are translucent. Add the mushrooms, white pepper, ground ginger, black beans (or black bean sauce) sambal oelek and soy sauce. Stir well. Add a smidge of water if it’s starting to stick on the bottom, and/or lower the heat a little.

Let the mixture fry a little until the mushrooms start to get tender, and then add the stock or broth. Stir well, scraping the bottom of the pan so that nothing burns on. Bring to a gentle boil. Mix the cold water and flour together with a whisk, or shake together in a plastic lidded container until smooth. Pour into the meat mixture, stirring constantly, and bring back to a boil to thicken the gravy. If it gets too thick, you may need to add a little more water or stock. Reduce the heat and let simmer until the vegetables are tender.

Taste the gravy and adjust the seasoning to taste.

Slice the bok choi is sliced into large, bite-sized pieces (they will shrink a bit as they cook). Pile the bok choi on top of the meat mixture – don’t stir it in – and cover with a lid. Cook over medium-low heat for about five minutes, or until the greens wilt and decrease in volume. Then, stir carefully into the beef mixture underneath. Add sesame oil and stir through.

Taste to adjust seasoning, then serve over rice. My family liked to add a final drizzle of soy sauce at the table.

If you have leftovers, they can easily be reheated in the microwave or the stovetop, but my mother's usual approach was to combine the rice and beef mixture thoroughly, and then reheat it in the oven, covered, in a casserole dish (with maybe a tiny sprinkle of extra water to keep it from drying out. We liked it just as much on the second day as the first, even though we referred to it as "horse mash" because my sister thought the combined dish looked much like the cooked porridge that was fed to horses recovering from strangles (equine distemper), in the stables where she worked.

January 04, 2015

Cong You Bing: Chinese Scallion Pancakes (with bonus Scallion Pancake Duck Tostadas)


I learned about these lovely Chinese flatbreads while walking hurriedly through Vancouver's Chinatown, some years ago. The image of them being rolled out and fried, seen through a take-out restaurant window, stuck with me for quite a while and I regretted not stopping to try them. I eventually had to get some, of course, and became an immediate fan -- they were everything I wanted them to be: crisp, flaky, with a shimmer of sesame flavour and that satisfying mild green onion bite.

Here in my current location, a small city in Germany, good Chinese food is hard to come by. So, when the craving hit, I decided to learn how to make my own.

The first recipe I tried was for smaller, cocktail-sized ones, but had a dodgy methodology. They were tasty, but oddly fiddly and got oil everywhere. I ultimately decided to simply apply the proper technique for making the large ones, despite it meaning more work for me in terms of rolling, seasoning, coiling, and rolling again. While it did take a bit longer, the results were much better.

I'm sure that every fan of duck, and/or Chinese cuisines, is familiar with Peking Duck with Mandarin Pancakes. The pancakes in that case are soft crêpes, and comprise one of the traditional Peking duck courses. I enjoy them, but the overall dish is very soft, and often a little sweet for my taste. Instead, I imagined a version of Mexican Tostadas, but with duck and Chinese flavours, using the crispy, savoury, cocktail-sized Cong You Bing as a base. For the duck, I had leftover roasted duck meat, which we shredded and reheated - tossed with a combination of Hoisin sauce, sesame oil, golden mushroom sauce (you could use Oyster sauce instead) with a delicate hint of Sriracha (I would have preferred a Chinese-style chile oil, but had none to hand).

Top the freshly fried Cong You Bing with a little of the shredded duck, top with a bit more sliced scallion, and presto! Scallion Pancake Duck Tostadas. They were delicious, and they turned out exactly as I had pictured them (see photo below).

Cong You Bing

(Chinese Scallion Pancakes)

Makes: 2 large or 8 cocktail-sized pancakes

1 cup all-purpose flour (plus extra for rolling)
1/3 cup hot water

1-2 finely sliced scallions
1 tablespoon toasted sesame oil
coarse sea (or kosher) salt
1 tablespoon toasted sesame seeds

2 tablespoons peanut oil (for frying)

In a mixing bowl, add the hot water to the flour all at once, and stir rapidly with a wooden spoon until it turns into a soft, pliable dough (add more flour if necessary). Turn out onto a floured board/counter, and knead for about 10 minutes until smooth and silky feeling. Place it back in the (now cleaned and lightly oiled) bowl, and cover with a towel or plastic wrap and let it rest for half an hour. It will not rise - there's no yeast - but it does need to fully hydrate the flour.

When the dough has rested, turn it out onto a floured work surface, and divide into either two or eight. The instructions after that are the same for either size. Yes, of course you could do four. Divide the dough as you will.

Shape the dough pieces into disks. Working with one at a time, roll a disk out as thin as you can. Roll it up into a tube, as though for a jelly roll or cinnamon buns, and coil the tube into a tight spiral, tucking the end under. Mash it flat with your hand, and then roll out very thinly again. Brush a little sesame oil over the rolled out surface, sprinkle with a bit of salt and a few sesame seeds, and scatter scallions over the surface. Roll up into a long tube again, coil it tightly again, tucking the end under, mash it with your hand again, and then roll out gently until it is a pancake thickness (about half the diameter of the thinly rolled dough you started with). For the smaller sized ones, that's about palm-of-my-hand sized. Do not worry if some of the green onions poke through - they totally will and that's okay. Transfer to a side board, and repeat until you have completed each pancake.

Technically, the first "empty" roll-out is not entirely necessary, but it does add a bit of flakiness to the final flatbread. If you're impatient, or pressed for time, you can skip that one, and go straight to filling them.

Heat the peanut oil in a large skillet until shimmering. Add one, or up to four small, pancake(s) and fry, turning frequently, until golden and crisp on each side. Remove to a paper towel to drain, and repeat until finished. For the larger ones, slice them into quarters to serve.

Serve with a soy-based dipping sauce (example below) or use as delicious tostadas.


Dipping sauce

2 tablespoons low-sodium soy sauce
1 tablespoon rice vinegar
1/2 teaspoon toasted sesame oil
1 small clove garlic, pressed
pinch freshly grated ginger
1 large pinch chile flakes (or cracked Szechwan peppercorns)
small pinch ground white pepper

Or any favourite Chinese dipping sauce you like.


Enjoy!

May 24, 2014

Almond Chile Chicken


I almost called this "Not-Quite Kung Pao Chicken" as the primary difference is the use of almond slivers instead of crushed or whole peanuts. However, it turned out much too tasty to burden with a name that suggested it was not living up to its full potential. Another significant difference is the absence of Szechuan pepper, although it would be a great addition. This recipe makes no claim to authenticity, but it is delicious. With three sources of chile, it's also very hot.

It's helpful to allow the chicken to marinate for a little while, at the very least while you prepare the peppers and toast the almonds, but ideally at least for half an hour. You can easily add in another vegetable for an all-in-one dish green bell pepper, for example, or diced baby corn, or even finely chopped celery (to stay true to its Kung Pao roots), but don't crowd the chicken with a lot of other things. Maybe serve a simply steamed gai lan with a shot of oyster sauce, or sautéed baby bok choi with a nice dressing on the side. Serve the chicken over rice.

Almond Chile Chicken

4 Servings

400 grams boneless chicken (breast or thigh)
1/3 cup slivered almonds, toasted
1/2 small red onion, thinly sliced
handful of dried red chile pods
3 — 4 fresh red chiles (long, preferably)
3 cloves fresh garlic, minced
1 tablespoon peanut oil

Marinade and cooking sauce
2 tablespoons Chinese mushroom sauce (or oyster sauce)
2 tablespoons low-sodium soy sauce
1 teaspoon honey
1 tablespoon Sriracha sauce
1 tablespoon dry sherry (or Chinese wine)
1 teaspoon rice wine vinegar (or black vinegar)
1/2 teaspoon cornstarch

Garnish
green onion, thinly sliced
cilantro, stems removed

Combine the marinade ingredients in a large bowl, and stir until thoroughly combined. Cut the chicken into bit-sized pieces, and add it to the marinade, stirring well until the chicken is completely coated in sauce. Cover and let rest in the fridge for a few hours (if possible).

Thinly slice the red onion and mince the garlic, and set aside. Toast the almonds gently in a dry skillet until they are fragrant and golden brown, and set aside. Remove and discard the seeds from the fresh chiles and julienne the pods into nice, long matchsticks. Prepare the dry chile pods by removing the stem end, shaking out excess seeds, and breaking longer pods in half (or thirds).

Prepare any additional vegetables (either for this dish, or for a separate side), and slice the green onion and roughly chop the cilantro for your garnishes.

Have a half-cup or so of room temperature (or hot) water standing by once you're ready to fry.

Heat a large nonstick skillet (or wok, if you're set up for it) over high heat, and add the peanut oil. Using a slotted spoon or spider-tool, remove the chicken from the marinade (reserving the marinade to add later). Add the chicken in a couple of batches to the hot peanut oil, and let the pieces sear for a moment before giving it a quick stir. Add the red onion and stir through, and continue to sauté for another minute. Add the fresh chiles and the dry chile pods, and stir again. If you're adding diced baby corn, now is the time to add it, otherwise add any quicker-cooking items along with the marinade in a couple of minutes.

If the chicken starts to stick, or the marinade starts to burn, add a tablespoon of your stand-by water to loosen it up. Don't add too much water, or you'll be steaming your dish instead of frying it. You can get around this by simply using more peanut oil than indicated, but that makes for a much richer dish. Continue to sauté for another minute or so, and then add the reserved marinade along with another splash (ahem, tablespoon) of water, and stir rapidly to allow the sauce to cook through thoroughly and coat the chicken once more. Give it another couple of minutes sauté time, and add the almonds. Stir though, adding another tablespoon of water if it seems too dry, although you probably won't need to. Plate immediately, and garnish with the green onion and cilantro.

April 13, 2014

Duck Noodles


Duck Noodles are delicious. But you can already tell that, just from the name: Duck Noodles.

This is partly a recipe and partly a serving suggestion. You probably already know how to stir fry some vegetables and noodles, and your selection of both might vary from mine (although I must put in a vote for both baby corn - fresh, if you can get it - and snow peas, which go so beautifully with the duck). But, at the end of the day, make the noodles how you like best, and top them with this tasty, tasty duck.

Pan Seared Duck Breast for Duck Noodles

Serves 2

350 grams duck breast (skin on)
3 tablespoons reduced sodium soy sauce
1 tablespoon dark soy sauce
1 teaspoon sesame oil
1 teaspoon chile oil (optional)
1 teaspoon honey
1 tablespoon finely grated ginger (grating from frozen is easiest)
1 clove of garlic, sliced
2 star anise stars

Combine everything but the duck into a small dish (just large enough to fit the liquid and the duck breast (which will go in later), and stir well to combine, making sure that the honey is all dissolved.

Trim any straggly bits from the duck breast (if necessary) and, using a very sharp knife, cross-hatch the skin (that is, make long, shallow cuts diagonally along the whole length of the skin, and the turn the knife approximately 90 degrees and repeat, so that you end up with diamond-shapes over the whole surface). The closer the cuts are to each other, the better the fat will render during the cooking phase. Be sure when you are cutting to cut only through the skin and fat, and not into the duck meat itself, or the meat may dry out a little as it cooks. It is easiest to do when the duck is very cold, because the fat stays firm as you cut. When the whole surface of the skin has been cross-hatched, place the duck skin-side up in the marinade, and let sit for about 4 - 6 hours. Ideally, the liquid will not cover the skin, but don't worry if it does.

When you are ready to start cooking, prepare all of your mise en place for the noodles and vegetables, so that they are ready to go. Preheat your oven to 400 F, and preheat a steel or cast iron skillet until very hot.

Remove the duck from the marinade, and pat dry, especially the skin. Sprinkle the skin with a little coarse salt, and place skin-side down in the dry, very hot pan. Immediately turn the heat down to medium, and do not touch the duck again for at least five minutes.

If the skin is now golden brown and crispy all the way through (the edges may get a bit darker, especially if they got marinade on them), remove it from the pan. If the skin is not yet ready, wait another minute or two, peeking as necessary. Drain the excess fat from the skillet (reserve it for other cooking purposes) and return the duck breast to the pan, skin-side-up. Place it in the preheated oven and roast until the desired doneness - 10 minutes for very rare, 15 for rosy medium-rare (preferred). Remove from the oven, and transfer the duck to a cutting board to rest before you slice it.

While the duck is in the oven, and then resting, finish preparing your stir fry with the vegetables and the noodles. A spoonful of the reserved duck fat in the stir fry accentuates the duck flavour in the final dish. You can also use some of the marinade from the duck in the stir fry, but be sure to remove the star anise.

Arrange the finished noodles and vegetables on a large serving platter (or bowl), and then thinly slice the duck breast and lay it across the top. Garnish with thinly sliced green onion and red chiles.

March 16, 2014

Hot, Sweet, & Sour Eggplant


This is fantastic hot or room-temperature, and just as good the next day. I use bulbous dark purple eggplants, as those are the ones available to me, but you could also use the longer, light purple Chinese varieties.

The combination of vinegar, soy sauce, honey, and sambal oelek give it that classic hot, sour, salty, sweet harmony of flavours that make you want to eat the whole pan at once. The texture of the eggplant becomes meltingly soft, just firm enough to maintain its shape, and is a nice counterpoint to a classic stir fry. If you like, thinly slice some garlic and add it along with the chiles.

Hot, Sweet, & Sour Eggplant

Serves 2 - 3

225 grams eggplant
1 1/2 tablespoons soy sauce
1 tablespoon red wine vinegar or black vinegar
1 tablespoons honey or agave syrup
1 tablespoon sambal oelek (or other hot chile paste)
1/2 teaspoon powdered ginger or 1 tablespoon finely minced peeled, fresh ginger
1 - 2 long red chiles, seeded
1 teaspoon cornstarch
1 tablespoon coarse salt
5 tablespoons peanut oil, divided

Slice the eggplant lengthwise into quarters, and then slice the quarters crosswise to make triangular-ish slices that are about 1/2 centimetre wide. Sprinkle the eggplant slices with coarse salt, and set in a colander over a plate for at least half an hour. Rinse the salt off thoroughly, and drain well. Pat dry to remove any remaining water from the surface of the pieces.

Finely slice the chiles, into either rings or strips, as you prefer.

Combine the soy sauce, vinegar, honey, sambal oelek, cornstarch, and ginger in a small bowl, and stir until smooth (or at least as smooth as anything containing sambal oelek is going to be).

Working in several batches over high heat, heat the peanut oil in a skillet. Lower the heat to medium high and, working in batches, stir fry the eggplant pieces for a few minutes, until they are golden in spots but not cooked through. Remove eggplant pieces to a waiting plate as they are done, and repeat until all of the eggplant is done, and the skillet is empty. Be sure to reserve a tablespoon of oil for the sauce.

Lower the temperature to medium, and add the final tablespoon of peanut oil to the skillet. Stir the soy sauce mixture again, and add to skillet. The mixture should bubble up immediately, but if it instantly caramelizes into a solid mass, your heat is too high. In that case, add a little hot water (a couple of tablespoons - best to have it standing by, really, just in case) and stir until smooth, before proceeding. Otherwise, immediately add the sliced chiles (and garlic, if using) and quickly stir until they are coated, and then add the eggplant pieces back to the pan. Lower the heat and stir and cook until the eggplant pieces are tender, and coated with a thick, sticky glaze. Serve hot or at room temperature.

Sometimes when I make this it turns out lighter, sometimes darker, so no worries if it doesn't look exactly like this. More often, I would say it turns out a touch darker, because I often have my pan a little hotter than necessary.

May 04, 2013

BBQ Pork Fried Rice


Fried rice is a culinary wonder. How else can you take a few bits of meat, an egg, some scraps of vegetables, and leftover rice, and make a meal worthy of a feast? But...what if you have no leftover rice? Fried rice is the valedictorian in the argument for making more rice than you need to. Still, I've been known to fire up the rice cooker first thing in the morning, to make sure I have "leftover" rice for dinner in the evening. As I did, in fact, this time.

Fried rice can be an intensely personal dish - we all have a favourite version (or versions) that define it in our minds and in the expectations of our stomachs. One of the most delicious ones I know is a dried scallop and egg white fried rice prepared by a local restaurant. It is incredibly pale, with only coins sliced from (I think!) gai lan stalks to relieve the otherwise monochromatic rice-scape. One day, I'll take a crack at making that one, too.

My at-home go-to fried rice, however, is very simple. I pick up some char siu from a Chinese market (or restaurant) on the way home and, if I have successfully avoided simply eating it all straight out of the container, into the skillet it goes.

I make this in a large non-stick skillet, as opposed to a wok, but feel free to use a wok, especially if you have a gas burner that can get it hot enough. As you can see, this goes wonderfully with Beijing Wings and blanched gai lan with oyster sauce (or choy sum with hoisin sauce).

BBQ Pork Fried Rice

Makes about 4 cups

150 grams Chinese barbeque pork
1 tablespoon vegetable oil
1-2 eggs, lightly beaten
1/2 small (yellow) onion, finely diced
1 rib celery, sliced thinly
1 tablespoon slivered fresh ginger
2 tablespoons low-sodium soy sauce
1/4 teaspoon sesame oil
3 cups steamed rice, cooled
1-2 finely sliced green onions

Dice pork into small cubes and set aside. Separate the cooled rice gently with your fingers (a quick spritz of cooking oil can help) so that no large chunks remain.

Heat 1/2 tablespoon oil in hot skillet and stir-fry yellow onion, celery and ginger for 30 seconds. Add the pork and stir-fry for a further 30 – 60 seconds. Stir in soy sauce and sesame oil and cook, stirring, for 1 minute. If you want to add snow or snap peas (a very nice optional extra), add them now, and stir fry for another 30 – 60 seconds. Push everything to the edges of the pan, leaving a bare space in the middle. Add the remaining 1/2 tablespoon of oil, and pour the beaten eggs into it. Let the eggs set for a minute, and then add the rice, spreading it quickly around the pan. Stir-fry for a minute or two, using a spatula to break up the eggs into small pieces. Lastly, add spring onions and stir-fry for a further 30 seconds or until well combined and rice is heated through.

Transfer rice to a platter and serve with soy sauce and hot chile oil on the side.

April 17, 2013

Szechuan Green Beans


This is another one of those restaurant dishes that is so good, and so simple, but seems to be something that I don't make at home nearly often enough. It doesn't take long, but it is very hands-on for the ten minutes of cook time, so plan to have any other dishes that you might also be making be able to withstand a little neglect at this point.

This basic version is vegetarian (vegan, actually, if you substitute the sugar with agave syrup), but you could also easily add in a variety of meaty items: finely diced char siu (Chinese BBQ-style pork) and/or tiny dried shrimp are classic choices, as is a little bit of fresh ground pork that is browned in the first stage of cooking, before the beans go in (be careful not to add too much - any meat in this dish should primarily be an accent, not a focus). For a more protein-rich vegetarian version, go with very small cubes of tofu (or seitan) briefly fried until golden in the oil (and removed to a plate) before the beans go in. Combine again during the seasoning stage at the end.

Szechuan Green Beans

Serves 4
Total Prep & Cooking Time: 20 minutes

16 oz green beans, trimmed and left whole
2 tablespoons soy sauce (low sodium)
1 tablespoon rice vinegar
1 teaspoon golden sugar
1 tablespoon sambal oelek
2 tablespoons peanut oil
1 - 2 green onions, thinly sliced
3 cloves garlic, sliced thinly

Combine the soy sauce, vinegar, sugar, and sambal oelek in a small bowl and set aside.

Wash and trim the beans, and dry thoroughly (so there is no residual water to spit at you while you are cooking).

Because this dish cools quickly once cooked, it's a good idea to warm a serving dish just before you begin cooking. Although, the beans are perfectly delicious at room temperature -- still there's something to be said for hot out of the pan.

Heat a large iron or steel skillet over high heat until water dances when flicked on it. Put the overhead fan on high.

Add the peanut oil to the skillet, and tilt the pan until it coats the bottom and part of the sides of the skillet. Add the trimmed green beans. Cook, stirring frequently, until the beans are tender, about 8 - 10 minutes. Test one, to be sure. Don't be afraid of the beans blistering and partially blackening -- this is part of the characteristic flavour, and the most delicious ones have some of the black bits. If your beans are really staying tough, add a tablespoon of water to the pan and let the steam help you out (be careful it doesn't cause a splash of hot oil onto you)

Add the garlic and stir through. Give it a moment or two for the garlic slivers to become golden. Add the green onion and the spicy soy mixture. Cook for another 30 seconds, stirring constantly, (or use two spatulas to toss like a salad until the beans are evenly coated with seasoning) and scrape the whole mass of beans into your serving dish.

March 19, 2013

Spicy Orange Tofu with Broccoli


The first time I made this, I couldn't find the kind of tofu that I wanted, and I ended up with a pre-seasoned "spicy" tofu that unfortunately was also pre-coloured with orangey red food dye, which turned the entire dish an alarming shade of rust, and made the broccoli look like it was suffering from some sort of disease. Not so very appetizing.

The flavour, however, was exactly what I was looking for, so I persevered, bought the proper kind of tofu (atsuage), and happily devoured the results. This is a wonderful way to get extra vegetables (and fruit) into your evening meal.

Spicy Orange Tofu with Broccoli
Adapted from Eating Well

Serves 4

380 grams atsuage (homestyle fried tofu), blotted dry
1 cup mandarin orange segments
200 g broccoli
2 teaspoons olive oil
1/2 teaspoon vegetable base
1 tablespoon Soy Sauce (less Sodium)
1 tablespoon rice vinegar
1 tablespoon dried orange peel, prepared
1 cup orange juice
1 teaspoon cornstarch
2 teaspoon chile flakes
2 cloves garlic

Combine any juices from the mandarins with the extra orange juice, the soy sauce, and the cornstarch. Stir until smooth, and set aside. Clean the tangerine peel if needed, then rehydrate in hot water for ten minutes, scrape away any pith with a spoon, and slice into thin strips (or dice finely).

Prepare the broccoli by separating the florets and trimming and slicing the stem. Prepare the atsuage by cutting each piece in quarters (corner-to-corner), and then turning and slicing into triangles. Slice the garlic and the ginger.

In a large skillet, over medium-high heat, heat the oil, then add the garlic, ginger, and sliced tangerine peel, and stir through, giving it about half a minute to sizzle. Add the orange juice mixture, the drained mandarin sections, and the broccoli, and stir through. The sauce will start to thicken instantly. Reduce the heat to medium, and place a lid on for about two minutes, or until the broccoli starts to become tender. Stir, and check on the broccoli, giving it another minute if necessary. Add the tofu and stir throughout, gently, adding a little more water if necessary to keep the sauce from disappearing (it should reduce to a nice glaze). Cover, and let the tofu warm up (it is already fully cooked). Sprinkle with the dried chile flakes. Serve over rice, garnished with thinly sliced green onion, if you like.

August 19, 2012

International Bento (China): Chicken wings bento


My last post reminded me that I've really fallen down on posting my bentos, so here's another one: Chinese-inspired chicken wings ("Beijing Wings" from Cook This, Not That!), pork fried rice, and baby bok choy with spicy vinaigrette.

The pork fried rice is much like pork fried rice anywhere - a bit of egg, a bit of bbq pork from a Chinese butcher, some onion, leftover plain long grain rice. There's an art to a great fried rice, but this one was just a quick, cobble-together: tasty, but not truly a classic of its kind.

The bok choy in vinaigrette did not enjoy waiting in the fridge until morning, and it looks as though I may have over-steamed it, too, as it's usually a bit brighter green. The vinaigrette is a mixture of soy sauce, rice vinegar, sesame oil, sambal oeklek, minced ginger, and minced garlic. I don't use measurements when I make this up, but I don't use much oil. It's more like a dipping sauce than a real vinaigrette, but it goes beautifully on steamed or stir-fried bok choy, gai lan, or other strong greens.

The wings are fairly simple to make, and are baked instead of fried, so, theoretically a bit healthier for you, even though the skin's still on.

Beijing Wings
Adapted from Cook This, Not That!

Serves 3 - 4

1 kilo chicken wings, jointed (freeze the tips for making stock)
1/3 cup low sodium soy sauce
3 tablespoons brown sugar (or honey)
4 cloves of garlic, minced
2 tablespoons freshly grated ginger
2 tablespoons butter
2 tablespoons Sriracha
1 - 2 tablespoons fresh lime juice (half a lime)
toasted sesame seeds
1 green onion, sliced

Combine the soy sauce, sugar, garlic, and ginger in a large glass or ceramic bowl. Add the wing sections (you can also buy just paddles or drumettes) and stir them around until they are well coated. Cover the container with its lid or plastic wrap, and refrigerate for at least an hour, four or eight hours being better (ideally, do this after breakfast to be ready for dinner).

Preheat the oven to 450F, and line a baking sheet with foil. Spray the baking sheet with a thin layer of canola spray (or brush lightly with peanut oil). Drain the wings from the marinade (discard the marinade). Lay out the wings in a single layer on the foil, and bake for about 15 minutes. The skin should start to get crispy. Turn the wings over and bake for another 5 to 10 minutes.

In a large skillet, melt the butter and Sriracha, stirring to combine. Remove the wings from the oven, and quickly add them to the skillet. Toss the chicken around in the hot sauce, and saute for a couple of minutes. Remove the chicken to a platter, and garnish with sesame seeds and thinly sliced green onion.

January 29, 2012

Beef Fried Rice Noodle

(Belated) Happy Year of the Dragon! How about some 乾炒牛河?

This was the very first dish I had in a Chinese restaurant, and I both adore it and hold it to high standards. It's a tricky one to be sure - careful handling is needed to ensure that the noodles do not become either greasy or mushy. It's also often overloaded with bean sprouts, which puts a lot of people off it entirely, but I don't mind bean sprouts, actually. There's none in the picture simply because I don't tend to keep them around generally, and I didn't remember to pick some up on my way home from work. The loss is negligible, really, especially if you serve the dish with some nice gingered broccoli. It really does need a vegetable on the side, in my books, to feel like a meal.

Now, it should be noted, that while I mentioned that I am picky about this dish, my version includes an ingredient which is not usually found in it (black bean sauce), but I do enjoy the depth of flavour that it brings, so I'm keeping it. Since I use a low sodium version of soy sauce, my dish is not as darkly coloured as some, so if you want a darker overall look, substitute some dark soy sauce in the sauce mixture. Do keep in mind that this is a very sodium-intense dish, though - a little less is probably better for you.

Now, I suspect some of you may be saying "wait a minute! She's got "convertible to vegan" in her tags!" Yep. To convert this dish to vegan, all you need to do is use a combination of sliced mushrooms and/or fried tofu (atsu-age) instead of the beef, and a vegan-friendly sweetener (such as agave). It's still going to be delicious, but it might need a new name.

As for Gluten-Free? Simply ensure you are using one of the GF versions of soy sauce and black bean sauce (or skip the black bean sauce and use a little extra soy sauce in that case, right at the end).

Beef Fried Rice Noodle
Serves 4 (as part of a meal)
Total Prep & Cooking Time: 45 minutes

2 tablespoons peanut oil, divided
200 grams thinly sliced beef
600 grams fresh wide rice noodle (ho fun)
1 cup trimmed bean sprouts
1 medium yellow onion
2 cloves garlic, sliced
2 green onion

Marinade for beef
2 tablespoons low sodium soy sauce
1 teaspoon sugar
2 teaspoons cornstarch
1 tablespoon Chinese cooking wine (or dry sherry)

Sauce
1/4 cup low sodium soy sauce
2 tablespoons water
1 tablespoon black bean sauce
1 teaspoon sesame oil
1 teaspoon beef concentrate

Combine the marinade ingredients in a bowl, and add the beef, stirring well to make sure it is thoroughly coated.

Wash and dry the sprouts (trim the dragging tails, if you like). Wash the green onions and cut into matchstick-lengths (full disclosure - in the picture above, I erred by forgetting to prep the green onions, so I sliced them thinly and added them as a garnish, after the picture was taken). Slice the yellow onion (pole to pole) in long slices.

Combine the sauce ingredients in a measuring cup and set aside.

Separate the noodles onto a plate - if they are really stuck together, place them in a large pot of almost-boiled water (the heat should be off) and let them sit for about five minutes, giving a stir occasionally, until they separate. Drain immediately into a colander. If the noodles separate nicely without the soaking step, give them a quick microwave-zap for a minute or two, until they are hot. This will prevent over stirring later.

Heat a tablespoon of peanut oil in a large non-stick skillet over high heat. Add the garlic, then the bean sprouts and green onions, fry for a minute or two, then remove them to a warm plate. Lift the beef slices out of the marinade, and quickly stir fry them until they are mostly cooked. Remove the beef to the plate with the bean sprouts. Add the second tablespoon of peanut oil, and quickly stir fry the onions until just tender-crisp - they should be translucent, but not too floppy. Quickly add the hot noodles, the reserved marinade from the beef, and the sauce ingredients, and stir and toss the noodles until thoroughly coated and hot throughout. Add the beef and sprouts back into the pan, and continue to stir and toss until everything is nice and integrated. Serve hot, with extra soy sauce and/or chile oil on the side (and a nice green vegetable, too, ideally).

Enjoy!

November 21, 2010

Forbidden Rice


A friend gave me some beautifully inky "Fobidden Rice" earlier this year, and I was quite thrilled, because I had been wanting to try it (thanks, Lisa!). It's quite different from Thai black rice, which is a fairly long grain and appears to be primarily used for sweet snacks and desserts. Chinese Forbidden Rice is a short grain, and is rather small overall. A grain of the black rice next to a grain of basmati, for example, is an almost comical contrast.

Having never made Forbidden Rice before, I did a little research online before I started cooking. Most of the advice that I encountered suggested that the the rice needs less in the way of cooking water than most rices, but we found it quite firm and a little dry in texture, so a little more water would not have hurt, I think. The actual packaging (Cote D'Azur™ Chinese Forbidden Rice) called for equal parts water and rice, plus a pinch of sea salt. Next time, I think I would add another quarter-cup of water per cup of rice.

The flavour was very interesting. Definitely falling on the "nutty" side of unpolished rices, there was an almost woodsy undertone that I found very appealing, especially against a simple, brightly flavoured counterpoint such as the basic gingered chicken and broccoli stir fry that we paired it with.

I was really amazed by how black the rice stayed, once cooked. I was expecting it to go rather purplish, like many of the "red" rices do (although perhaps darker), but those little rice grains stayed black.

After poking around the internet for further suggestions for the remaining rice, and eyeing various recipes for puddings, salads, and, intriguingly, mixed rice types, I decided to take up a suggestion that I found in a few places: mixing about 20% of the black rice into 80% "regular" japonica rice (Japanese-style rice). I cooked it in the rice cooker, using the same amount of water as I would if I were making 100% japonica. The result was quite striking (sorry, no picture), as the black rice turned everything a sort of gentle, royal purple colour, with darker purple grains of the black rice. I should have made some of it into onigiri, because that would have been adorable (especially using a cherry-blossom shaper). I don't have very much of the black rice left, however, so I may try the mixed rice again. If I do, I will be sure to take pictures to share with you, and maybe make those onigiri, if we have any leftovers.

July 07, 2005

Double Ginger Chicken Stir Fry

There is an art to the stir fry, and it's one that has taken me a long time to learn. Most of the principles seemed pretty simple - cut things small, cook quickly over high heat, use contrasting textures of vegetables for maximum effect.

Somehow, though, my stir fries were never quite what I wanted them to be, until one night that Palle made dinner for me. It was the onions. They were cooked, but still crisp - a textural issue which had eluded me for some time. His secret? Add the onions at the end.What? Onions go in at the beginning. Almost every dish I make seems to involve chopping up an onion first. It felt wrong to add it last. I cringed, looking at the neat pile of chopped onions on my cutting board when I first put the theory into practice. I probably made a face. But, at the end of it, I added the onions last, and they had the texture I had been looking for. A whole world of stir fry opportunities opened up for me.

There are a few secrets to stir fries, and most of them involve the word "not." Not to add too much thickener to the sauce, not to cook too long so that the tender vegetables go limp, not to add too many different seasonings that will make the finished dish taste like all of the leftovers at a Chinese restaurant were smooshed into the same takeout container. There are a few positive rules, too: always make sure your pan is very hot before you begin, or you won't properly sear the meat or infuse the aromatics into the hot oil.

Double ginger chicken stir fry came about because I love fresh ginger. I also like the background heat of dried ginger, and combining the two as the dominant characteristics on a background of chicken just sounded like a really good idea. I added mushrooms, because I like them, and because they also play well with ginger. I added bell peppers, because they are a sought-after stir fry item in this household, and I added celery because I had some on hand.

The stir fry is a college mainstay for good reason. You don't need a lot of meat (but you can use it if you've got it), it has loads of flavour, and uses vegetables that are usually pretty affordable, particularly in the summer. It's a cheap topping for inexpensive rice or noodles. You can substitute ingredients according to whim, availability, and budget. You can pick a flavour and go deep - spicy, or gingery, or garlicy, or black-bean, or hoisin, or oyster sauce, or... or... it's really up to the cook.