August 10, 2016

International Bento: Guam - Chamorro Red Rice


It's a funny thing, but I've been making this for quite a number of years, thinking that it was Mexican red rice. It is not. I mean, it makes sense, because Mexican cuisine makes good use of achiote seeds, and that is what gives the rice that nice red colour. I'm not even sure at what point I made the decision to make this dish, but it was cobbled together out of solid rice pilaf theory and the vague knowledge of Mexican red rice being a real thing. Which, of course, it is. It's just not this.

So recently, I had an idle moment of wondering how far my red rice differed from classic Mexican versions (taking into account that there are probably a few variations), and was startled to discover that what I was making didn't even come that close. Amused at my assumptions, I did a bit more creative googling, and discovered that what we have been happily devouring for several years now, is in fact a Guamanian dish called Chamorro red rice. The name Chamorro denotes the indigenous people of Guam (the name Chamorro also applies to the indigenous people from the Northern Mariana Islands).

Unsurprisingly, there are quite a few different styles of this dish, too, including everything from bacon to peas. While many of the recipes use a very generous amount of oil, mine is more modest, meaning that the rice can go comfortably with a richer dish without feeling too heavy.

The biggest difference that I found between my recipe and most of the others available online, is that I grind the achiote seeds and use the resulting powder in the dish, rather than simply soaking them in water to colour the water, which is then used to flavour and colour the rice.

Chamorro Red Rice

Serves 4

200 grams parboiled rice
1/2 tablespoon peanut oil
1/2 small yellow onion, finely chopped
2 cloves of garlic, minced or crushed
1 heaping teaspoon annatto seeds, ground
1/4 teaspoon coarse sea salt
1/2 teaspoon ground cumin
375 mL water and 1 teaspoon vegetable base (or equivalent vegetable broth)

Heat the oil in a medium pot (one with a tight-fitting lid). Sauté the onion and garlic in the oil, and then add the ground annatto, cumin, and salt. Stir well, then add the rice and stir until the grains are evenly coated with oil.

Add the water and vegetable base (or broth), stir, and bring to a boil. Turn the heat to the lowest possible setting, and allow to cook gently for 15 minutes (covered). Then remove the pot from the heat (don't just turn the burner off) and let it sit for another 5 - 10 minutes before you lift the lid. Fluff with a fork and serve.

So what else is in the bento pictured above? Smokey roasted chicken thigh (bone removed post cooking) and corn seasoned with lime juice, salt, and ancho powder.

I think this dish goes particularly well with Margarita Chicken.

July 17, 2016

German baking: Amerikaner


There are various stories about why this popular treat is called an "Amerikaner", but none are particularly satisfactory. My favourite is that the traditional leavener, ammonium hydrocarbonate (or bicarbonate), could be shortened to "ami-ca", which doesn't make much more sense in German. The German word for the above is either Hartshornsalz (ammonium bicarbonate) or Hirschhornsalz (ammonium hydrdocarbonate) -- literally, "deer horn salt".* The use of either of these ammonia salts gives a unique texture and flavour, and although recipes abound that call for baking powder, it seems generally agreed that those ones are lacking in the special signature flavour created by the Hirschhornsalz.

German baking categories don't include soft cookies in with the firm/hard ones. The soft ones are regarded as a small cake, even though as single portions go, they're dauntingly large. Think of an oversized muffin top with the texture of a velvety pound cake, that has been flipped upside down and glazed on the flat side. Locally, these are most often made with a white glaze, although a couple of places offer half-and-half white and chocolate glazing. They are sometimes compared to American Black-and-Whites -- another possible origin story.

I decided to make smaller ones, for better portion control. The regular ones are twice the size of these. I used a disher to scoop the batter, but in order to get the coveted perfectly round shape, next time I will probably use a pastry bag to pipe the wet batter onto the parchment paper. It's definitely a learning process.

A final note on ingredients - most of the recipes I've seen online call for a package of vanilla pudding powder, which is merely cornstarch with vanilla flavour and a pinch of salt. I've added these ingredients separately.

Safety note: ammonium bicarbonate is an irritant to the skin, eyes, and respiratory system. The heat from your oven causes a certain amount of it to sublimate, which releases it as a gas into the hot air inside your oven. If your face is in front of the oven door when you open the oven to remove the cookies, you will get a face-full of ammonia gas. Don't do it; instead, shield your face whilst opening the oven door, to give the gas a chance to disperse. If possible, open a door or window or use a hood fan for additional ventilation while you are cooking with this chemical. For more information, click here.

Amerikaners

Makes about 20 "small" cookies

100 grams unsalted butter, softened to room temperature
100 grams sugar (I used raw sugar, but it wasn't specified)
2 eggs, beaten
1 teaspoon vanilla extract
1/3 cup minus one teaspoon milk
3 tablespoons cornstarch
1 pinch of salt
250 grams cake flour
5 grams ammonium hydrocarbonate/bicarbonate (if you must substitute, try 2 teaspoons baking powder)

For the glaze

250 grams confectioner's sugar
Enough lemon juice and/or water to make a thick glaze

Preheat the oven to 190 C Over/under (375 F) with a rack in the middle.

In a mixing bowl, combine the butter and sugar and beat until light. Add the eggs, beating well after each addition, until fully incorporated. Add the vanilla extract to a 1/3 cup measure, and fill the rest with milk. Add to the butter/sugar/egg mixture, and beat well.

In a smaller bowl, combine the flour, cornstarch, ammonium bicarbonate, and salt. Stir to combine. Add the flour mixture to the wet mixture, and stir just to combine. Note: ammonium bicarbonate stinks like, well, ammonia. This will disappear as it bakes. Try not to inhale too deeply.

Line a baking sheet with parchment paper. Drop or pipe about a tablespoon of batter onto the parchment and test-bake for 8 - 10 minutes to see if it spreads out the way it should (if not, you may need to add another tablespoon of milk).

Bake, watching it like a hawk - you do not want these to burn. They should remain pale, but get a bit golden on the bottom. Repeat until you've used all the batter.

If the dough spreads to your satisfaction, lay out six more cookies on the parchment paper (remember to give them lots of room to spread in all directions) and bake until just golden. They will be very tender and a bit fragile. Remove them to a rack to cool, and spread the bottoms thickly with glaze, leaving them glaze-side up to set.

* While ammonium hydrocarbonate was originally harvested from deer horn, amongst other things, this brand is vegan so no deer were harmed or used in the making of this recipe.

July 03, 2016

Harira


I continue to be inspired by my vacation in Marrakech last year, and as you can see I have many more Moroccan recipes still to explore.

Harira is a traditional soup from Morocco, and while it is enjoyed year-round as an appetizer or light meal, it gains particular significance during Ramadan, for many households being a significant dish for iftar, the traditional meal that breaks the daily fasting during that month. Its recipes are as varied as the households they come from, but generally are all based on a combination of tomatoes, legumes, a starch such as rice or pasta, green herbs, and spices. Meat is an optional component, but used in fairly small quantities as it is not the focus of the soup. I've used lamb in this version, because we have such an excellent supplier of good quality lamb that I cook with it as often as I can, but beef or chicken could be used instead or the meat could be omitted entirely. For a meatless, vegan harira, I would double the amount of lentils, and possibly also increase the amount of chickpeas.

The soup is thick and hearty, and always served with bread. As part of iftar, it might also be accompanied by dates, hard boiled eggs, small savoury pastries, even homemade pizza. Iftar is served just after sundown, and although it is Ramadan right now, we are not Muslim so we enjoyed the harira at our usual dinnertime.


This version of harira is pretty close to the one I first tried at the market restaurants that spring up every evening in Jemaa El Fna, the main square of Marrakech. It is adapted from MarocMama's recipe.

Harira with Lamb

Makes 7-8 cups

1 medium yellow onion
4 cloves garlic
5 large roma tomatoes
225 grams lamb, diced small (optional)
1 cup chopped parsley
1/2 cup chopped cilantro
4 tablespoons tomato paste
1 tablespoon olive oil
3/4 teaspoon salt
1 1/2 teaspoons black pepper
1 tablespoon sweet paprika
1 tablespoon turmeric
1 small pinch saffron, crushed between fingers (optional)
400 grams cooked chickpeas
1/4 cup dry green or brown lentils (washed)
30 grams spaghettini or other thin pasta (broken into short lengths)
1/2 cup unbleached all-purpose flour
5 cups water

Prepare your mise en place: roughly chop the onion and garlic together, and the tomatoes and herbs each separately.

In a food processor, puree the onion and garlic until smooth (a tablespoon of water may help this process).

In a Dutch oven, heat the olive oil over medium heat. Add the onion/garlic puree, and stir and cook for a few minutes. Increase the heat slightly, and add the meat, if using. Stir and cook the meat until it has lost its raw look on all sides.

Add the tomatoes to your now-empty food processor and quickly puree. Add the pureed tomatoes, tomato paste, chopped herbs, salt and the spices, and stir well. Add four of the five cups of water, and bring up to a simmer. Add the washed lentils and chickpeas, and stir through. Reduce the heat to a bare simmer, and let cook for an hour, to let the lamb get tender. This can be reduced to 30 minutes if you aren't using the meat - long enough for the lentils to get tender.

While the soup is simmering, whisk together until smooth the remaining cup of water with the flour. Let it stand while the soup cooks, so that the flour fully hydrates.

When the lentils are cooked and the lamb has had some time to get tender, add the broken pasta and stir through. Then, stirring constantly, add the flour/water mixture in a thin, steady stream. The soup will start to thicken very rapidly, but keep stirring it until all of the flour mixture has been added. This is a very thick soup. Cook and stir for another 20 minutes, to allow enough time for the raw taste of the flour to cook out, and for the pasta to cook. You will need to keep the burner on its lowest heat and stir the soup regularly, to prevent the scorching. Serve as an appetizer or whole meal, with bread and any other accompaniments you like.


June 25, 2016

Moroccan Orange Slices with Orange Flower syrup


This is an incredibly refreshing dessert, particularly after a rich meal, or a meal eaten late at night. It could also be a nice finish to an elegant breakfast. Best of all, it's quick and easy. The trickiest bit is peeling the oranges, and you'll probably master that pretty quickly.

Also, if you bought orange flower water ages ago for a recipe where you used a mere teaspoon, and the bottle has just been sitting in your cupboard ever since, here's a fantastic use for it.

Moroccan Orange Slices in Flower Water

Serves 2 - 4

2 large navel oranges
1/4 cup orange flower water
1/4 cup sugar
Ground cinnamon (to taste)
Mint sprigs

Start by making a simple syrup from the orange flower water and the sugar. Bring it to a simmer, and cook it for about five minutes over low heat. Put it aside to cool. This makes twice as much syrup as you need, so you can put the rest in a small jar or bottle in the fridge until next time (or for pancakes), once you're done here.

Using a good, sharp knife, cut the top and the bottom from the orange. Don't hack the whole top end off, just take enough off the top of it until you're through the pith and can see the top of each section of orange. Stand the orange on end, and position your knife at an angle where the pith meets the flesh of the orange, with the blade facing down and angled out. Gently but firmly saw downwards to remove a strip peel-and-pith off of the orange. Re-angle your blade as you go to follow the shape of the orange. If you lose a bit of orange, that's okay. Turn the orange a quarter turn, and repeat cutting the strip away. Do this twice more, until each "side" of the orange has a strip of peel removed. Then you should be able to remove the remaining peel in four more slices (plus maybe an extra one or two to get little bits of pith that stayed behind). Turn the orange upside down, and remove any bits of pith that stuck to the bottom side. There always seems to be a few. Then, turn your naked orange onto it's side, and cut it into rounds about a centimetre thick. Repeat with the other orange. It's so much easier the second time!

Arrange the orange slices on plates, however you like. I like to remove the centre bit of core-pith, but that's up to you, and if the centres of the slices are a bit fibrous, you can use an apple corer or a sharp knife to remove those bits. Drizzle a tablespoon of syrup over each orange, and sprinkle with cinnamon. Garnish freely with fresh mint, and you're done.


I note that when we finished the orange, we mushed the mint leaves around in the syrup, and ate them too. Urp.

June 19, 2016

Zrazy Grzyczana z Kaszą: Polish Braised Beef Rolls with mushroom stuffing and Kasha


A couple of weeks ago, I made a Lithuanian recipe for Blueberry Dumplings, using a cookbook given to me by my former colleague at the end of my last work contract.

Today, I offer you not one, but TWO Polish recipes, from an entirely different cookbook, given to me by an entirely different thoughtful colleague at the end of my last work contract. I guess my non-stop talk about food is paying off! It was hard to decide which cookbook to start cooking from, so I eventually decided to choose based on which one I received first, but am evening the score by making this a two-for-one.

The book is From a Polish Country House Kitchen by Anne Applebaum and Danielle Crittenden. There's a lot of good looking stuff in here, and I can't wait to get my hands on some of these recipes. (Duck and red cabbage pierogi? Yes please!) I wanted to start with something that felt very traditionally Polish, because my greatest association with Polish cookery is Barscz. Now, I love a good barscz, but to be perfectly honest, there is a bit of a blur around the dish in terms of nationality and cuisines - probably because I grew up with the Ukrainian and Russian versions. For the first effort from this book, I wanted something that really identified as Polish.

Now, you could quibble all day on the origins of some of these dishes. What in Poland is called Zrazy is called Rouladen in Germany, Paupiettes in France, and probably a half a dozen things in half a dozen other places. But this version, with the mushroom/bacon/onion filling, doesn't seem to be reflected in any of the other recipes that I've seen. Likewise the kasha recipe, despite all its infinite variations, appears a little differently here than I was familiar with from Russian or Ukrainian versions.

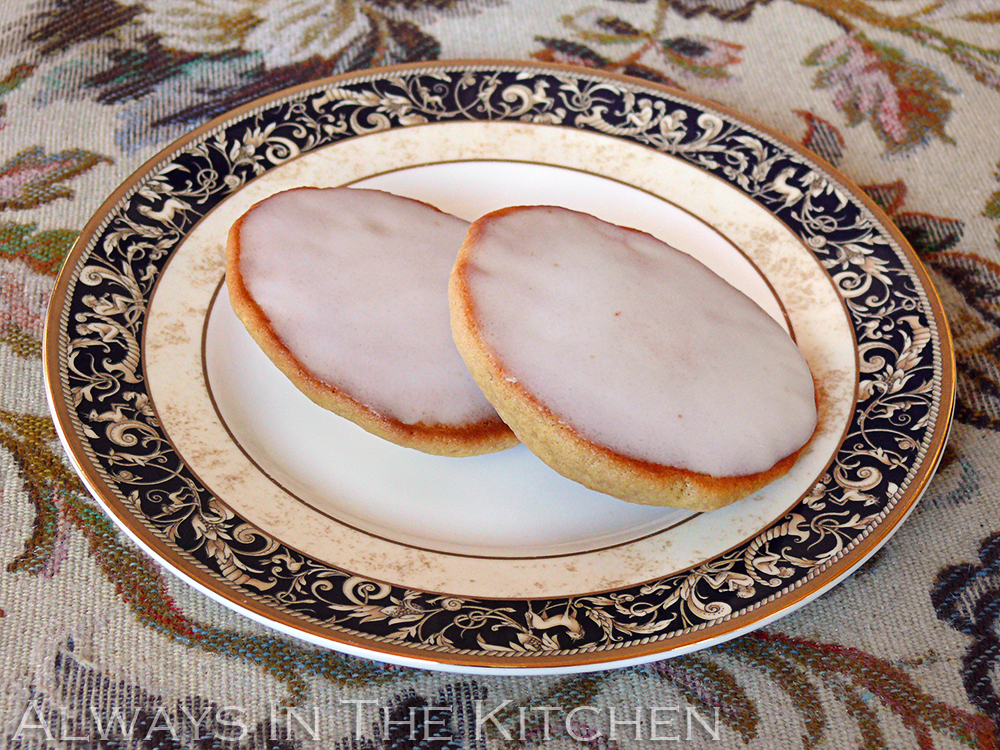
Finally, before we get to the actual recipes, I wanted to note that according to the book, this recipe should serve two people (scaled from the original four). Generous! That was a bit much for the two of us, based on our usual dinner size, but we happily put the rest in the fridge for a quick dinner later in the week. Depending on how hungry you are, or what portions sizes look like to you, well, it could vary a bit. For me, the math of roughly 125 grams of meat per serving seemed perfect. There's two on the plate in the photos because a) it looks nice, and b) we didn't realize how optimistic the serving size was until we started eating, and we promptly agreed to reserve the second zrazy.

Zrazy Grzyczana
Braised Beef Rolls with Mushroom Stuffing
Adapted from From a Polish Country House Kitchen

Serves 2 - 4

2 tablespoons butter
1 large yellow onion
225 grams wild mushrooms, chopped (I used chanterelles)
2 tablespoons chopped fresh dill weed
2 tablespoons bread crumbs (I used panko)
450 grams beef top round steak, boneless, sliced into 4 long, very thin/wide steaks
4 slices raw bacon
1/4 teaspoon Kosher Salt
1 cup dry red wine
1 cup beef broth
2 tablespoons cornstarch

Finely chop the yellow onion and three quarters of the mushrooms. Melt one tablespoon of butter in a skillet, and sauté them until tender and reduced in volume. Combine in a food processor (or turn out onto a cutting board) with two tablespoons fresh minced dill, and two tablespoons breadcrumbs. Chop/pulse until finely chopped, but not puréed. Set aside.

When you buy the beef, if you can ask the butcher to cut it for rouladen, it will save a lot of headaches. Use a meat-mallet or rolling pin or even a small skillet to pound it (gently, that is) into a long thin strip. Lay a strip of bacon along its length, and add a quarter of the mushroom filling. Season well with salt and pepper. Fold the sides in just a little bit (as if you were making a spring roll or a burrito) to help contain the filling, and roll the steak up lengthwise into a tidy roll. Secure the roll with butcher's string or toothpicks and set aside. Repeat until all four steaks have been made into rolls.

Melt another tablespoon of butter in a small skillet, and brown the zrazy on all sides. Remove the zrazy to a plate, and deglaze the pan with the wine and the broth. Bring it to a boil, reduce the heat to a simmer, and place the zrazy back in the braising liquid, along with the reserved mushroom pieces. Braise the rolls for an hour, or until very tender (now you can start preparing the Kasha, if you like). Remove the rolls to a plate, and remove the strings or toothpicks from each piece. Take 2 tablespoons of cold water and dissolve the cornstarch in it (or you can harvest a bit of the braising liquid in advance, at let it cool first). Add the cornstarch mixture back into the braising liquid and bring to a boil. Let it simmer and reduce, stirring frequently, until thick and sauce-like. Put the zrazy back into the sauce, and spoon some over each roll. Serve with Kasha and some vegetables - I've chosen pickled beets and a cucumber-sour cream salad with dill.

I won't lie to you - the inclusion of beaten egg in the below recipe seemed kind of optimistic. But it all turned out wonderfully! Apparently the egg gives it a sort of fluffiness, and it certainly was fluffy. Sometimes it pays to follow instructions.

Kaszą/Kasha
Adapted from From a Polish Country House Kitchen

Serves 4

1 cup toasted buckwheat groats
1 beaten egg
2 cups boiling water
1/4 teaspoon salt
ground black pepper

If your buckwheat groats are not toasted, you can toast them yourself in a dry skillet over medium heat, stirring from time to time, until they smell lovely and toasted. Let cool before proceeding with the recipe.

In a mixing bowl, beat the egg well. Add the cooled, toasted buckwheat groats, and stir until very well integrated.

In a sauce pan with a tight-fitting lid, over medium heat, add the buckwheat/egg mixture. Stir continuously, until the grains start to separate themselves from the mass of eggy/buckwheat goo. Then, add the boiling water (having a kettle on standby for this is helpful), the salt and pepper, and give it one last stir before turning the heat to low, covering, and letting cook for ten minutes. After ten minutes, remove the pan from the heat (leave it covered) and let stand on a cool burner or other safe place for another ten minutes. Fluff with a spatula, and serve as though it were rice.

It turns out that the Kasha likes the beef and wine sauce from the zrazy quite a bit.

June 07, 2016

Šaltanosiai: Lithuanian Blueberry Dumplings


Yes, these are essentially the Lithuanian version of pierogi. Lithuanians like to make savoury versions as well, using pretty much the same dough wrapper, in which case they are called Kolduny (or Kalduny). Šaltanosiai means "cold noses" perhaps because the blueberries pressed against the dough look a bit like cold noses pressed against a frosted window? No? Then I've got nothing, sorry.

This recipe comes from a cookbook called Taste Lithuania by Beata Nicholson which was a farewell gift from a lovely colleague, at the end of my last work contract. Given that when we met I pretty much pounced on her right away and demanded information about Lithuanian food and cooking, this was not only a delightful surprise, it was a continuation of many conversations that we've had. Even more touching, she took the time to go through the book and add little sticky notes with personal and cultural commentary about quite a few of the recipes. This recipe was the first marked recipe in the book; she noted that her family's recipe was lost when her grandmother passed away, and recalls the dangers inherent in the hot blueberry filling, in the form of "blue surprises on white t-shirts".

It is with great pleasure that I selected this as the first of what I'm sure will be many recipes to come from this book.

Šaltanosiai: Lithuanian Blueberry Dumplings

Adapted from Taste Lithuania by Beata Nicholson

Makes: approximately 46 - 48 dumplings

Dough
380 grams all-purpose flour, plus extra for rolling
1 large egg, beaten
2/3 cup water
pinch of salt

Filling
2 cups blueberries (wild, if you can get them)
1 heaping tablespoon flour
1 tablespoon sugar

The recipe had some problematic equivalences written out - the first of which was that the amount for the flour in the dough was given as 380 grams OR 1 pound. Since these are not really equal, and given that I have made these kinds of doughs before, I decided to start with the lesser amount, because I could always add more flour if needed. This was the correct approach, as I didn't really need to add much more flour (and certainly not so much as would have equalled a pound).

To make the dough, put the flour and salt in a mixing bowl and beat the egg and water together separately. Add the liquids to the solids, and stir until it all comes together into a rough dough. Let it stand (in the bowl, or turned out onto the counter) for ten or 15 minutes to make it easier to deal with. Once it has relaxed, knead until smooth and elastic, adding flour if necessary to keep it from sticking. The finished dough should be satiny and smooth. Set aside to rest while you prepare the filling.

To make the filling, combine the ingredients in a bowl, and toss well to ensure the blueberries are coated.

To make the dumplings:

Lay a piece of parchment paper on a plate or baking sheet to receive the finished dumplings.

Cut the dough into half, and roll out quite thinly -- to about 3 millimetres' thickness. Use a biscuit cutter or an upturned glass to cut out small rounds. The glass I used was just under 7 centimetres across.

For each dumpling, give the little round of dough an extra pass with the rolling pin, to make it oval. Add a teaspoon of filling, fold in half, and crimp the edges closed. You can use a fork to help seal the edges, but be careful not to pierce the dough over the filling, or they will leak when you cook them. Lay the dumpling on the parchment paper, and take up the next round of dough, repeating until finished.

To cook the dumplings, gently boil them in lightly salted water for 7 minutes. Lift out with a spider or slotted spoon, and transfer them to serving plates. Top each plate with a bit of sour cream, and a few extra blueberries (if available). If you like your desserts a bit sweeter, sprinkle a little sugar over before serving.

For dumplings that you are not going to eat right away, just like with gyoza you can simply put the tray of uncooked dumplings to the freezer for a couple of hours, until they're frozen stiff. Then transfer them to a freezer bag, removing any extra air if possible, and seal. You should be able to store then, frozen, for up to three months without any loss of quality.


Confession time: I absent-mindedly cooked up enough for three or four servings, when I only needed two. I let the extras cool on a plate, and then stored them in a sealed container in the fridge for a couple of days. Then I fried them up in butter, sprinkled a little extra sugar on top, and ate them for breakfast. I...I think I might like them even better that way (hopefully any Lithuanians, ahem, who might reading this are not too disappointed in me!)