November 17, 2015

Lamb & Guinness Stew


This delicious stew is built using my base model for meat stew: brown the meat well on at least two sides, braise the meat with onions for a good long time, add vegetables and cook until tender, season to taste.

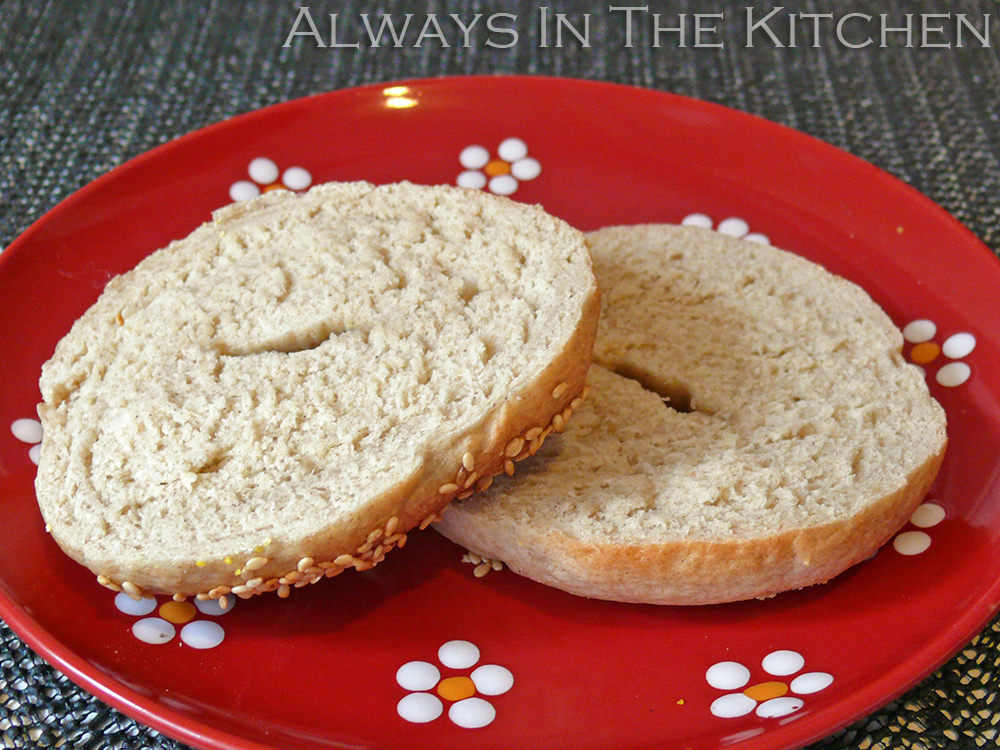
We had this bread the first night with thick slices of rye bread from our bakery, but just about any kind of bread would be good with this. The remaining half-batch of stew was put into a freezer container to be pulled out later in the month when we're feeling particularly in need of an effortless, homemade meal. Depending on my energy level at the time, I might, or might not, decide to make biscuits or dumplings to go along with the stew.

In Germany, the supermarkets and farmers' markets have a pretty wonderful concept: Suppengrün. Literally translated, it means "Soup greens" and consists of a single bundle containing at least a wedge of celeriac, a few carrots, a section of leek, and some parsley. Some of them will have part carrots and part parsnips, and some of them will add a whole bundle of fresh herbs instead of just the parsley, but that's dependent on the individual character of the vendor. The basic version is always available, and is nicely sized for one pot of soup or stew. This is not only perfectly sized for small German fridges, but also helps keep food waste to a minimum. One package of Suppengrün just exactly what you need for a recipe without having to buy a whole bag of carrots, for example, or an enormous celery root or bunch that you might not be able to use up in time before it gets squishy in the vegetable drawer. It takes care of the crisper portion of the mirepoix in one item, and even the fancier ones are well priced. I hope this idea catches on worldwide.

Lamb & Guinness Stew

Serves 4 - 6, depending on sides

900 grams cubed lamb shoulder, lightly salted
1 tablespoon peanut oil (or other oil for frying)
1 large yellow onion, diced medium
1 small leek, white part only, thinly sliced
3 cloves garlic, minced
1 cup diced celeriac or 2 stalks of celery, diced
3 large carrots (or a mixture of carrots and parsnips)
2 large waxy potatoes
1 can or bottle of Guinness
2 cups lamb or beef broth or stock
3 bay leaves
1 tablespoon tomato paste
1 teaspoon Worcestershire sauce
1/4 teaspoon white pepper, ground
1/2 teaspoon yellow mustard seeds
2 tablespoons of all-purpose flour
1/2 cup water

Heat a dutch oven over medium-high heat, and when hot, add the oil. When the oil is also hot, add a sparse layer of lamb cubes, and allow to sear on one side, before turning to sear on a second side. Remove the lamb from the pan to a holding plate, and repeat until all of the lamb cubes are seared on two sides. Add the diced onion, the leek, the bay leaves, and the minced garlic to the fond in the empty pot, and add a little splash of water if necessary to prevent scorching. If you are using stalk celery instead of celeriac, add that now, too. Stir and scrape up the brown fond in the bottom of the pot, until the onions are starting to turn translucent. Add the tomato paste, and stir through again, being careful not to let it burn. Add the Worcestershire sauce, the mustard seeds, and the ground white pepper, and stir through.

Then, add the Guinness, and stir through, making sure to scrape up the bottom of the pot very thoroughly. Add the lamb or beef broth or stock (it's okay to use a good quality concentrate that you like the flavour of), and return the seared lamb to the pot. Simmer, covered at a low temperature for 1.5 hours, for meltingly tender lamb.

While the lamb simmers, prepare the remaining vegetables. Peel the carrots and cut them into large bite-sized chunks. Same for the potatoes. The celery root should be heavily peeled, and diced fairly small.

When the lamb is tender, combine the flour and the half cup of water in a small, sealable container, and shake vigorously (holding it shut the whole time) to make a smooth slurry. Pour it into the dutch oven and stir it through. It will not look very appealing, at first, and it won't do much to thicken the stew until it comes up to a full simmer, but it needs to go in now because it takes about a half-hour to cook out the raw taste of the flour.

Add the prepared vegetables, stir through, and bring up to a simmer again (the slurry and the cold vegetables will bring the temperature down very quickly). Turn the heat back down, cover the pot, and simmer for another 30 - 45 minutes (testing larger chunks of carrots for doneness seems to work well). Alternatively, you can put it (covered) in the oven at 350 F for the same amount of time.

Serve with a fat slice of bread, or a bun, or biscuits, or dumplings. Leftovers, should you be so lucky, keep nicely in a sealed container in the freezer for up to a month without loss of quality. Be sure to cool the stew thoroughly before freezing, for best textural results. I like to leave it in the fridge overnight, and then transfer it to the freezer in the morning.

October 24, 2015

Crumpets


I've always enjoyed making breads - pancakes, biscuits, tortillas, pizza crusts, sandwich loaves, challah, pita with self-forming pockets, crisp coiled flatbreads full of green onions...and of course, recently, bagels. I probably won't ever run out of new ones to try. The world is full of amazing bread.

This is the first time I've ever made crumpets, though. They are a quintessentially English bread that is cooked on a griddle or skillet rather than in the oven, and I can't find them easily in Germany. So, of course I decided to make my own, especially as they've been on my list for quite a while, now. There is, however, a surprising number of recipes to be had. I read a lot of them online, and combed through my cookbook collection for good measure. I wanted something that was easy, didn't take too long, and yet had the true characteristics of a ideal crumpet - airy, with a nice holey structure throughout and a tender middle. I ended up hybridizing several recipes to create the one below, with a hat-tip to the Tesco website for providing the starting point for the ratios.

You will need crumpet rings, or egg-poaching rings, or some other food-safe way of corralling your batter in the pan. The standard size is about 3 inches or 7 3/4 centimetres diameter.

Crumpets

Makes 8 - 10

1 teaspoon canola oil
225 grams (1 3/4 cups) all-purpose flour (Type 505 in Germany)
150 ml whole milk
150 ml water plus extra as needed
1 teaspoon dried yeast
1/2 teaspoon sugar
1/2 teaspoon coarse salt
50 ml warm water
1/2 teaspoon baking soda

Warm the milk and 150 ml water together until just pleasantly warm but not hot. While it heats, in a mixing bowl, combine the flour, yeast, sugar, and salt, and stir together well with a whisk to integrate and aerate the ingredients. Make a well in the centre, and pour in the warm milk-water mixture. Stir briskly with a whisk to get a smooth batter. It should be about the consistency of pancake batter, so if it is too thick, add another tablespoon or two of water to loosen it up.

Scrape down the sides and cover the mixing bowl with a clean kitchen towel, and put it someplace warm to rise. I use my oven, which I had turned on for a minute or two to warm up, and then shut off before using. Let the batter rise for 45 minutes.

Preheat a large nonstick skillet over medium heat. Spritz it with canola oil, or use a pastry brush to brush on a thin coating. Brush your crumpet rings lightly with oil, too.

While the pan is warming up, mix the warm water and baking soda together, then stir it quickly but thoroughly through the crumpet batter. The batter is kind of stretchy at this point.

When the pan is ready, add about three tablespoons of batter to each crumpet ring (I use a small ladle to scoop the batter), turn the heat down, and set your timer for 5 minutes. It might take as long as six or seven minutes, depending on how thick your batter and hot your pan is, so you need to watch them. Bubbles will start to form quite quickly, but you want to wait until they burst and become holes that stay visible, before removing the rings (using tongs or a glove, because they are hot!), and flipping the crumpets over.

Let the crumpets cook for about one minute on the second side, and then flip them over again and remove to a rack to cool.

Bag them and store them in the fridge once cooled.

They toast up beautifully for breakfast or afternoon tea - top them with a little butter, with or without jam, or a slice of good sharp cheese. You could also use them as a base for poached or fried eggs, of course. Perhaps even some sort of unholy breakfast sandwich. It's up to you.

October 13, 2015

Pumpkin Pie


Pumpkin pie represents such a beloved combination of flavours in North America that we're apparently even happy to consume it as a latte (okay, maybe not all of us), or (better still) beer.

It is also a staple long associated with harvest season feasts such as Thanksgiving and Hallowe'en - eminently sensible, since this is when pumpkins are ready for cooking. There's a lot of great options for pumpkin desserts - everything from flan to mousse, and that's not even counting the muffins, quick breads, and scones. My sister makes a fantastic pumpkin cheesecake, with a baked on sour cream topping, but that's a lot more advanced than this simple pie, which is just a single bottom crust and a filling that could best be described as mix-and-pour.

Somehow, though, pie remains the classic pumpkin dessert. This one is a little bit tangy from the crème fraîche, sweet (but not breathtakingly so), and not too dense. If you prefer mild spices, reduce the cinnamon to 1 teaspoon and the ginger to half a teaspoon. You can substitute ground cloves for the allspice, if you like.

Pumpkin Pie
Makes 1 pie

1 single pie-crust, unbaked
425 grams pumpkin puree (unsweetened, unseasoned)
3 large eggs
1/3 cup raw sugar
1/3 cup granulated sugar
200 grams crème fraîche
3 tablespoons dark rum
1 teaspoon cornstarch
1 1/2 teaspoons cinnamon
3/4 teaspoon ground ginger
1/2 teaspoon ground nutmeg
1/4 teaspoon ground allspice
1/8 teaspoon salt

Make your favourite single pie crusts recipe (or try the one shown here), and line a standard 23 cm pie-plate, folding and crimping the edges under if you like, or even simply pressing them gently with a fork against the top edge of the plate, if you want to go super simple.

Once the crust is in the pan, preheat your oven to 425 F / 225 C.

In a medium-large mixing bowl, beat the eggs until smooth (I use a whisk, but you could also use a food processor). Remove a tablespoon or two into a separate ramekin dish and set aside. Add the sugars to the mixing bowl, and beat until smooth. Dissolve the cornstarch in the rum, and add to the eggs and sugar, and stir through. Add the pureed pumpkin, the salt, and the spices, and stir until smooth. Finally, stir in the crème fraîche and mix until thoroughly combined. It will be a very pale orange at this stage, but it will darken up nicely as it cooks.

Put the pie pan on a baking sheet (or pizza pan) for easier handling. Use a pastry brush to paint the top edges of the crust with the reserved beaten egg. Pour any leftover egg into the pie filling, and stir it through.

Pour the thick pumpkin mixture into the unbaked pie shell, and give the pan a little jiggle to settle it evenly.

Move the pie (on its baking sheet) to a rack in the middle of the oven, and bake for 15 minutes. Lower the heat to 350 F / 180 C, and bake for another 45 minutes. The pie filling should look kind of rounded, glossy, darker than it was, and still a touch wet in the middle. The middle might even still jiggle a bit, which is okay - this pie must cool for a couple of hours before being cut, and it will continue to cook as it cools, and it will set up very nicely during that time.

Remove the pie from the oven and place on a cooling rack. As the pie cools, the surface will flatten out, losing the slightly domed look for a completely flat surface. Sometimes cracks will appear in the surface, but that's fine - doesn't change the flavour (and you can always fill them with whipped cream if you like).


Wait a minimum of two hours before slicing and serving. Excellent with a cup of coffee, or a glass of bourbon. If you like, feel free to add a little whipped cream (or a lot).

Cover leftovers well with plastic wrap and refrigerate for up to three days.

September 20, 2015

Lye Water Bagels


Bagels always sounded like a lot of work. First you have to make the dough, then let it rise, shape, boil (!), and finally bake. And then there's the lye water, which is a separate sort of anxiety on its own. Lye is caustic and requires careful, safety-forward handling, which raises a additional barrier to being motivated enough to begin.

Happily, although there are lengthy-process recipes out there, you can absolutely make delicious bagels in only a couple of hours. I started these after breakfast, and we ate them for lunch.

I scoured around the internet for recipes, and finally hybridized the likely-looking ones into the recipe below. These are made partially with high-gluten flour, but you could as easily use only white bread flour instead. The extra gluten in bread flour helps these bagels develop their trade-mark chewiness.

These are somewhere between the aesthetics of New York style bagels and Montreal style. I make no claims to authenticity, so if you're a style hard-liner, this recipe may not be for you. If you happily eat any kind of bagel you encounter, I hope you'll give this one a try.

Lye Water Bagels

Makes 8 medium-large bagels

300 mL water, heated to wrist-warm
1/2 tablespoon honey
20 grams raw sugar
7 grams active dry yeast
10 grams salt
200 grams high-gluten or bread flour (such as German flour type 1050)
200 - 300 grams all purpose flour

For boiling:
1 tablespoon lye water* (I get mine from an Asian supermarket)
12 cups water

For baking:
Cornmeal as needed
egg wash (optional)

This dough will be a very firm one, and I caution you not to all all of the flour at once, lest you make it too firm. I was a little careless myself, and added a bit more flour than I should have. The end result was that I had a tough time shaping my bagels, and one of the hand-looped ones came apart during boiling (it was still delicious).

Pre-warm the oven so that the dough will have a nice warm place to rise.

Into a large mixing bowl, dissolve the honey and sugar in the warm water. If the water is a bit hot, let it cool until it's pleasantly warm but not hot against the wrist. Sprinkle the yeast over the sweet water, and wait until it proves itself by foaming up and smelling yeasty.

Add the 200 grams of high-gluten (or bread flour) and the salt, and beat vigorously with a wooden spoon until it is nice and smooth. Add 200 grams of the all-purpose flour, and stir it in, turning it out onto the work surface eventually, to knead it all in. If needed, add the remaining 100 grams flour a little at a time until you have a stiff dough.

Knead the stiff dough for 10 minutes, either by hand or with a very sturdy stand-mixer. If you are kneading by hand and are having a tough time, clean your hands thoroughly and oil them before continuing to knead. After ten minutes, smooth the dough into a compact ball and return it to the mixing bowl, which you have cleaned and lightly oiled. Roll the dough around in the bowl so that the surface of the dough picks up some of the oil. Cover the bowl loosely with plastic wrap, and let sit until the dough has doubled in size - about an hour.

Preheat the oven to 450 Fahrenheit, with a rack in the middle slot.

In a large pot (I used my Dutch oven) on the stove, heat the 12 cups of water until boiling, and then add the lye water just before you add the bagels.

While the water is heating, shape your bagels. Squeeze the excess air out of the dough, and then divide into 8 equally sized (more or less) pieces. You can shape your bagels by making a dough rope (or "snake") and looping it into a ring by wrapping it around your hand, pressing the ends together very firmly, or by making a smooth ball of dough and then forcing your thumb through the centre, gradually expanding the hole until the desired doughnut-shape is achieved. I tried both, but found the second method a bit easier than the first.


Prepare a plate or wooden cutting board with a thin layer of cornmeal. Also prepare a baking sheet with a thin layer of cornmeal for the oven stage.

When the water is boiling, add the lye water, and then immediately add 2 or 3 bagels, carefully, by hand, and time them for one minute. After the minute, turn the bagels over, and boil for one more minute. Use a spider-tool to remove the bagels from the water, onto the cornmeal-covered cutting board. Add the next bagels into the water and start the timer again.


If you want toppings on your bagels - poppy seeds, or sesame seeds, or whatever - now is the time. Brush the tops of the just-boiled bagels with an egg wash, and press them upside-down into a plate of seeds/toppings. Place the bagels topping-side-up on the baking sheet.

Move all the boiled bagels onto the baking sheet, cornmeal-side down. Bake at 450 F for 10 minutes, or until nicely browned. Allow to cool for at least 15-20 minutes before eating.


We had ours with cream cheese, of course, and a heavy grinding of black pepper.


Once completely cool, bag up and store as you would any freshly baked bread.

*I should note that I may use more lye water next time, as I couldn't find a reliable guide to how much lye water to add to my boiling water. Most instructions assume you will be using a dry form of lye, which is more concentrated. A higher concentration of lye should make for a somewhat darker colour on the finished bagel.

September 13, 2015

Chanterelle Risotto


Late summer through fall is chanterelle season here in Germany. You will see market stalls piled high with Pfifferlinge, as they are called here, and you will see specials on the chalkboard of almost every restaurant: chanterelles with dumplings (especially a variety called Serviettenknödel), chanterelles with pasta, creamed chanterelles on toast, and of course, chanterelle risotto.

The secret to a nice mushroom risotto is not to overcook the mushrooms. I like to fry a few decorative ones in butter to set aside to use as a garnish, and then sauté the rest for the main risotto itself. By sautéing the mushrooms first, before anything else goes in the pot, it's easy to remove the lightly sautéed mushrooms to a plate to add back in later, so that they don't get that wrung-out squidgy quality that happens with overcooked mushrooms.

As always, everything that is not a feature ingredient in a risotto should be so finely chopped as to not exceed the size of a cooked grain of arborio.

Chanterelle Risotto

Serves 4

300 grams fresh chanterelle mushrooms
4 tablespoons salted butter, divided
2 shallots, finely minced (or small onions)
2 cloves of garlic, pressed or microplaned
220 grams risotto rice (I'm using Baldo here, but arborio is fine)
1/2 cup dry white vermouth (or dry white wine)
1/2 teaspoon coarse sea salt or Kosher salt
4 cups warm vegetable stock/broth (or mushroom stock)
juice of 1/2 lemon
1/2 cup freshly grated parmesan cheese

Clean your mushrooms and set aside the ones you want to use for garnish. Remove hard stem-ends from the rest, and roughly chop. Finely chop your shallots and press your garlic. Measure out everything else and have it standing at the ready.

In a large pot, such as a Dutch oven, heat 2 tablespoons of the butter and quickly fry the chanterelles reserved for garnish. Set aside, and then add the rest of the mushrooms to the pot. Sauté briefly, then set aside in a bowl until the risotto is almost finished.

In the same pot, add one more tablespoon of butter, and then add the shallots and garlic. Stir and sauté until slightly translucent, and then add the rice, stirring well to make sure none of the grains stick and burn. When the grains of rice are all coated with the butter and they start to catch at the bottom of the pan and a little golden colour starts creeping in to the bottom of the pan, add the vermouth (or white wine), all at once. Stir vigorously to make sure everything is scraped up from the bottom. Add the salt, and stir through.

The vermouth will disappear pretty quickly, so be prepared to start ladling stock into the rice. Use a small amount at first, just adding a little at a time, stirring well over medium heat, and waiting until most of the liquid has been absorbed before adding more.

When you are halfway through your stock, stir in the lemon juice. Continue to stir and add stock until you have no more liquid to add, and then return the reserved chopped mushrooms to the pot and gently stir through. Add the final tablespoon of butter, and stir through. Turn off the heat, cover the pan, and let stand for 5 minutes. Remove the lid and stir in the parmesan cheese. Spoon into shallow bowls and top with the reserved fried mushrooms, and maybe a little extra sprinkle of parmesan.