Showing posts with label Holiday. Show all posts

February 12, 2013

Breast of Turducken

Intrigued by the idea of an extravagance like the infamous "turducken", but without the oven space (or the army of people to eat it up)? Why not make a smaller beastie overall by stuffing a turkey breast instead of a whole turkey? After all, Valentine's Day is coming, and if you were wanting a sexy little meal for two, with a bit of extra panache and just a few leftovers for sandwiches or a casserole, then this is the recipe for you.

Sure, it looks difficult, what with the layers and all, but I assure you that it is actually quite simple. It's just showy that way. Best of all, it's really two dishes in one, since the gravy is made from the braising liquid.

My initial inclination was to use duck confit for the "duck" portion of the turducken, but whilst shopping at Oyama Sausage Co., I noticed that they had a special on black truffle duck sausages, and asked myself "What could be fancier than that?" Since sausage is a ground mixture, it also solved the question of how I was going to keep the disparate layers from falling apart when sliced; I simply placed the sausage layer between the flattened turkey and chicken breasts.


Which is, in essence, almost my entire recipe, but for the cooking instructions. You could easily figure the rest out for yourself, I'm sure, but here are the details, just for fun:

Breast of Turducken

Serves 6 - 8

1 large turkey breast (about 750 grams)
250 grams duck sausage
1 large chicken breast (about 200 grams)
1/4 teaspoon kosher salt
1/2 tablespoon peanut oil (or other)
1/2 cup dry vermouth
1 1/2 cups turkey broth
2 tablespoons flour
salt & pepper to taste

Butterfly and pound flat the turkey breast. Take the duck sausage out of its casings, and spread three quarters of it evenly over the inner surface of the turkey. Add the chicken breast (also butterflied and pounded flat) and place the last bit of sausage in a thin line down the centre of the stack. Roll up (in such a way that the centre-line of sausage will run the length of the resulting roulade) and tie with butcher's twine at two-inch (or so) intervals. Rub the surface of the roulade with peanut oil (or olive oil, or grapeseed oil) and sprinkle with salt.


In a large skillet, over medium-high heat, sear the roulade on all sides. Add the vermouth, cover well with foil, and transfer to a preheated oven at 375 F for 1 hour, or until completely cooked (use a probe thermometer to get it to a safe temperature).

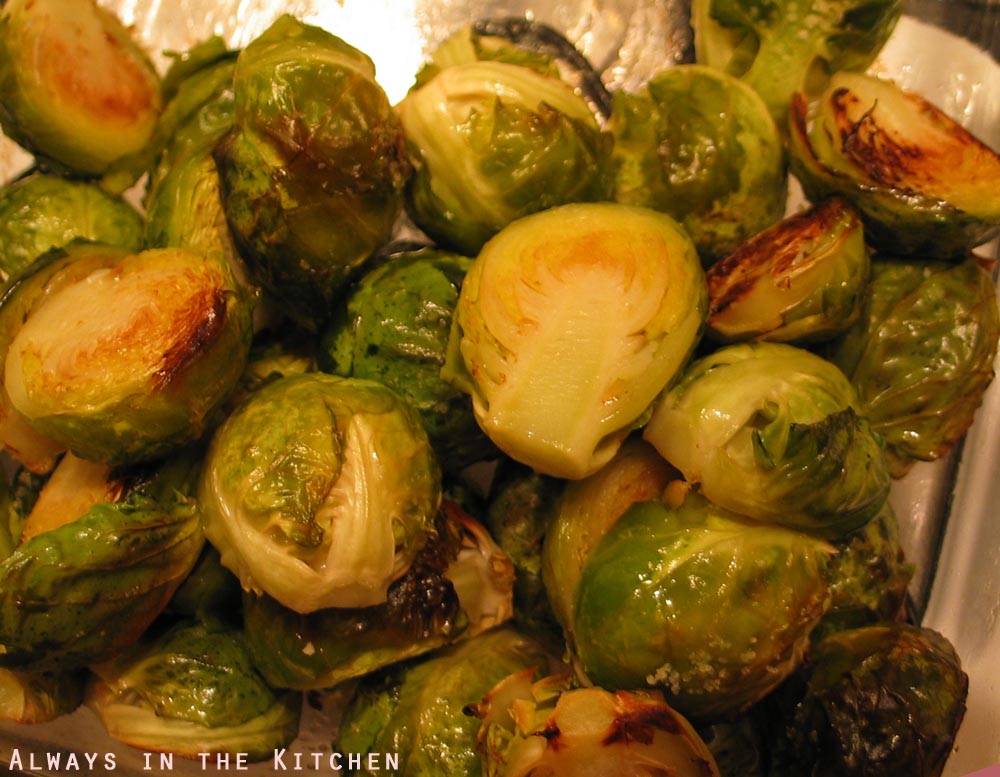
While the roulade is in the oven, you can prepare any side dishes that you like. Mashed potatoes are a great one, since you're going to have gravy. Carrots, corn, Brussels sprouts, yams, any or all of these make a fine side to your breast of turducken.

Let stand for 15 minutes on a carving board (loosely tented with the foil) to let rest before slicing. This gives you enough time to make some gravy (not shown, because it obscured the pretty bullseye pattern of the sliced roulade).

If your turkey broth is cold or room temperature to start (you could, of course, also use chicken broth or duck broth), shake it with the flour in a lidded container (holding tightly), and add to the now-empty skillet - do not clean the skillet first! Stir over medium heat until the gravy thickens, scraping up any goodness from the bottom of the skillet. If it is too thick, you can add a little more stock or water, or any vegetable water you might have from, say cooking potatoes, or carrots, or corn, or some other side dish.

If your turkey broth is hot, shake the flour with a little cold water and add it to the skillet after you have added the broth. Feel free to proceed in your usual gravy fashion, if you don't care for either of these methods. Let the gravy simmer very gently on low while you carve the roulade (make sure you remove the strings, first) and plate the rest of the meal, and then pour it into a gravy boat or bowl with spoon and take it to the table.

December 31, 2012

Coconut Friands

These were the sleeper hit of the season!

I generally tend to have dried coconut around the house - it's wonderful in a lot of baked goods, perks up a bowl of oatmeal, and makes a nifty sambal or chutney. A spoonful in a choco-banana smoothie almost turns a breakfast beverage into a party single handedly.

For all of that, I don't often feature coconut in all of its glory all that often. Sure, I've made the odd macaroon in my day, who hasn't? People like coconut macaroons. But! I suspect that people would probably like coconut friands even better.

I found this recipe on the delightful Girl Cooks World blog, where she subtitles them "little coconut tea cakes", which is a very good description to highlight the differences between friands and macaroons. She also differentiates them from the potentially related financiers, for which she also has a few recipes (and boy, they look good!).

These are gluten free (Girl Cooks World is quietly, entirely gluten free), which makes them an excellent treat to take to festive occasions where such bounty might be thin on the ground. Your gluten-free friends will be delighted, and so will anyone else who tries them. I halved the recipe, with excellent results (as listed below), but you can certainly "double" it again to get 24 lovely little cakes. Don't worry, they won't have a chance to get stale.

Coconut Friands

Makes 12 mini tea cakes

2 large egg whites
3/4 cup finely shredded unsweetened dried coconut
1/3 cup sugar
2 1/2 tablespoons superfine rice flour
1 1/2 tablespoons potato starch
1/4 teaspoon vanilla extract
1/8 teaspoon kosher salt
4 tablespoons butter, melted

Preheat your oven to 350 F. Spritz a 12-whole mini muffin tin with cooking spray, generously. Set aside.

Whip the egg whites until smooth and frothy, but not stiff. Add each of the remaining ingredients, in order, stirring well with a spatula between each addition.

Divide the batter between the muffin-cups. Bake for 17 - 20 minutes, or until the edges are tinged with gold. Remove from the oven, and carefully invert over a rack. A quick tap on the bottom of the pan should remove any stragglers, or you can use a little fork to help lift them out. Re-arrange so they are all right-side-up, and allow to cool at room temperature. Dust with confectioner's sugar, if you like.

Excellent, hot or cold.

Next time I make these, I plan to add a little lime zest in with the sugar. Doesn't that sound delightful?


January 03, 2011

The Last Pie of the Year is also the First Pie of the Year

Which can only mean one thing: Tourtière for New Year’s Eve (and again, New Year’s Day). (It's also often made for Christmas Eve, instead, depending on where you hail from.)

Tourtière is one of those wonderful foods which can be summed up as “those Quebecois pork pies” (doing it something of a disservice in brevity), but also holds an awful lot of holiday tradition, and hot debates as to the exact ingredients required (or, in some cases, permitted). There is the great potato debate - should it be included at all, should it be in chunks, or should it be mashed smooth? There is the meat debate - all pork, a mixture of pork and beef (and the percentages thereof), should you use game, such as venison or rabbit? And finally, last but not least, the seasoning. I’ve seen arguments for salt-and-pepper only (boring, but safe, I suppose), nutmeg and cloves (my personal favourite), and a sort of kitchen sink approach which encompasses every possible option from the spice rack, and infinite variations in between.

I am not Quebecois (although part French), and therefore do not have a family imperative to include in my definition of this dish, but I have a great fondness for French food in general, including its many regional variations. Here is an ad-hoc version that should prove tasty to most meat-pie loving folks:

Dawna’s Tourtière

Serves 6 - 8
Total Preparation & Cooking Time: 1.5 to 2 hours

Pastry for one double crust pie
2 cups flour
½ cup butter, cold
Pinch of salt
5 tablespoons cold water

Using a food processor fitted with a metal blade, blend the flour, butter and salt with quick, full-speed pulses until the butter is the size of little peas and evenly distributed throughout the flour. With the motor running on low, add the water all at once through the top of the food processor. Immediately crank the speed up on the processor, and in a few seconds it should start to become dough, little chunks of which start to glomb together and try to crawl up out of the bowl. Pull the dough clump(s) out onto a lightly floured counter, and knead just barely until it comes together. Separate into two roughly equal pieces, and pat down into disks. You’re done! You can refrigerate them until you are ready to work with them, or you can roll out the pastry now if your filling is ready. This pastry works beautifully for sweet or savory pies and tarts.

Filling

600 grams lean ground pork
300 grams extra lean ground beef
1 medium onion, minced
2 cloves of garlic, minced
1 bayleaf
1 medium potato, boiled and mashed (as smooth or lumpy as you wish)
½ teaspoon salt
Good pinch of ground nutmeg
Good pinch of ground cloves
Small pinch ground sage
Small pinch ground thyme
Black pepper to taste (lots)
½ cup vegetable broth

Brown the pork and the beef in a large skillet. Add the onion, garlic, and bayleaf and stir and saute until the onion becomes translucent and tender. Stir in: first the seasonings, then the broth, and finally the potato. Stir about, and taste. Adjust the seasonings to your liking, remove the bayleaf, and remove the filling from the heat.

Roll out your pie’s bottom crust and place it in the pie plate. Heap up the filling in the middle, and then spread it about so that the pie will be full, without gaps by the side crust. Sprinkle the filling with extra nutmeg, and lay the top crust over the filling. Trim and crimp the sides, and cut slits (air vents) in the top of the pie, and brush it with an egg wash (essentially, one egg, beaten smooth, applied with a pastry brush until the whole top surface, including crenellations, are liberally coated with yellow goo. This only uses up about a tablespoon, at the most, of your beaten egg, so put the rest in the fridge (in a little dish, covered well) for a future omelette or other baking tasks).

Place pie in a 450 F oven for 10 to 15 minutes, then reduce the heat to 350 F and continue to cook for another 20 to 30, depending on your oven.

Allow to cool for about five or ten minutes before slicing, to help it preserve its shape when cut.

You may wish to serve this with a nice tomato chutney, or banana ketchup, or even salsa. I won’t judge - well, not much, anyway.

Happy New Year!

November 25, 2010

Thanksgiving Redux


Happy Thanksgiving to my friends south of the border!

Up here in Canada, we celebrate Thanksgiving in October, so to allow time to sufficiently digest the turkey before having more at Christmas, or so the story goes (according to me). However, it's true that we don't always have turkey for Christmas dinner at our house (although we usually have one on Boxing Day with the family), and it's also true that we sometimes mess around with cross-cultural holiday traditions.

Tonight, we'll be having a turkey & stuffing skillet dinner, with roasted Brussels sprouts and a baked sweet potato. It's considerably less effort than a traditional stuffed turkey dinner, and perfect for those of us who like to squeeze in an extra turkey-related meal between the others. I'm still tweaking the recipe, though, and you'll get an update on it when I've figured it out completely...

On Canadian Thanksgiving, however, we let our fusion madness run amok. This time, the infusion was from Japanese cuisine. The above picture is our turkey gyoza with sage-rice, sake-steamed sweet potato cubes, and ginger-sauteed Brussels sprouts, with little bowls of miso gravy and cranberry-soy dipping sauce (made with cranberry sauce, rice vinegar, and soy sauce).

The sage rice needs work - I needed to use either more (and more finely chopped) fresh sage, or combine it with a pinch of dry sage to really infuse the rice with a pleasantly mild sage-iness. As it was, the inclusion of the sage was tasty, but seemed kind of accidental or incidental to the dish.

The sweet potato cubes were a new variation on our favourite "Holiday Yams" which are briefly described about half-way through this post on jerk chicken. Instead of citrus juice for the liquid, I simply used sake, and instead of the mixed spices, I used thin coins of peeled ginger. The results were lovely! I used a covered corningware dish to make these, and bake them for about 40 minutes at 375℉ (you can adjust the time accordingly if you are cooking something else concurrently at a different temperature. This version was also a big hit, and will definitely be called upon again.

As a weird, additional bonus on the day, we were let out early from work on account of the (snowy) weather, since Vancouver comes to a screeching halt if more than two snowflakes are spotted in the air together. This means that I had lots of time to get home, and get dinner on the table, which was much appreciated.

December 24, 2006

In the Nick of TIme

The baking is finished. Whew!


Cranberry squares. I don't get to make these as often as I would like, since I'm the only person in the house that can eat cranberries. I love them, though, and my mother used to make them, so they're a Christmastime favourite, and if we're having company, I get to make them. They're essentially date squares (or, if you prefer, matrimonial cake) with cranberry filling instead of dates. Less sweet, very festive.


Ginger snaps are a little more festive with red sugar on them...


I've said it before, but there must be shortbread!

I'm ready. Hang the stockings.

December 20, 2006

How I Spent My Evening: A Story in Pictures

I love making these tiny French butter cookies at Christmas. They are not difficult, but a tad laborious. I realize I skipped photographing a step - the slicing of the dough. Such is the case, late at night, when one's hands are awfully sticky. My apologies...
Step one: Hurl partially formed dough onto a parchment sheet.
Step two: Try to persuade dough to conform to the sized paper under the parchment.
Step three: Try harder... use rolling pin "persuasion."
Step four Cut dough into strips, and alternate.
Step five: repeat, using eggwash "glue" and reverse the colour scheme. Repeat again, reversing colours once more for the final layer.

Step six: chill and thinly slice the completed cookie logs. (You can wrap them well in waxed paper or parchment, and freeze them for several months. Defrost slightly before slicing, or they will be shattery.)

Step seven: bake for 8 minutes.

December 29, 2005

For the Love of Brussels Sprouts

Brussels sprouts don't get nearly enough love in this world. Still, someone must be eating them, because they show up faithfully all winter long in the markets. I find that often when a meal includes them, the wee cabbages are drearily overcooked and often stone cold by the time the plates are served. This is a tragedy, for a good Brussels sprout is a tasty treat that shouldn't be relagated to the "last bowl to be emptied" status that it seems to have in so many households.

In fact, if it were not for the firm tradition that insists on serving them for Thanksgiving and Christmas dinners, I wonder if they'd be available in anything but the specialty markets. A few years ago, I discovered the secret to foolproof sprouts: slice them in half and roast them with a little drizzle of chicken fat. That's it! I was making a baked chicken-one-pot supper, and was shy on the usual vegetables that I generally include. I had some sprouts though, so I wedged them in around the other veggies, shrugged, and figured they'd at least be fine for one night's dinner. How surprised I was, at how well they turned out! Everywhere the sprouts touched the glass of the baking dish, was a caramelized golden brown, and the small amount of fat rendered from the chicken legs I was baking gave them a tender succulence that could not be believed without sampling. A discreet scattering of kosher salt grains across the top of the dish meant that the Brussels sprouts were delicately seasoned, and the long oven-time meant that they stayed nice and hot on our dinner plates.

About halfway through dinner, we were lamenting at how few sprouts I had actually included in the pan. By the end of dinner, we were vowing to never again subject the noble sprout to boiling or steaming, if roasting was at all feasible.

It took a few tries to hit on the exact formula, but here it is in its glory:

Roasted Brussels Sprouts

1 large glass/pyrex type baking dish, spritzed lightly with canola oil
Enough sprouts so that, when cut in half pole-to-pole, they cover the bottom of the dish in a single layer.
A final spritz with the canola oil over the rounded tops of the sprouts
A tablespoon or two of chicken fat, drizzled over the sprouts
A small pinch of kosher salt sprinkled over all

Bake uncovered in an oven set at 350 - 400 F, for 25 - 35 minutes (depending on your oven setting. Obviously, in hotter ovens cook for a shorter period of time). Finished sprouts should be fork-tender and showing a little brown on their cut-sides.

The beauty of the variable timing is that you can cook it along side another dish at whatever temperature is required.

You'll be fighting over the last sprout in no time.

December 22, 2005

There Must be Shortbread!


I do not cook for a large family and therefore it is only to be expected that my Christmas baking has decreased proportionately - excepting those years when we host a holiday open house, in which case I find myself making even more things than if I were baking for a family of twelve. Every year, I weigh the pros and cons of different recipes versus the available time, strength and energy that are available to me. Fruitcakes - dark, rum-soaked, full of naturally dried fruit without a neon-coloured cherry to be found - I only make every couple of years, in tiny loaf pans for passing out to relatives and friends of the fruitcake-appreciating persuasion.

When I was a kid, there were no baking-traps to navigate around. Pretty much the only holiday sweets we had were those that we made ourselves (excluding Santa's modest delivery), or polite amounts of those made by our neighbours and relatives. There were no cookie-studded workplace platters to navigate around, no client-appreciation chocolates lurking on every surface in the kitchen, no office parties with alcohol and rich food. Thus, I stumbled into the business world completely unprepared for the onslaught of goodies that were on offer throughout December, where polite meant actually taking a piece of grainy fudge or a misshapen sugar cookie instead of restricting oneself to one. I was also completely unprepared for the shocking variety of cookies all called shortbread. As we all know well, the only true shortbread is the one that your mother used to make, right?

My mother's shortbread is incredibly simple to make, and is the one thing that is an absolute requirement on my holiday table. Because it is easy to make (even easier to eat!) even at my tiredest I can manage to knock out a tray of these. It has become my one must-have bit of holiday baking.

Prize Shortbread

1 cup salted butter, at room temperature
1/2 cup icing sugar
large pinch ground ginger
2 cups unbleached, all-purpose white flour

Preheat the oven to 350 F. Lightly grease (or spritz with canola oil) a large baking sheet.

Cream together the butter and the icing sugar until the mixture is light, fluffy, and its colour has changed to white. This will take several minutes with a hand-mixer, and is essential, as there is no levening agent in the cookies. Add the ground ginger and one cup of flour, and mix until the flour is thoroughly incorporated. Add the other cup of flour, but use a spatula to blend it smoothly into the dough. Turn out onto a lightly floured board, sprinkle with a little flour, and roll out to the desired thickness - I like mine only a little thicker than thin sugar cookies, but not too thick. Traditionally, these are cut into squares or rectangles, and special shapes were reserved for the sugar cookies. I've thrown caution to the wind here, however, and used a little tree cutter for my shortbread this year.

Cut the cookies however you like - if using a cutter, you can re-roll the scraps and cut again, but do handle carefully because if you add too much flour during the rolling, they can get a little tough. Place the cookies on the baking sheet - they won't need much room between them because they don't really rise, but a bit of space makes it easier to pull them off the sheet. I like to poke some airholes with a fork to prevent the dough from bubbling up, but it's not strictly necessary.

Bake for 10 - 15 minutes, depending on how thick your cookies are. Check frequently - a slight tinge of gold on the edge is okay, but you don't want them to brown. Cool on racks and store out of sight, if you hope to keep them around for a few days.

December 09, 2005

And So It Begins


The holiday baking has begun.

I confess, I started off easy with a version of my Buttermilk Coffee Cake. Instead of doing the usual ribbon-layer in the centre, I stirred some allspice and nutmeg into the batter, along with a handful of dried cranberries (there's few enough cranberries in this that the cranberry-impaired can removed them easily). A little extra nutmeg and some cinnamon across the top, and ba-da-bing, one baking item "down." Mind you, this barely counts as Christmas baking, since it's actually relatively healthy. However, it will be a festive addition to work-lunches over the next couple of weeks, and it never hurts to balance out the damage done by shortbread and butter tarts with goodies of a lighter nature.

I'm still dithering a bit on what other items to make, but time is marching along, so I need to get down to business this weekend. I desperately need to go shopping for a few critical ingredients, but I also need to crack open the holiday recipes and remind myself of the amounts to buy. One year, I ended up with so many leftover ground almonds that I was putting them in everything in sight for a few weeks.