Showing posts with label Breads. Show all posts

March 24, 2007

First Attempt: English Muffins

I have been looking for a commercially produced English muffin that is not full of crap. By crap, in this case I mean high fructose corn syrup, but I'd also be pretty happy to find one that is made with only good ingredients (instead of chemical "dough conditioners" and preservatives), and in particular one that is made with real sourdough culture. Alas, they do not appear to be on the shelves of my local markets. I can get bread made from rice, gluten-free bread, and most recently bagels made without refined (or any) flour (thank you Silver Hills!), but the English muffin appears to still be under the stranglehold of Big Bakeries.

So, I dusted off my copy of Peter Reinhart's The Bread Baker's Apprentice, and discovered that, not only does it have a recipe for English muffins, it also is one of the few recipes that takes less than an entire day (or two, or three) to make. It calls for buttermilk, which in this case would be an acceptable exchange for sourdough, since sourdough and I have an uneasy baking relationship.

They look pretty good, I think, but they're definitely a work in progress. For one thing, they were a bit tall in the saddle - I had made the dough a little too stiff, I think, so they sat up nice and tall rather than expanding outwards as well as upwards when they rose. They also didn't have the characteristic bubbly texture in the centre, which I also attribute to the overly-stiff dough, as I've noticed with my pizza dough that if I make it too tight the bubbles don't form in the crust.

Finally, I think that my lovely cast iron pan was perhaps a shad hotter than strictly necessary, as they seemed to brown faster than I wanted. Perhaps I should have made a batch of pancakes first, since by the end of a batch I seem to have that perfectly seasoned skillet at just the right temperature, and then simply slid the muffins onto it then.

I will definitely have another whack at this recipe. I'm longing to make my own breakfast sandwiches, and I have some lovely merguez patties in the freezer to give it a go... I've been experimenting with adding semolina flour to my pizza dough lately, and since the recipe for the English muffins is very similar (VERY similar), and it makes it easier to make a good, tacky, soft dough, that may be the way to go.

If that doesn't work out, I may have to start a petition to one of the local bakeries to start making them.

November 02, 2005

Cornmeal Cheddar Onion Bread - that's almost a meal

I have a lot to live up to, in the bread-making department.

When I first started making bread, it was my mother's brown bread that I made. Dense with whole wheat and added wheat germ and bran, dark with molasses, enriched with eggs and baked in six-loaf batches, her bread was a hearty, filling loaf that rounded out a bowl of soup or stew into a dinner quite handily. The recipe, for which - alas! - I do not have a written copy, was tricksy. She gave it over and over to friends and community members who admired her bread, but they almost universally reported failure of their attempts to replicate her bread.

For some reason, her recipe just didn't work well for others, but I was one of the few who could even come close - although mine never rose quite as high as hers and therefore was a little denser and a little crumblier. That was the bread that I grew up with as sandwich bread; a sandwich made from two of these slices would sit with you for a while.

We did occasionally have other, lighter breads in the house, when I was growing up, usually in the form of soft French loaves - batards - that were our favourite base for garlic bread on spaghetti dinner nights. I was enamoured of their airy texture, which was foreign and exotic seeming to me, but didn't have the sugary squidge of the white sandwich bread my schoolmates had in their lunches. In my late teens I discovered sourdough rye breads, and cheese breads. Despite my affection for "regular" bread, what a delightful discovery these new breads were! My eyes were opened to the possibilities.


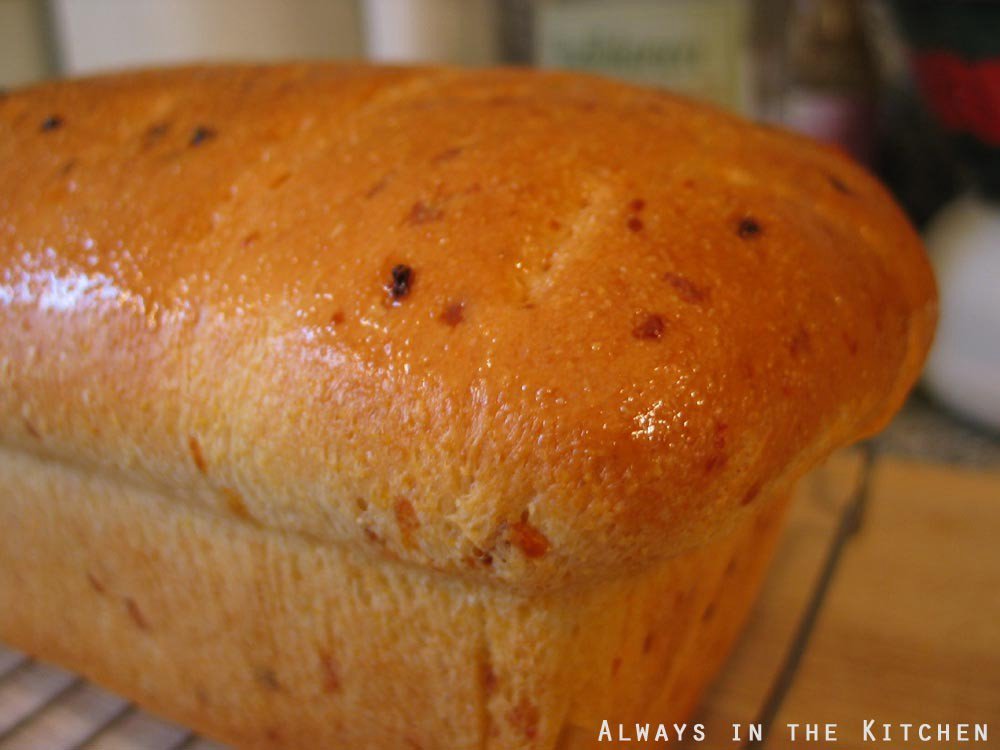
When I began experimenting with bread baking in my twenties, I quickly came up with a heartier type of white bread of my own: The 
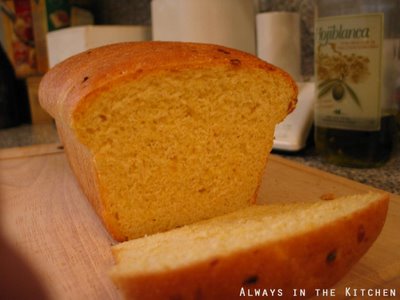
Cornmeal Cheddar Onion loaf. I played with the proportion of cornmeal to wheat flour, and experimented with using raw minced onion or sauteed. I adjusted the level of cheese, and since I was at the time shifting towards sharp or aged cheeses, that simple change afforded a whole new level of cheese flavours.

It's a tasty bread, but it does have limited applications. It makes excellent toast, for example, and a shockingly good toasted cheese sandwich, but sweet applications and peanut butter are pretty much out of the question. It was originally designed as a breakfast bread - something heartier than your average loaf, to stay with you in the morning, but it translates to other meals pretty well. The cornmeal does reduce the amount of glutinous spring in the bread, so untoasted sandwiches can be a touch crumbly, but with a little capicolla and fresh mozzarella...maybe a little basil...it can be a delicious lunch. At mid-day or in the evening, next to a steaming bowl of soup, it holds its own.

Cornmeal Cheddar Onion Bread

Makes 1 loaf

1 cup warm water
1 tablespoon active dry yeast
1 teaspoon sugar
1 egg, beaten
3 tablespoons olive oil
1/2 small onion, very finely minced
2 1/2 to 2 3/4 cups unbleached all-purpose flour
3/4 cup yellow cornmeal
1 cup grated sharp cheddar
pinch salt

In a large mixing bowl, sprinkle the yeast and sugar over the warm water. Let stand until it gets foamy-looking. While the yeast is getting foamy, sauté the onion in the olive oil. It will seem like a lot of olive oil, but go with it - that's how much the bread needs. When the onion is soft and translucent, remove from the heat and allow it to cool. Mix the flour, cornmeal, cheese, and salt together in a separate bowl.

Add the beaten egg to the foamy yeast mixture, and then stir in the somewhat-cooled onion and olive oil. Add a cup of the flour mixture to the wet mixture, and beat with a wooden spoon for about 100 strokes. This will help the overall texture of the bread. Add the rest of the flour mixture and stir slowly until it is all incorporated into a nice doughy ball. If your dough is still quite sticky and wet, dust it with flour.

Turn the dough out onto a lightly floured surface, and knead until it starts to feel like a cohesive bread dough. This can take up to ten minutes of kneading, and you may need to add a little flour here and there to keep it from sticking to your fingers. That's okay, but don't get carried away and add so much flour that the bread dough becomes stiff and unyielding.

Place the ball of dough in a lightly oil mixing bowl. Allow the bread to rise, covered, in a draft-free area for 45 minutes to 1 hour, or until nicely doubled. Press the air out of it ("punch it down") and shape it carefully into a loaf. Place in a greased loaf pan, and allow to rise in a draft-free area for about ½ hour. Place in a pre-heated oven at 375°F and let bake for 35-40 minutes, or until it sounds hollow when tapped on the bottom. Turn out of the pan to cool on a wire rack.

Note: If you like a nice, shiny brown top crust, you may wish to brush it with a little egg wash before putting it in the oven. Just beat up an egg with a little water, and use a pastry brush to apply a thin layer of the wash to the loaf just before it goes in the oven.


August 20, 2005

Return to the Kitchen: Crepes!

It always feels a little strange, stepping back into my kitchen after being away from it. True, I was only gone ten days, but that's a pretty long time to go without cooking anything, as far as I'm concerned. I'm always slightly concerned that I'll have forgotten how to do something important, or that I'll fail to remember simple things like monitoring pan-temperatures, or whether something has been left in the broiler. Such things have never come to pass - yet! - but I am always still a little concerned.

Today also brought a return to a dish I've not made in a long time: Crepes. I've always been partial to them, but when I travelled to France on my Big Trip ten years ago, I fell in love with them. Sweet, savory, stacked, folded, on a plate, or in a folded paper cone, crepes were my number one hunger-buster on the streets of Paris, and they're awfully good at home, too.


Since I have been primarily cooking lighter meals since we got back from Scotland, I decided to make a breakfast of savory crepes. With their payload of a single egg and but a half-teaspoon of canola oil, they fit well enough in with my criteria that I decided to include slices of Freybe's Italian sausage - part of their line of lower-fat chicken and turkey sausages that I use in a number of supper dishes (like Sausage and Hominy Chili) quite frequently.


Like a number of food bloggers, I've recently been pillaging the Williams Sonoma website for its recipes, and the one that I decided on for my crepes was their Black Pepper Crepes with Goat Cheese and Tomatoes. Since I was using a 9 or 10" non-stick frying pan instead of a WS crepe pan, I only got five crepes instead of eight, but I also was using between a third and a half cup of batter for each one, too - so that sort of makes sense. I also decided that the black pepper element of the crepe batter was negligible, so next time I may well add more pepper - or perhaps grind additional pepper over the crepe as it cooks on its first side, so the fresh black pepper sinks evenly into the batter and is locked in when the crepe is turned.


I also discovered that I did not need to re-season the pan between crepes, as the recipe suggests. Perhaps that is an advantage of the non-stick pan over the crepe pan, but it worked in my favour, so I'm not complaining.

I had forgotten how much fun crepes are. You can prepare them in advance. You can fill them with practically anything. You can dress them up or down. You can freeze them. And, you can microwave chilled crepes to heat them back up!

July 31, 2005

Chili, Biscuits, & Technology

Mostly, I tend toward cold, light, and refreshing meals at this time of year. Sometimes, however, the need to cook from the pantry, or the sort of odd light-headedness I get from eating sporadic non-meals for too long a stretch, makes me want something hearty. Chili fits the bill, because it is definitely hearty, but also employs the flavours of Mexico which eases the fact that it is not really summer food in most respects.

I've been on something of a mission to clear out my fridge before we head away to Scotland this coming week, and thus I have sometimes found myself with interesting challenges on my hands. Having used the last of my tortillas, and not really wanting to get or make more that will then languish in my absence, and being quite low on bread, I decided to make biscuits to go with my chili. Usually, we can demolish a pan of biscuits in pretty much record time, and if there were any leftover, I could always freeze them. Besides, biscuits are a classic sort of Texan dish, and quite appropriate for chili. Especially, if they are cheese biscuits.

For the chili, I was simply using up ground beef that was in the freezer, and a miscellany of beans and tomatoes in the pantry. The various seasonings are things that I always have on hand, and so I made what for me is a fairly standard bowl of mixed bean chili.


I should say here, that I am a huge fan of "proper" Texas chili, the quintessential "bowl o' red" as well as more faithfully Mexican dishes, such as Posole (which to me has always seemed to be a sort of chili), but I also enjoy my mother's style of chile, which as you can see, uses ground beef, kidney beans (I also added black beans, since they were handy), tomatoes, and peppers. It is a fine, comforting dish, and it makes a fine conversion to Chili Macaroni, Chili Dogs, or even Chili Omelettes, if that's what floats your boat.

The biscuits are my oh-so-simple biscuit recipe, gussied up with a little cheddar cheese and some freshly snipped sage from the window sill. For the first time, I actually used the food processor to mix the dough - filled with trepidation that the dough would yield tough little bullets instead of my predictably airy little scones. I need not have worried, as it turned out. The processor did an excellent job of integrating the cheese, and the biscuits rose up as tall as I could have wished.


They were as good a match for the chili as I had hoped, too. The flavours of sage and cheddar complemented the chipotle-tinged chili, and the whole meal (rounded out with cole slaw) turned out rather well.

I'm cautiously pleased with the food-processor adventure, and will probably employ it again. I am often torn between my absolute pleasure at doing things the old fashioned way, and the speed and convenience that comes with using newer kitchen technology. The only reason I might not use the processor, really, is that it is marginally more effort to clean than a bowl and wooden spoon. Since I can throw the processor bowl and lid into the dishwasher, that probably shouldn't be much of a deterrent.

The chili is gone, having been reincarnated (heh) as chili dogs a couple of nights later, and the few biscuits that made it through the night were eagerly devoured the next day.

The fridge is almost bare. We leave for Glasgow in two days.