
Bagels always sounded like a lot of work. First you have to make the dough, then let it rise, shape, boil (!), and finally bake. And then there's the lye water, which is a separate sort of anxiety on its own. Lye is caustic and requires careful, safety-forward handling, which raises a additional barrier to being motivated enough to begin.
Happily, although there are lengthy-process recipes out there, you can absolutely make delicious bagels in only a couple of hours. I started these after breakfast, and we ate them for lunch.
I scoured around the internet for recipes, and finally hybridized the likely-looking ones into the recipe below. These are made partially with high-gluten flour, but you could as easily use only white bread flour instead. The extra gluten in bread flour helps these bagels develop their trade-mark chewiness.
These are somewhere between the aesthetics of New York style bagels and Montreal style. I make no claims to authenticity, so if you're a style hard-liner, this recipe may not be for you. If you happily eat any kind of bagel you encounter, I hope you'll give this one a try.
Lye Water Bagels
Makes 8 medium-large bagels
300 mL water, heated to wrist-warm
1/2 tablespoon honey
20 grams raw sugar
7 grams active dry yeast
10 grams salt
200 grams high-gluten or bread flour (such as German flour type 1050)
200 - 300 grams all purpose flour
For boiling:
1 tablespoon lye water* (I get mine from an Asian supermarket)
12 cups water
For baking:
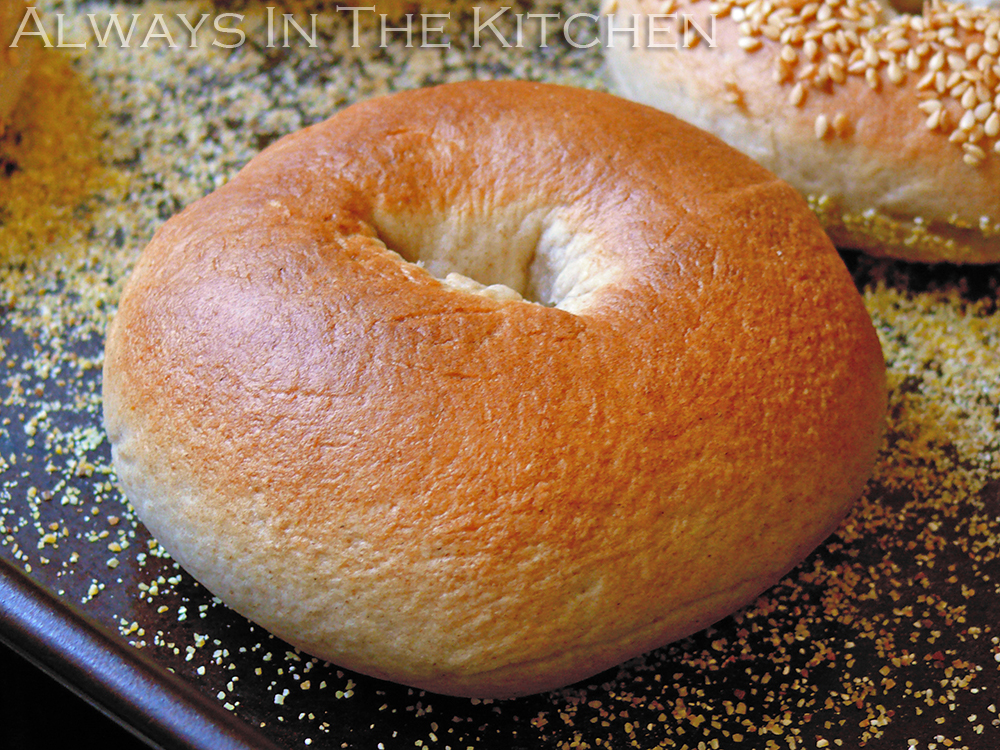
Cornmeal as needed
egg wash (optional)
This dough will be a very firm one, and I caution you not to all all of the flour at once, lest you make it too firm. I was a little careless myself, and added a bit more flour than I should have. The end result was that I had a tough time shaping my bagels, and one of the hand-looped ones came apart during boiling (it was still delicious).
Pre-warm the oven so that the dough will have a nice warm place to rise.
Into a large mixing bowl, dissolve the honey and sugar in the warm water. If the water is a bit hot, let it cool until it's pleasantly warm but not hot against the wrist. Sprinkle the yeast over the sweet water, and wait until it proves itself by foaming up and smelling yeasty.
Add the 200 grams of high-gluten (or bread flour) and the salt, and beat vigorously with a wooden spoon until it is nice and smooth. Add 200 grams of the all-purpose flour, and stir it in, turning it out onto the work surface eventually, to knead it all in. If needed, add the remaining 100 grams flour a little at a time until you have a stiff dough.
Knead the stiff dough for 10 minutes, either by hand or with a very sturdy stand-mixer. If you are kneading by hand and are having a tough time, clean your hands thoroughly and oil them before continuing to knead. After ten minutes, smooth the dough into a compact ball and return it to the mixing bowl, which you have cleaned and lightly oiled. Roll the dough around in the bowl so that the surface of the dough picks up some of the oil. Cover the bowl loosely with plastic wrap, and let sit until the dough has doubled in size - about an hour.
Preheat the oven to 450 Fahrenheit, with a rack in the middle slot.
In a large pot (I used my Dutch oven) on the stove, heat the 12 cups of water until boiling, and then add the lye water just before you add the bagels.
While the water is heating, shape your bagels. Squeeze the excess air out of the dough, and then divide into 8 equally sized (more or less) pieces. You can shape your bagels by making a dough rope (or "snake") and looping it into a ring by wrapping it around your hand, pressing the ends together very firmly, or by making a smooth ball of dough and then forcing your thumb through the centre, gradually expanding the hole until the desired doughnut-shape is achieved. I tried both, but found the second method a bit easier than the first.

Prepare a plate or wooden cutting board with a thin layer of cornmeal. Also prepare a baking sheet with a thin layer of cornmeal for the oven stage.
When the water is boiling, add the lye water, and then immediately add 2 or 3 bagels, carefully, by hand, and time them for one minute. After the minute, turn the bagels over, and boil for one more minute. Use a spider-tool to remove the bagels from the water, onto the cornmeal-covered cutting board. Add the next bagels into the water and start the timer again.

If you want toppings on your bagels - poppy seeds, or sesame seeds, or whatever - now is the time. Brush the tops of the just-boiled bagels with an egg wash, and press them upside-down into a plate of seeds/toppings. Place the bagels topping-side-up on the baking sheet.
Move all the boiled bagels onto the baking sheet, cornmeal-side down. Bake at 450 F for 10 minutes, or until nicely browned. Allow to cool for at least 15-20 minutes before eating.
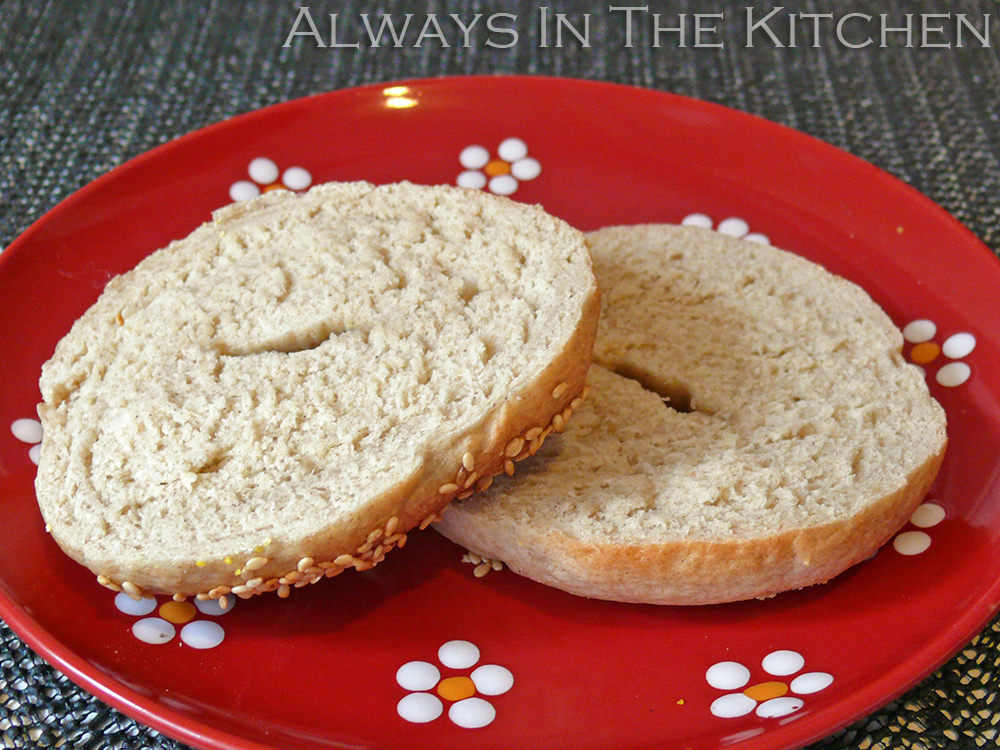
We had ours with cream cheese, of course, and a heavy grinding of black pepper.
Once completely cool, bag up and store as you would any freshly baked bread.
*I should note that I may use more lye water next time, as I couldn't find a reliable guide to how much lye water to add to my boiling water. Most instructions assume you will be using a dry form of lye, which is more concentrated. A higher concentration of lye should make for a somewhat darker colour on the finished bagel.


