November 24, 2013

Kürbisauflauf mit Hackfleisch: Pumpkin Casserole with Ground Meat


So, now that my pots and pans are all unpacked, I can finally get back to cooking. The first few things that I made were pretty much comfort foods for us - pizza, baked chicken, chili (and subsequently, of course, chili mac), which contributed to the normalization process by which our brains slowly become wired to register "oh yes, this is where you live now. I can tell, because of the food." I didn't photograph anything, because you've seen them all before.

So, now that we've made a couple of "old" recipes (and madly buying spices so that I can make whatever I want without suddenly realizing, for example that I don't have bay leaves yet), it's time to explore some German cooking.

Auflauf, which is a German-style casserole, is one of my new favourite words. We learned it at Restaurant Am Gautor, when Palle ordered it for lunch off of their seasonal menu card. We appear to have arrived in the middle of mushroom season (pfifferlingen = chanterelles; steinpilze = porcini) and pumpkin season. Even tiny shops that sell only one or two food items (like the wine vendor down the street from our apartment) boldly advertise "Kürbissuppe", "Kürbiscremesuppe" or "Hokkaido kürbissuppe"on the chalkboard by the door. Seasonal eating is definitely the fashion, here, and some restaurants, like Gautor have a special supplementary menu to reflect the current offerings.

The undisputed champion pumpkin in terms of market shelf-space, restaurant offerings, and recipes that appear in the freebie television guide, is the Hokkaido Kürbis, which I was more familiar with as a Red Kuri Squash, pictured here.


So of course I plunged into a crash-course of reading through online recipes to try to come up with a viable one. Once I had a basic ingredients list and methodology that seemed to represent the dish as we experienced it in the restaurant, I went ahead and changed and streamlined the process to fit my kitchen style. It was a bit of an enterprise, but well worth it. You could do a meatless version with veggie ground, of course, or adding in a layer of brown lentils which have been seasoned in the same manner as the meat (Vegans will want to break out their favourite cheese-sauce analog for the last step).

(n.b. Some of the photos in this post are a little iffy - new kitchen, new lighting, new setting on the camera...will soon get the hang of the new location, though.)

Kürbisauflauf mit Hackfleisch
(Pumpkin Casserole with Ground Meat)


Serves 4

450 grams cooked potatoes, diced (I used leftover roasted potatoes)
450 grams hard winter squash, such as Butternut, or Hokkaido/Red Kuri
1 medium yellow onion, finely chopped
2 cloves garlic, finely chopped
1 teaspoon olive oil
250 grams lean ground beef (or beef/pork mix)
1 medium tomato, fresh, diced medium-small
Salt
Pepper
1/4 teaspoon smoked paprika
1/8 teaspoon cayenne
pinch of oregano (dried leaf style)
3 tablespoons butter
3 tablespoons flour
3/4 cup whole milk
3/4 cup vegetable stock or broth
pinch nutmeg
90 - 100 grams grated cheese, such as edam, gouda, butter cheese, or other good melting cheese. I used Gouda.

Lightly oil a 7x11" casserole pan (or any shallow 2 litre pan). You could also use 4 individual serving dishes, which would make for a nice presentation.

The primary recipe that I was consulting suggested that the potatoes and the squash be peeled, cubed, and (separately) boiled until tender. However, it seems unnecessary to dirty up that many pans. I used leftover roasted potatoes, and simply roasted the cubed squash, but you could roast it all together, if you had a big enough pan to do it in (sadly, you'd need a bigger pan than the 7x11 casserole in which the dish is assembled). Roast the potato and squash until just tender - don't overdo it, or the squash may turn to mush. Conversely, you could roast the potatoes, and boil the squash at the same time - your call.

Peeling the squash is a bit of a pain, but the skin is not really all that edible (and certainly undesirable), so make sure you get it all off. A sturdy peeler or a good chef's knife should do the trick. Cut the potato and the squash into roughly the same size pieces - that is to say, ideally about the size of a medium-sized red radish. If you're roasting the squash, it will take about 30 minutes at 350 F (180 C), if boiling, not longer than 5 minutes.


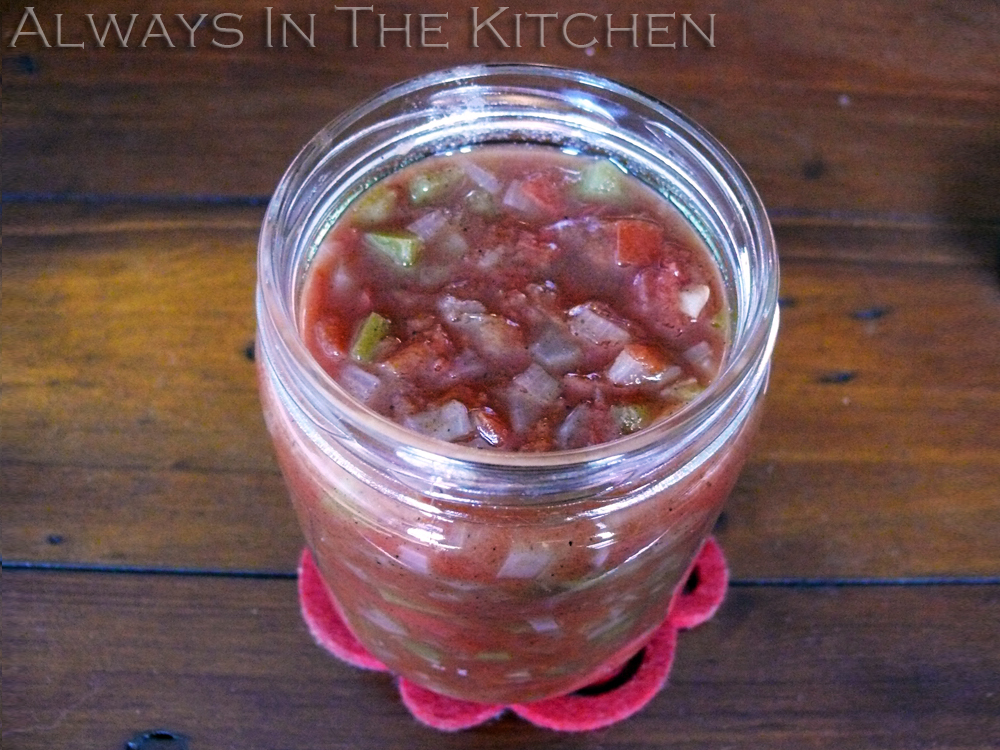
Peel the onion and garlic and dice finely. In a medium/large skillet, heat the olive oil and brown the ground meat thoroughly. Then add the onions and garlic. Once the onion starts turning translucent, add the diced tomato. Season the mixture with salt and pepper to taste, a good pinch of oregano leaves, and the smoked paprika and cayenne. Don't go overboard with the seasonings here, or you risk overwhelming the finished dish. You can use regular paprika if you don't have smoked (also called Pimentón de la Vera), but the smoked variety gives a lovely warming quality to the dish. Allow the mixture to cook for about five minutes over medium heat, and then turn off the heat, cover and keep warm.


At this point, preheat your oven to 400 F (200 C).

In a small to medium saucepan, melt the butter over medium heat, and then add the flour all at once to make a roux. Allow the roux to cook, but not darken, until it starts to smell pleasantly nutty. Add the milk slowly, whisking constantly to avoid lumps, and then add the broth, switch to a spatula, and continue to stir. When all of the liquid has been added, and the mixture is smooth and thick, remove from the heat and stir in the grated cheese and a pinch of ground nutmeg. It does not need salt, because it gets plenty from the stock/broth and the cheese. If you are using low sodium versions of those, you may want to add a little pinch, but don't overdo it. Stir until smooth. For goodness sake, don't taste it, or you may end up sitting on your kitchen floor eating the whole lot, instead of making your casserole.


Assembly time! Into your oiled (or buttered) casserole dish(es), put all of the potatoes, shaking them to spread them out into a single layer. They should nicely cover the whole bottom of the dish. If there's too much room around them to make a convincing layer, you are using too large a pan - switch to a smaller one before proceeding.

Next, add the seasoned ground meat mixture as a layer on top of the potatoes.


Arrange the roasted squash cubes over the meat mixture. I could have used a bit more squash, I think - this is a pretty sketchy-looking layer.


Finally, pour your delicious cheese sauce over the casserole, getting as even a coverage as you can, leaving nothing exposed. Place, uncovered in the oven, and bake for 20-25 minutes, or until hot, bubbly, and perhaps slightly browned in places on top.


In the interests of full disclosure, I did not have nutmeg, but I am convinced of its value in this context, because it always brings good notes to any white sauce. Next time, I will totally have nutmeg, and it will go in as written above.


Serve up and devour.

November 13, 2013

Bacon Cheddar Cauliflower Quiche


Good news! My kitchen has now arrived from Canada. Some attrition, unfortunately - my mother's ceramic bread bowl did not make it in one piece, my Lagostina Dutch Oven arrived misshapen and with a dented lid, and my 8" square tempered glass pan was shattered into fragments. The spider was bent out of shape (but has now been bent back into shape, more or less), and the plastic smoothie-blending cup was also broken. Sigh. The packers appear to have had no concept of load shift.

So now, I get to reassemble my spice collection, purchase some staple items (flour, cornstarch, yeast, baking powder, live herbs for the window sill in the kitchen, for example), draft some dinner menus, get cooking, and take some pictures!

In the meantime, please consider this delightful quiche as a brunch option:

Bacon Cheddar Cauliflower Quiche

You will need:

- Your favourite pie crust, lining the pie plate of your choice (this one is a small, six-inch (?) pie plate).
- crisply cooked bacon, crumbled finely, enough to cover the bottom of the pastry
- a layer of grated cheddar
- enough cooked cauliflower to loosely cover the layers below it (make sure the cauliflower is not wet)
- another layer of grated cheddar
- a royale mixture (eggs beaten with milk, seasoned with salt, pepper, Tabasco sauce, any any other seasoning you like)

For a 9" quiche I use a royale made from 3 eggs and 2/3 cup of 1% milk, but you can use any set-custard ratio that pleases you, sized for whatever pan you are using.

Pour the royale carefully over the other ingredients so that they maintain their positions. If you like a golden, glossy crust, dip a brush in the royale and carefully brush a little over the exposed upper portion of the crust.

Preheat your oven to 350 F and bake for 45 to 50 minutes (for a full sized quiche, a bit less for a smaller one - start checking at 30 minutes), or until the crust is golden and the filling is slightly puffed and firmly set. Allow to stand for 5 minutes before cutting, for easiest removal.

Here it is "in the raw", just before it went into the oven:

November 07, 2013

Heart & Blade Burgers


These were intensely, astoundingly, beefy. I got the idea from Jennifer McLagan's book "Odd Bits" where she exhorts the reader to make burgers entirely of heart, but for my inaugural attempt at cooking beef heart I decided to go with her further suggestion of cutting the heart 50/50 with non-organ muscle meat. She suggested brisket, but, based on the availability of the day, I went with bottom blade. For four patties, I used 250 grams trimmed heart, and 250 grams bottom blade, making each patty roughly a quarter pound.

I do not have a meat grinder, which is the only reason that it took me this long to make these. However, I cribbed from Alton Brown's instructions for making ground meat using a food processor, and that worked incredibly well:

Heart & Blade Burger Patties

Prepare the beef heart by trimming any muscle sheath, silverskin, tendons, or veins that may be clinging to the outside. Using a chef's knife, dice the meat into short, thick strips about 5 centimetres long. Next, trim and dice the blade meat into the same sized pieces.

Place the meat in a metal pan in the freezer for about 20 minutes, so that the meat begins to freeze and stiffens, but is still somewhat pliable.

Scrape the meat off of the pan into a food processor fitted with a metal blade, about 250 grams at a time - you don't want to overload the machine. Pulse the processor's blade repeatedly until the mixture begins to look like ground beef. Empty the processor, and repeat until all of the meat is chopped.

At that point, I put all of the meat together in the processor, added a tiny dribble of olive oil, and gave it another few pulses, simply to integrate it into a single mass and make sure there was enough fat to keep the meat from drying out.

Remove the metal blade and season to taste. We wanted to go with simple, almost stark burgers, so that we could really taste the meat. We used only a good pinch of kosher salt, but you could season these any way that you like to season your burgers.

Next I turned all of the meat out onto the counter, and shaped the mass of fluffy meat into four patties, which we fried over medium-high heat in a little butter (you could also use olive oil, of course). I worried that the patties might not hold together nicely, but they did. I was struck by how dark a red they were - lots of iron, for sure. These patties are quite lean, because heart meat is inherently lean. I patted them out quite thinly, because I wanted good bun coverage, but a thicker patty would work fine, too. If you're making them very thick, you might want to poke a hole through the centre to speed up and even out the cooking process, but that's up to you.

Now, I won't lie to you: there is a faint trace of gaminess, of "organ meat flavour" that one gets from the heart, but it is quite mild compared to, say, liver or kidney, and the overall effect is so overwhelmingly meaty tasting that the general impression that you get when biting into your burger is simply that of beef (and rightly so). I suspect that the all-heart burgers would be a little gamier, which would certainly be fine with me, but these were a wonderful introduction into cooking beef heart. Piled up onto a bun with all of the fixings (not pictured, sadly, because we fell on the finished burgers ravenously, and I forgot to take pictures), it made a delicious dinner.

So, what's next? All-heart burgers? Heart Loaf? "Heart"y Meatballs? There seem to be an awful lot of options, and I'm looking forward to further experimentation.


October 25, 2013

Gigantes & Briam Burgers


This is really more of a serving suggestion than a recipe, per se.

Remember the Briam that I enthused about last summer? Well, I started with the notion that I would make a veggie burger, using ground chickpeas in a sort of falafel-inspired patty, but when I realized that I also had leftover Gigantes, I thought I'd make the patties with those, instead.

The Gigantes are rather soft, so, in the absence of any aggressive thickener, such as chickpea flour (and with the vague notion of keeping the patty gluten-free, although the bun pictured here is not), once I mashed the beans up, the resultant patties were very soft, almost bordering more on hummus than on falafel. However, they were delicious, and they added a nice hit of protein to this sandwich to make it more satisfying to eat, and of course to add staying power. You could, of course, replace the bean patties with any patty-like interior that you like - keeping the Greek theme, ground lamb would be fantastic.

The Briam is also fairly soft, but retains enough texture to keep the pieces (mostly) in the bun, and so that you get at least some textural experience from the specific vegetables as you bite your way through the sandwich. This particular batch of Briam was a bit more eggplant-intensive than my usual, so the softness is an asset (leathery eggplant doesn't make good sandwiches, oddly enough). I highly recommend toasting the bun, not only for flavour, but to add much needed structure to the whole enterprise.

Because the patty was so soft that it practically became a spread on the bun, and because of the generous amount of olive oil already in the Briam, no other spreads or dressings were needed for this sandwich. I added some slices of feta to the bottom half, simply because I had it available, and the sharp, salty taste contrasted nicely with the mellow vegetables.

It's always good to make more Briam than you need; it keeps well for a few days, is delicious hot or cold, and can be pressed into service as a side dish, condiment, or sandwich filling/garnish at will. Next time I have some leftover, I'll definitely be thinking about this sandwich, and scheming to build an even better Gigantes patty, or perhaps a nice, crispy flat disc of falafel.


October 18, 2013

Reduce, Reuse, Recycle: Bacon Fat Biscuits


I'm not sure, but this might encompass all of the above principles: reduce the amount of groceries purchased (no extra purchase of solid fat for baking); reuse the fat drained from cooking bacon; recycle the fat into an entirely different dish. Okay, those last two are kind of similar, but I'm giving it points because the re-use is not for the same dish or type of cooking, and because it's actually incorporated into the recipe as opposed to simply being a cooking medium (the usual fate of reused fats, if I'm not mistaken). It's economical and delicious!

The biscuits shown above were made with unstrained bacon fat, which is why they are a bit flecked in appearance. To get a less speckled effect, you can strain the fat through a fine sieve (or possibly cheesecloth) to get a more homogenous, lard-white colour. I also was using (solid) bacon fat that was a little on the soft side, which actually seems to inhibit rising a bit; these could be taller.

You can do a straight-up substitution of whatever butter/lard/shortening etc. that you currently use for biscuits, but if you don't have a biscuit recipe, here's one to try:

Bacon Fat Biscuits

Makes 9 biscuits, or tops an 8 - 12 inch pot pie, depending on how thick or thin you want your topping.

Total prep and cooking time: 25 minutes

2 cups all purpose flour
4 teaspoons baking powder
1/2 teaspoon salt
1/2 teaspoon cream of tartar
2 teaspoons sugar
1/3 cup rendered bacon fat, in solid form (chill until firm)
3/4 cup milk - I use 1% milk

Preheat the oven to 450 F.

In a medium mixing bowl, sift together the dry ingredients - to be fair, I don't really sift, I aerate them with a whisk, but do whichever pleases you most. Add raisins, herbs, cheese, or any other additional flavourings at this time. Using a pastry-blender or a fork (and a lot of patience) cut in the bacon fat until the mixture is crumbly and the little lumps of fat are about corn-kernel sized. If your bacon fat is frozen hard, you can do this step in a food processor fitted with a metal blade.

Create a well in the middle of the mixture and pour the milk in all at once. Hold the bowl steady and, using a fork, stir rapidly and briefly until the dough comes together in a ragged mass. Quickly dump it out onto a clean counter, and knead very lightly and briefly until the flour is incorporated. You may need to add a little extra flour, but probably not. Go cautiously - too much flour makes tough biscuits.

Pat out the dough into a rough rectangle, and slice into the size of biscuits that you want. Place them on an ungreased cookie-sheet and bake for 12 - 15 minutes, or until they have gotten tall and golden.

If you are using the biscuits as a topping for pot pie, pat out the dough into the shape and size of your stew-pot. Stab the biscuits with a fork to make a few air-holes, and lift the entire thing (no cutting necessary) onto the bubbling hot stew. Place in the 450 F oven, and bake uncovered for about 25 minutes. It does take longer when the biscuit is cooked over a stew.

Bonus Tip: freeze your bacon drippings in a spare measuring cup until you have enough, or create a form out of tinfoil wrapped around your 1/3 cup measure, and store it (covered) in the freezer until it is full.

These would be awesome for Biscuits and Gravy, don't you think?

You can use the same technique to make pie crust, of course. Some of my friends will remember the potluck to which I brought sour cherry pie with a bacon fat crust, the leftovers of which were served with my friend Rodney's homemade gelato for breakfast.

October 08, 2013

Venetian Chicken Livers - Fegato di Pollo alla Veneziano


So! We've found a place to live, and will be moving in on November 1. My kitchen should be arriving shortly thereafter, and I am anxiously awaiting the opportunity to cook once again. Seriously, boiling eggs in an electric kettle may technically count as cooking, but crikey! What I wouldn't give for a simple skillet dinner right now...

In the interim, I've found a couple of photos in my archive from dishes we cooked earlier this summer, and so I plan to trickle those out until I'm cooking again. This one is from late June.

I apparently need to get more iron into my diet. I do take iron supplements - as much as my poor system can handle, but it's not enough to correct the serious deficit that I'm running, so I am finding ways to squeeze more red meats and offal into my diet. Yes, I know that there are plenty of vegetable sources of iron (I'm eating those too); I simply need all the iron I can get.

Liver is a rich source of easily absorbed iron, even poultry liver, so it seemed obvious to me that we should take a crack at a classic Venetian recipe for chicken livers with fettuccine. My husband was the cook this time, and I was the lucky person who simply had to show up and eat. This dish comes together very quickly, so make sure your prep is done before you start cooking.

Venetian Chicken Livers - Fegato di Pollo alla Veneziano
Adapted from Claudia Roden's Food of Italy

Serves 2

Fresh fettucini (2 servings)
225 grams fresh chicken livers, cleaned and sliced into medium-large chunks
1 - 2 shallots, sliced pole-to-pole into strips
2 cloves garlic, finely sliced
2 tablespoons butter
1 tablespoon olive oil
¼ teaspoon kosher salt
pinch white pepper
3 tablespoons red (or dry white) wine (approximately)
¼ cup freshly shredded parmesan cheese
2 tablespoons freshly chopped parsley

Prepare the pot with water for the pasta, and get it ready to drop the pasta (fresh pasta only takes about three minutes to cook). If you must use dry pasta, obviously start the pasta first, and adjust the timing accordingly. Warm some pasta bowls and have them standing by.

Clean and slice the livers, removing any grotty bits of sinew or connective tissue, and set aside. Slice the shallot(s) and garlic and set aside.

In a large skillet, heat the butter and the olive oil over medium-high heat until the butter foams and subsides, and then add the livers in a single layer. Sprinkle with the salt and white pepper, let them sear briefly to get a tiny bit of colour on them (about a minute). During that minute, drop your pasta into the boiling water, and make sure there's a colander or sieve ready to receive it. Give the livers a quick stir to flip them over, and push them to the outer edge of the skillet. Add the shallot strips and garlic into the bare centre of the skillet (you can add another bit of olive oil if it looks dry). Sauté briefly, and then gently stir the livers through the onion mixture. Add the wine (or a splash of vermouth) to deglaze and create a bit of a pan sauce, scraping up the bottom of the skillet. Continue to cook gently until the pasta is ready (in the other pot), and then turn off the heat under the livers.

Drain the pasta and portion into the warmed pasta bowls. Spoon the livers mixture over the pasta, being sure to pour any collected juices from the pan over each serving, and top with parmesan and parsley. Enjoy with a nice glass of wine.

If I recall correctly we utterly failed to remember to add the garlic, but it wasn't missed so it's clearly an optional ingredient (a Venetian may disagree with me). I do think that the next time I make this I might top it with a lemon gremolata, rather than just the parmesan and parsley, because I think it would beautifully - the sharpness of the lemon zest and raw garlic cutting through the richness of the dish. I'll be sure to report if that's the case.

October 03, 2013

Minor Update

I am in Germany!

My kitchen, however, is still afloat somewhere in the Atlantic (more or less) until we manage to find an apartment to rent.

I hope to be cooking again soon...

Wish us viel Glück; we could use it!

Tschüß

September 08, 2013

Interlude

Dear friends, readers, and subscribers:

Please note that there will be no new content for a little while, as my kitchen is in the process of being shipped to Germany. For now, I am always in other people's kitchens.

Once I am up and running again, I expect to resume posting, but there may be a little bit bigger of a gap than usual.

Please do check back for updates - I'm looking forward to getting back into the kitchen, and cooking up great food in a completely different environment!

Until then...

Guten Appetit!

August 19, 2013

Breakfast at Home: Orange Breakfast Polenta


This is something a little different, for those looking for a hot breakfast cereal that isn't oatmeal-based. The polenta is soft and creamy (vegans could use almond yoghurt or coconut cream instead of yoghurt), but if you make extra, it sets up quite firmly and can be sliced and fried, for a different effect, the next day. It is a little bit sweet, but not very. If you want it sweeter, you may wish to increase the honey a bit.

We served ours with bacon, because we like bacon, but broiled grapefruit halves would also make a great side. Next time I make this I might use half water and half orange juice, just to bump up the orange flavour without using the extract.

Orange Breakfast Polenta

Serves 2

1/2 cup peeled mandarin orange segments, in juice
2 cups water
1/2 cup cornmeal
1/4 cup plain Greek (or Mediterranee) Yoghurt
1/4 teaspoon Kosher Salt
1 teaspoon real orange extract (or orange zest)
1 tablespoon honey or sweetener of your choice

Bring the water and the juice from the mandarins to a gentle boil. Add cornmeal in a steady stream, stirring constantly with a whisk, and then lower the heat to medium; continue to stir and cook for ten to twelve minutes. (Start with a whisk, then switch to a silicone spatula or wooden spoon as it thickens). When you set your whisk aside, it helps to be able to soak it in water right away, for easy clean up later.

While the polenta cooks, somewhere around the half-way point, add the orange extract or zest, the salt, and the honey. Stir as continuously as possible, being careful that it doesn't bubble up and splash you - hot polenta clings and burns!

After 10 minutes, remove from the heat. Add yoghurt and stir until smooth. Pour into 2 bowls and arrange orange segments on top. Dust with cinnamon or clove if you like.

Pretty, easy, and delicious!

August 11, 2013

Jamaican Tomato Relish (Small Batch)


Unlike most of the recipes in my Jamaican repertoire, this is not spicy. Of course, you could change all that by adding a seeded, minced habanero along with the green bell pepper, but that's entirely up to you. It's a snap to make, requiring only a little chopping, a little simmering, and a non-reactive container to store it in.

This relish is great on burgers, hot dogs, cheese sandwiches, savoury pies, as a dip for tortilla chips (or crackers!), and as a bruschetta topping - pretty much anywhere you might otherwise use a salsa. It also keeps for a few weeks in the fridge without loss of quality. It's sweet and tangy and wonderfully summery.

I note that you can use a food processor to dice your vegetables, but the finished effect is much nicer if you chop them by hand.

Jamaican Sweet Tomato Relish
Small Batch

Makes 2 cups

1 medium yellow or red onion
1/2 large green bell pepper
5 medium Roma tomatoes, seeds removed
1/4 cup sugar
1/2 cup vinegar
1/2 tablespoon Kosher salt
1/8 teaspoon ground cloves
1/2 teaspoon ground Cinnamon
1/2 teaspoon ground Allspice

Finely dice the vegetables, and place them in a medium sauce pan with the sugar. Bring up to a simmer (don't add water - the sugar and the juices from the vegetables will provide ample cooking liquid), and let simmer, covered, over a low temperature for 20 minutes. Add the vinegar, salt and spices, and simmer another 20 minutes (uncovered) over medium heat, to thicken. Allow to cool slightly, and store in a glass jar. Store in fridge and use within 6 weeks.

Note: The first cooking stage smells kind of off-putting, because green peppers cooking in sugar is not the nicest smell in the world. Wait it out, it gets better. Also, try not to breathe in the vinegar when you pour it into the dish - the fumes are choke-inducing. Use your kitchen fan, if you have one.

SAFETY NOTE: This recipe is NOT intended for canning, but rather for immediate consumption. The proportions of ingredients have not been calculated for preserving purposes, and it may not be safe to do so. Please do not attempt to use this recipe for canning.

This has become my favourite sweet relish. I often scoop some up with crackers as a snack.